Get FASTER Internet: Ubiquiti UniFi Setup and Cost at Home
How I upgraded my home network with Ubiquiti UniFi, including my setup, cost, and if I’d do it again.
Introduction
Are you ever frustrated with the wireless internet in your home? If I look back two years ago, I was working at home and on video conference calls all day long. Repeatedly, the video would freeze, or just disconnect all together. At the same time, I was building out my smart home, gradually adding over 100 devices. But my home network was struggling. It was frustrating because it was killing my productivity. So, I was determined to do something about it. I’m going to show you how I upgraded my home network with Ubiquiti UniFi, share how it’s gone, and let you know if it was worth the cost, and if I’d do it again.
Main Points
There are a lot of variables that impact WiFi performance: internet speed that you pay for, router hardware, settings on your router, building materials in your walls, interference from other devices, and more.
In my situation, I was paying for a 1 Gbps download and upload speed — more than enough to handle the traffic I was throwing at it. But the coverage around my home just wasn’t there using the router from my internet service provider, or ISP.
I knew that I wanted to go from a single router broadcasting throughout my home, to a network with multiple access points for more even and reliable coverage. This is where I turned to Ubiquiti UniFi for my networking equipment, which I bought with my own money.
My Setup
Taking a look at my setup, it begins with the UniFi Dream Machine Pro. You can think of this as a replacement for your existing router. But unlike the router from your ISP, it makes use of separate switch ports and wireless access points to expand your system and your coverage.
The Dream Machine Pro supports up to 10 Gbps and has a Network Video Recorder, or NVR, hard disk drive bay. You can use this to record and save footage from a UniFi Protect security camera.
The Dream Machine Pro connects on one end to my ISP’s optical network terminal, or ONT, and to the UniFi standard 24-port switch with power over ethernet, or PoE, on the other end using a 10 Gbps SFP+ Direct Attach Cable.
Connected to the 24-port switch are my wired devices, including multiple smart home hubs and bridges, and an array of UniFi Protect cameras.
Additionally, I have four UniFi access points, or APs, connected to the switch. These APs are placed around my home.
I have a ceiling mounted U6 Lite on the basement level, a ceiling mounted U6 Long Range on the main floor, and a U6 In-Walls both on the upstairs level and in our detached garage.
Since each AP is hardwired into the switch via PoE, and these are spread out across my home, I’m able to get full strength WiFi no matter which AP my devices connect to.
Each individual AP can have 300 or more connected devices. As I move around the home, my phone or laptop seamlessly transitions from one AP to another depending on proximity and signal strength.
I took the additional step of adding dedicated ethernet ports to a few key places in my home, namely my home office and behind our wall-mounted TV. By having my computer and TV directly connected via ethernet, these devices get maximum internet throughput.
Both the Dream Machine Pro and switch have a 1.3” touchscreen display to access settings. These look cool, but I don’t really use them. Instead, I use the UniFi iOS app and the UniFi web portal to view and manage my network.
These interfaces are mind-blowing if you’re coming from your ISP’s basic admin experience, especially in terms of device-level insights and level of network customization.
In the event of an electrical surge or power outage, I have all my UniFi equipment plugged into a CyberPower Rackmount Surge Protector, and into a CyberPower UPS System for battery backup.
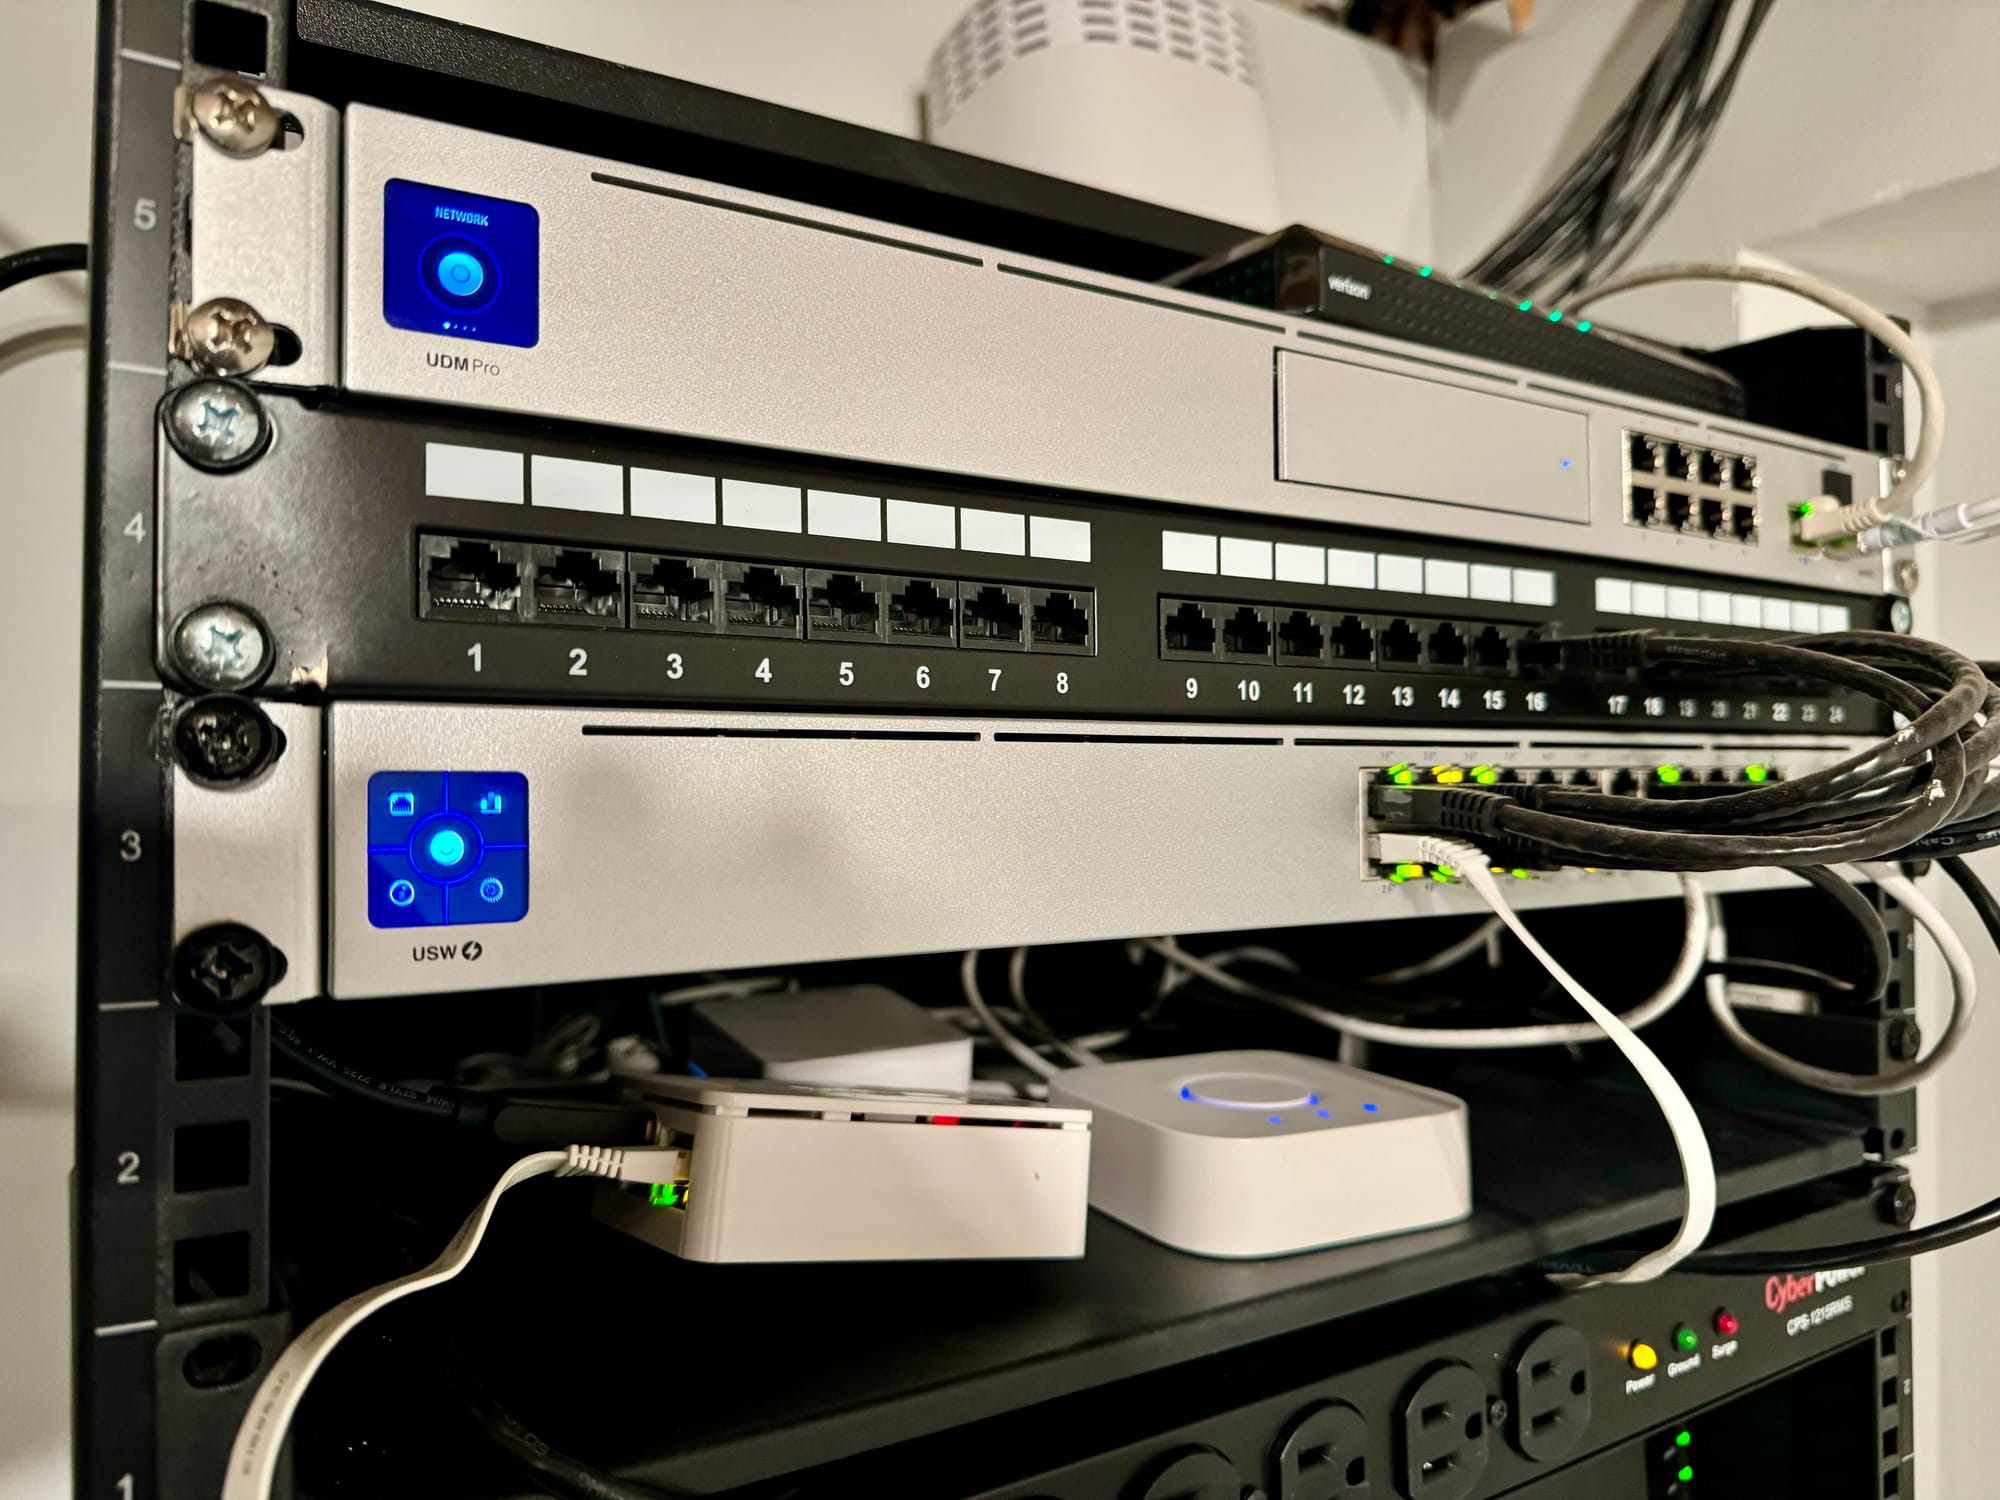
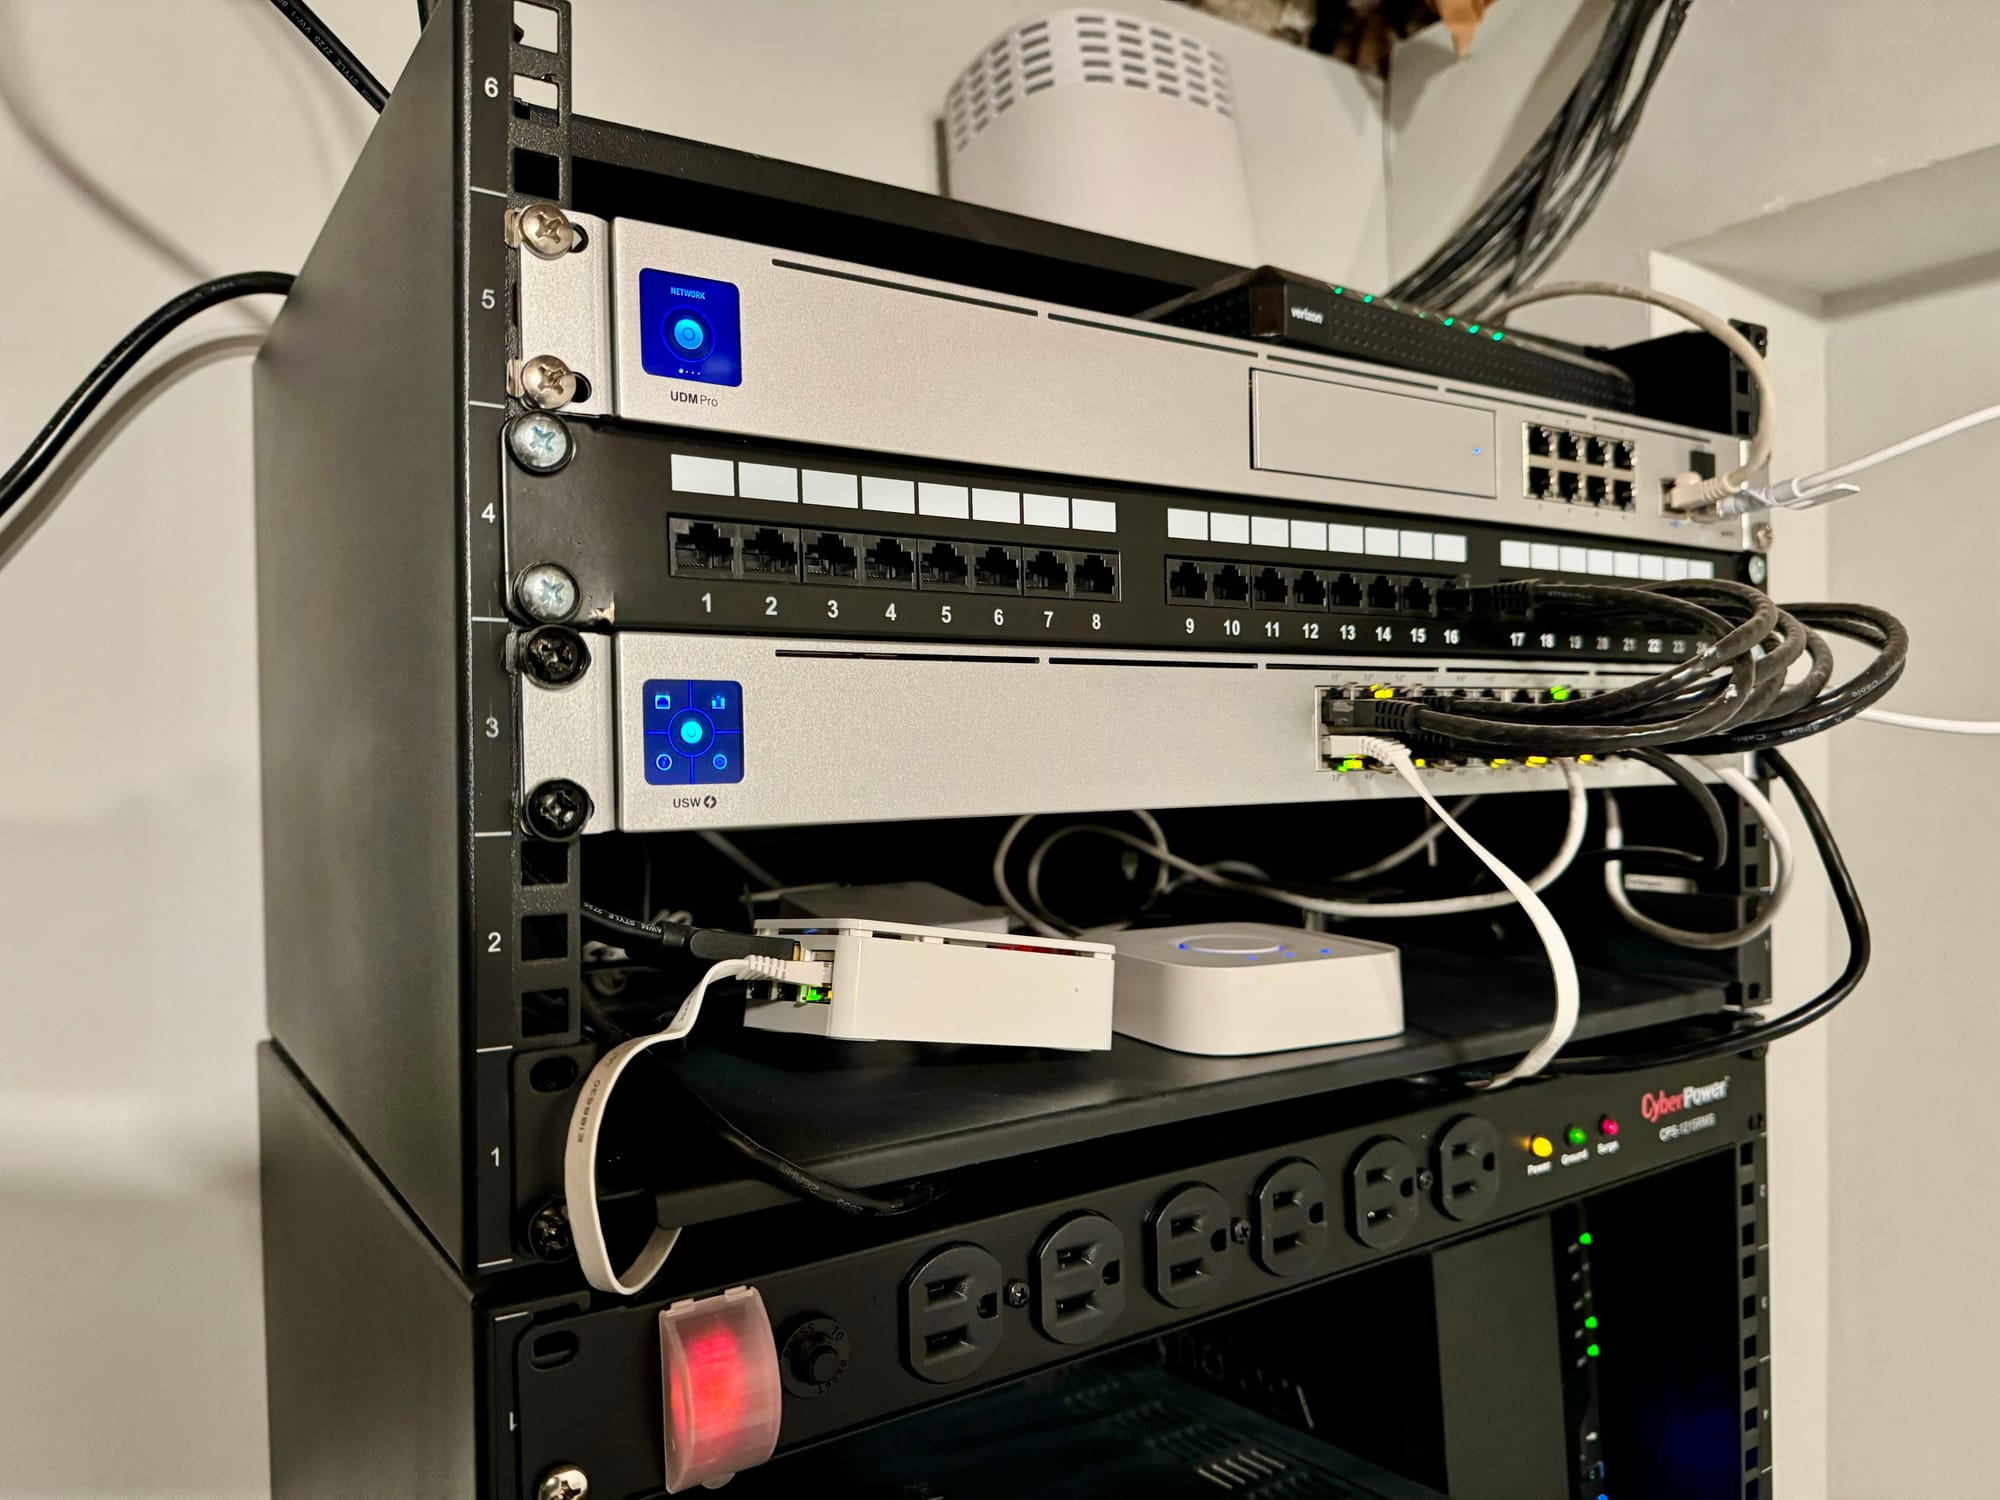
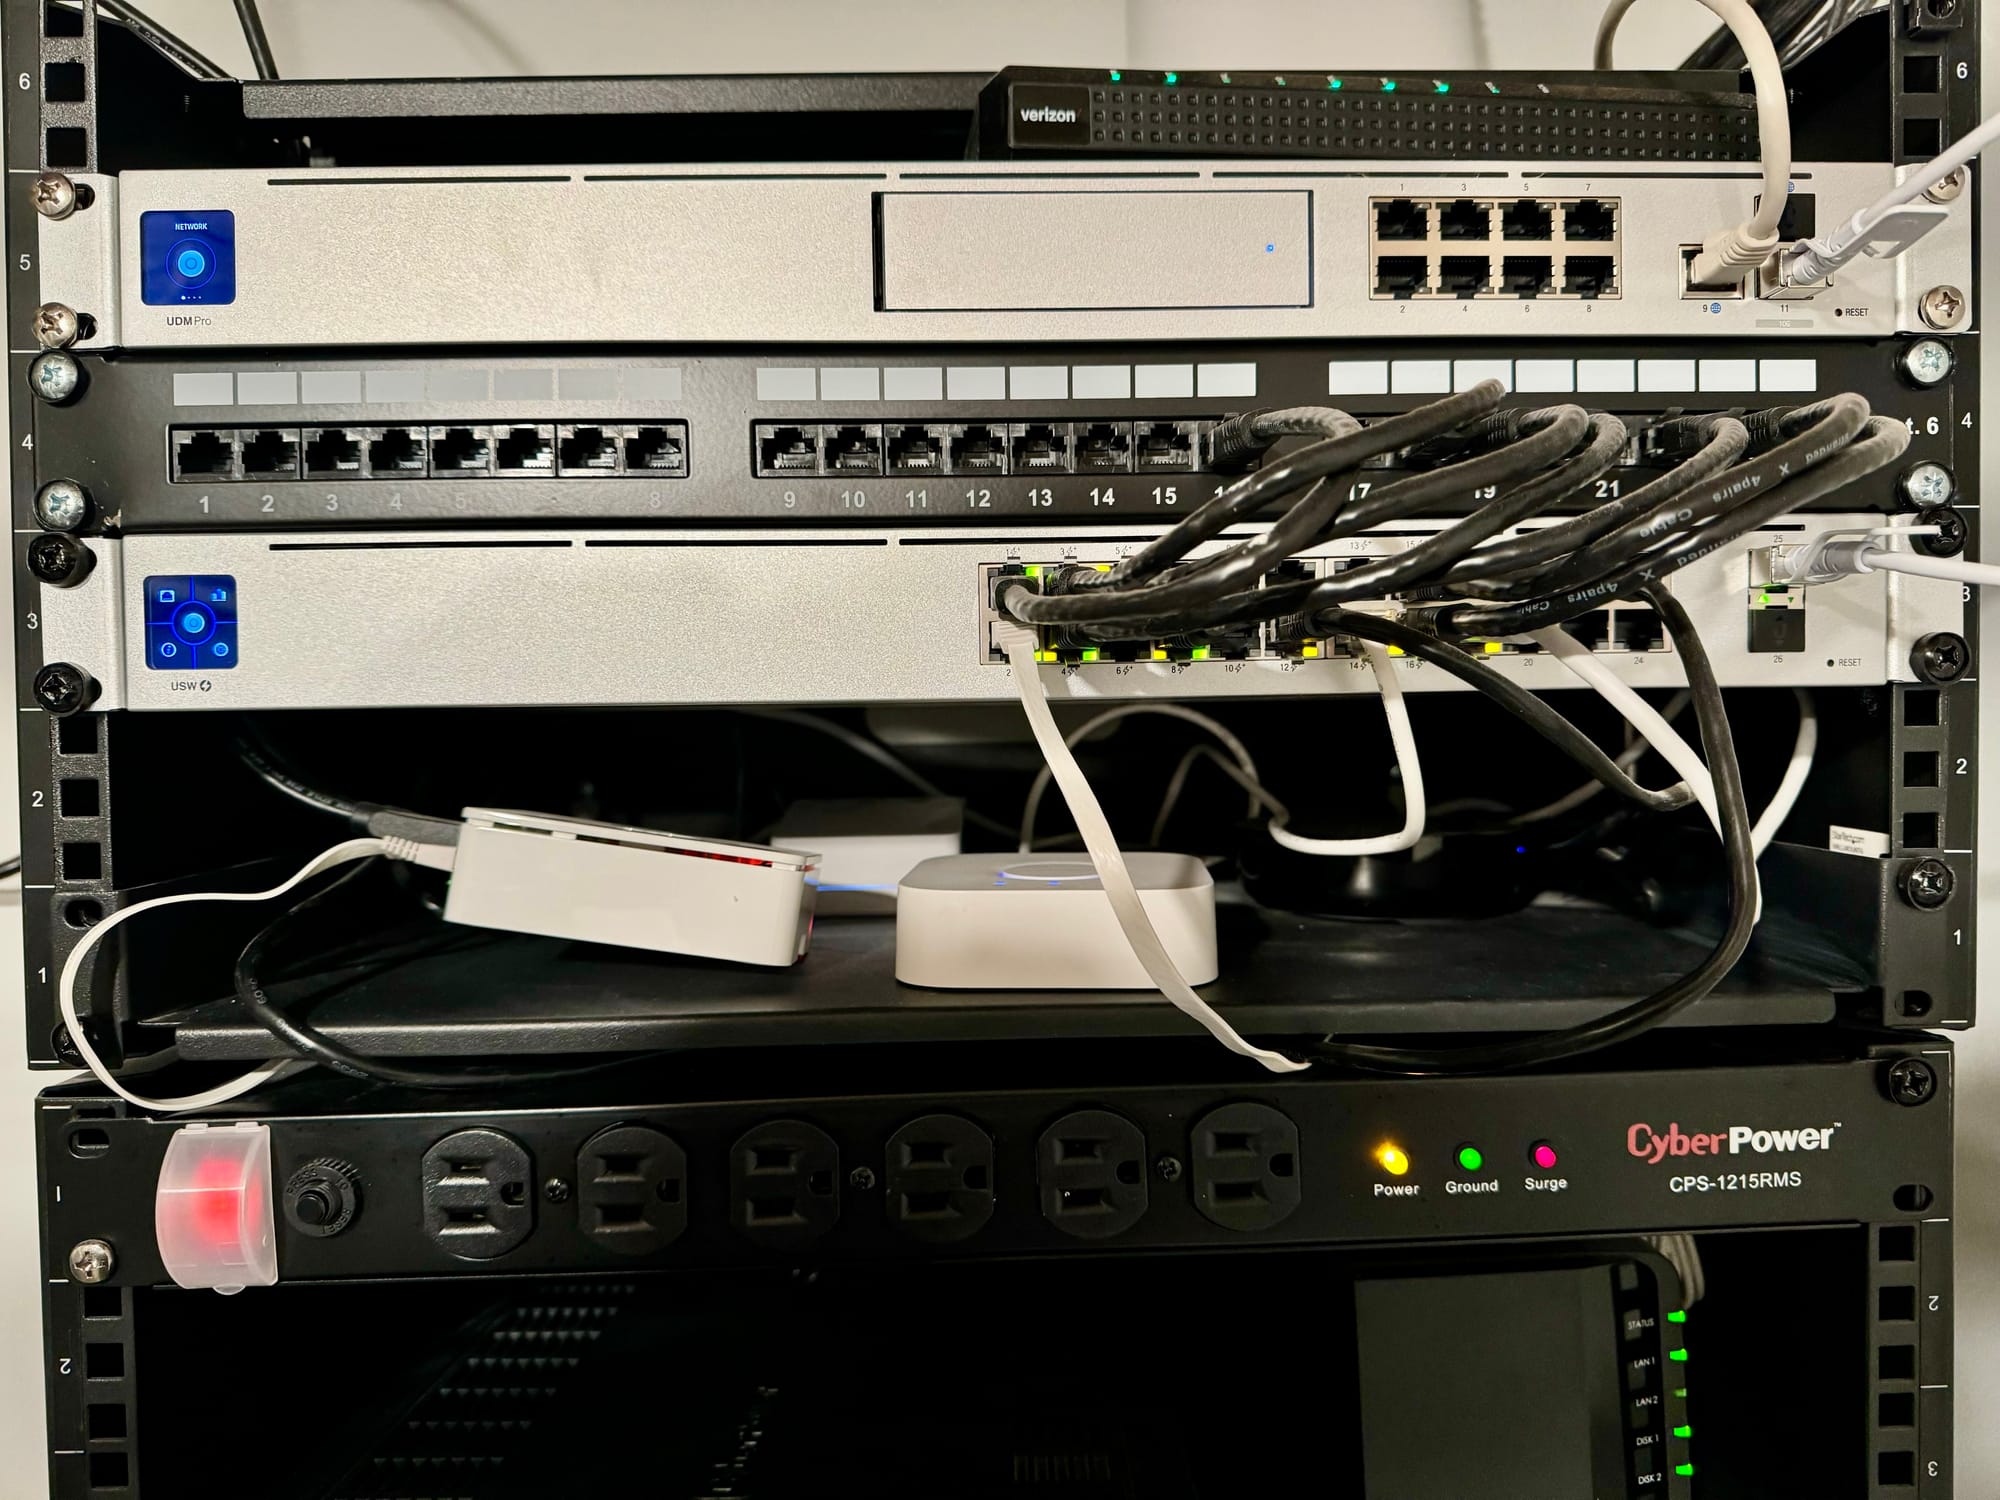
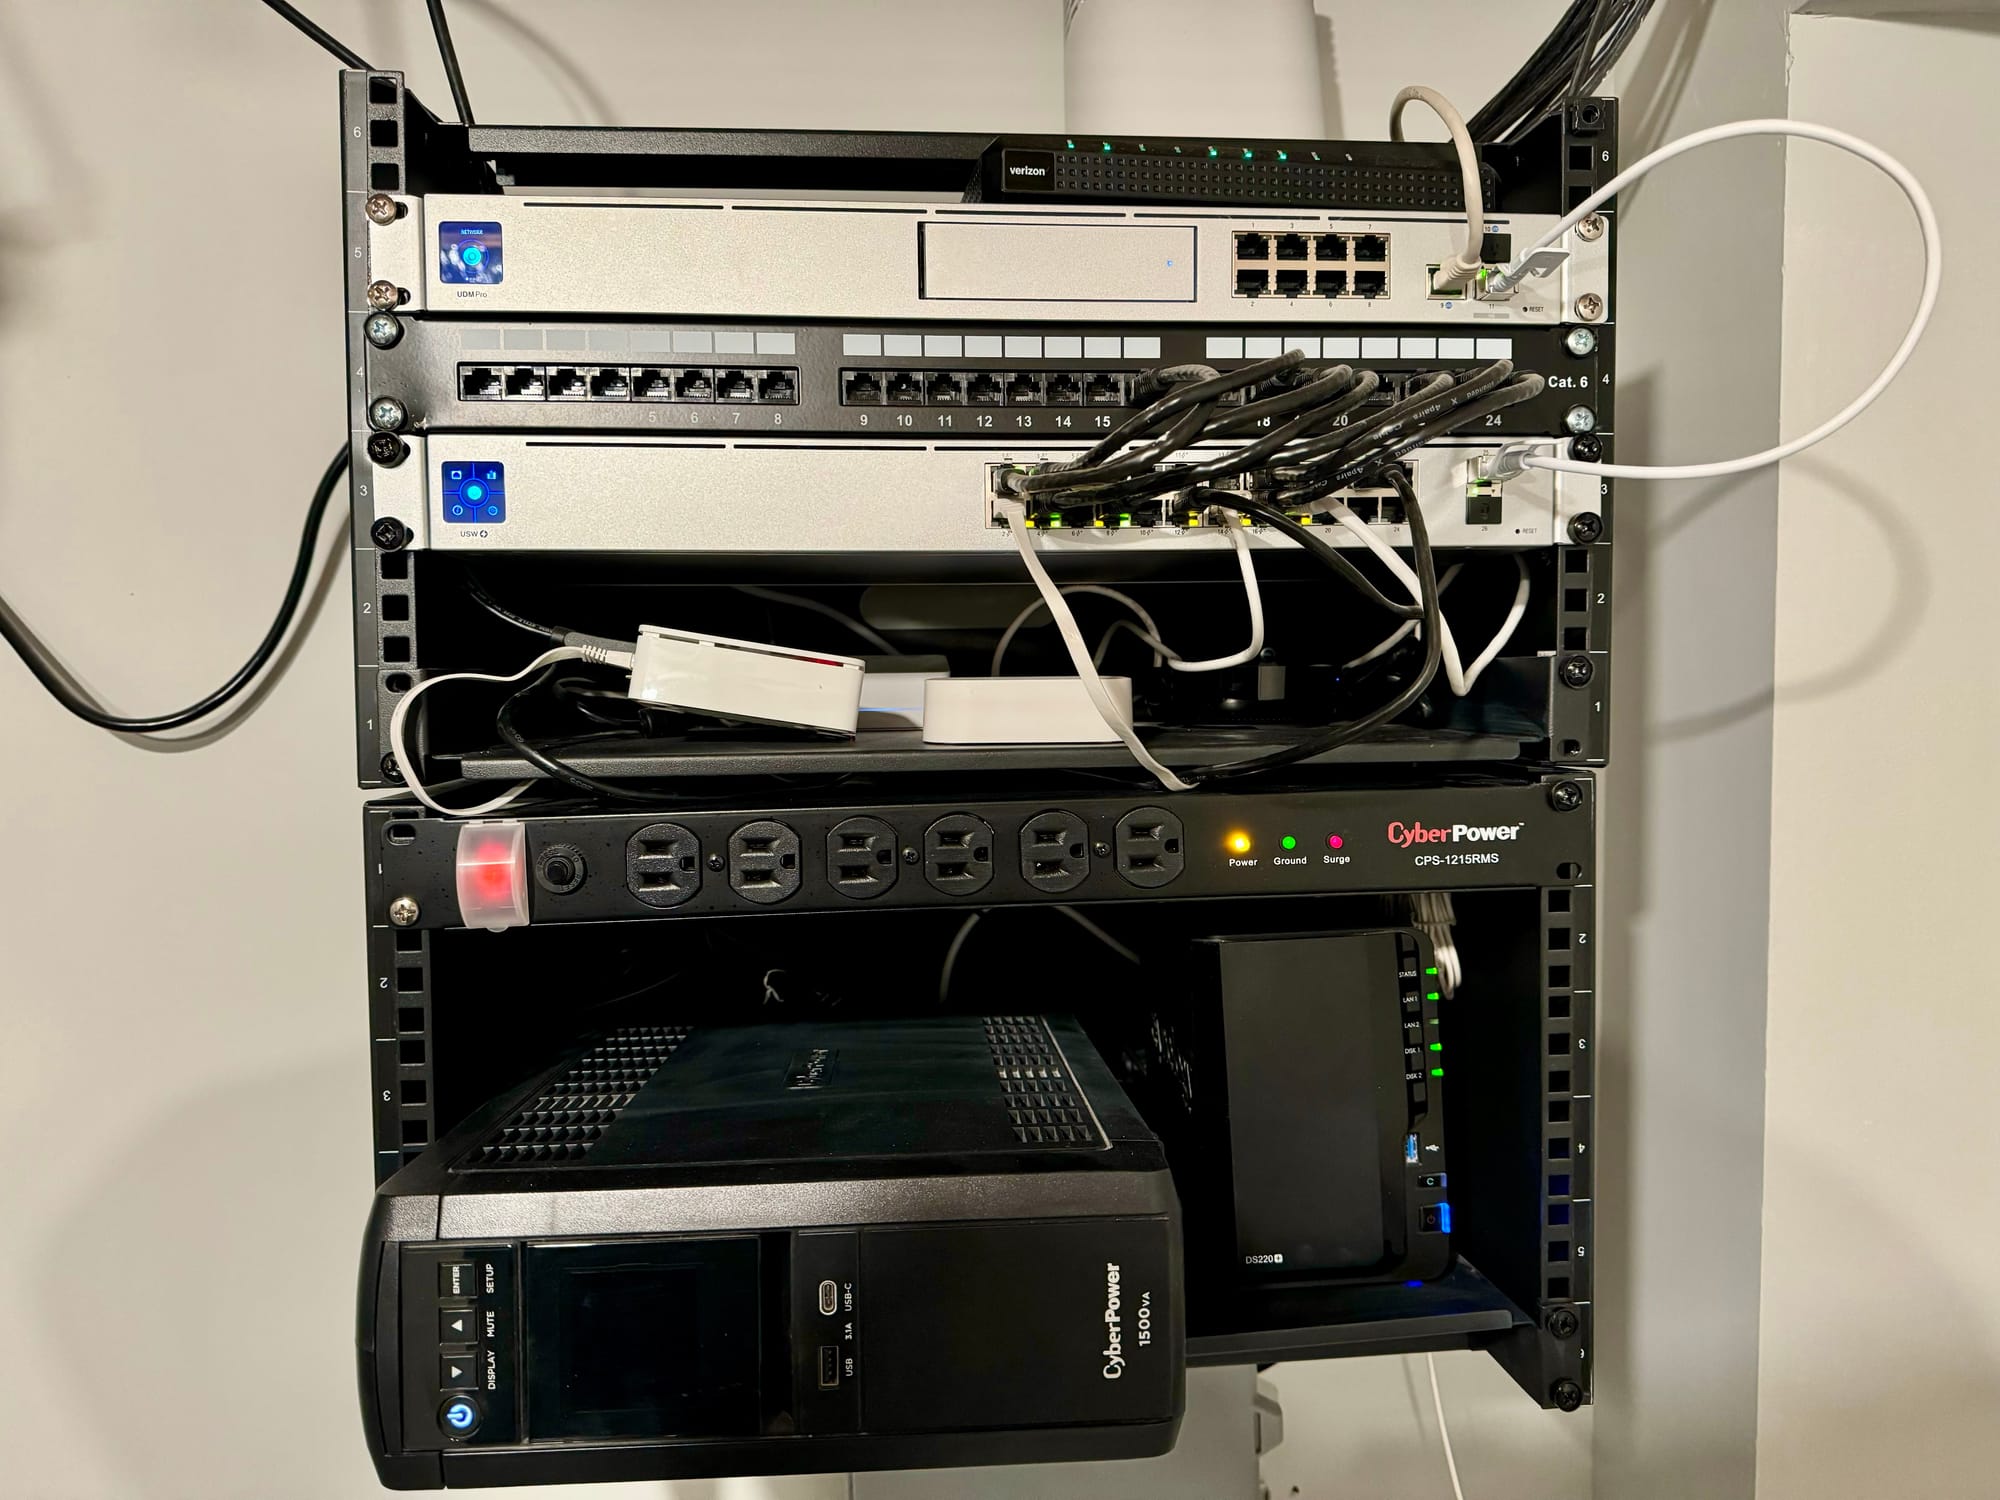
My Ubiquiti UniFi server rack, with UniFi Dream Machine Pro, standard 24-port switch, smart home hubs, Synology NAS, and a CyberPower USP
Why I Chose This
So that’s the setup, but why did I even choose this?
I was looking for five things:
- Reliability: I wanted the confidence and peace of mind that I could throw whatever I want at my internet, and it wouldn’t break a sweat. I was tired of the failed video calls, streaming TV buffering, and devices going offline.
- Customization: I wanted the ability to tailor the networking setup to my home environment so that I could achieve broad coverage. I have an internet-connected garage door opener, irrigation system, smart lock, and camera all located in my detached garage. Previously, these devices routinely went offline because they were too many barriers between them and the router.
- Expansion: I wanted a system that I could grow with. I could only imagine adding more internet-connected devices in the future, so I wanted a networking system that could handle any future needs.
- Security: Number four was security. I wanted to move away from WiFi-based, battery powered security cameras. Video playback on WiFi cameras was slow, and I was sick of charging batteries. I liked how I could easily integrate indoor and outdoor UniFi Protect security cameras with the networking setup, giving me PoE connections for always-on power and speed for smooth playback, plus an onboard NVR with local storage of my security camera footage.
- No subscriptions: And number five was no subscriptions. I wanted to pay for my equipment once, own it, and not be required to pay a monthly subscription for certain features or the ability to view my own security camera recordings.
Installation & Cost
You’re probably wondering about installation and cost. My home is 77 years old. It was not wired for ethernet, and the ISP router was already hardwired into a back corner of the house.
Installing a UniFi setup with a server rack, multiple hardwired APs and cameras, and dedicated ethernet ports required opening up my walls and digging a trench underground to my detached garage to route cables. You could do this work yourself, but given my time is a precious resource, I opted to pay a local installer to get it done quickly and reliably.
Now, let’s talk about the cost. I paid $4,400 for my setup. That cost included $900 in security cameras and $1,200 in labor. This means that if you did the install yourself and weren’t interested in cameras, you could cut the total cost in half from what I paid.
Final Thoughts
$4,400 is a lot of money to shell out for home networking and security. For me, it was worth every penny. I get maximum speed on wireless devices, and on wired devices. Everything just works, all the time — no matter how many devices are connected, or what I’m doing. My productivity goes up, not down. My smart home remains online. I can easily configure network settings, find open channels, setup port forwarding, get device-level information, and so much more.
To be clear, Ubiquiti UnFi is enterprise-grade equipment that I’m using in a single-family home. Many would say it is overkill for this situation. Honestly, they may be right.
But if your home network is struggling to keep pace, you want to grow your smart home, gain coverage throughout your property, enjoy tinkering, and don’t balk at the price — then this may be the right option for you.
Watch on YouTube
Featured Tech
Gateways - Ubiquiti UniFi Dream Machine Pro: https://go.michaelsleen.com/udm-pro
Gateways - Ubiquiti UniFi Dream Machine Pro Special Edition: https://go.michaelsleen.com/dream-machine-se
Gateways - Ubiquiti UniFi Dream Machine Pro Max: https://go.michaelsleen.com/udm-pro-max
Switching - Ubiquiti UniFi Standard 24 PoE: https://go.michaelsleen.com/usw-24-poe
Switching - Ubiquiti UniFi Pro Max 24 PoE: https://go.michaelsleen.com/usw-pro-max-24-poe
Switching - Ubiquiti UniFi Flex: https://go.michaelsleen.com/switch-flex
Switching - Ubiquiti UniFi Flex Mini: https://go.michaelsleen.com/switch-flex-mini
Switching - Ubiquiti UniFi Flex Mini 2.5G: https://go.michaelsleen.com/switch-flex-mini-2-5-g
WiFi Access Points - Ubiquiti UniFi U7 Pro Max: https://go.michaelsleen.com/u7-pro-max
WiFi Access Points - Ubiquiti UniFi U7 Pro: https://go.michaelsleen.com/u7-pro
WiFi Access Points - Ubiquiti UniFi U6 Pro: https://go.michaelsleen.com/u6-pro
WiFi Access Points - Ubiquiti UniFi U6 Long Range: https://go.michaelsleen.com/u6-lr
WiFi Access Points - Ubiquiti UniFi U6+: https://go.michaelsleen.com/u6-plus
WiFi Access Points - Ubiquiti UniFi U6 In Wall: https://go.michaelsleen.com/u6-iw
Power - CyberPower Rackmount Surge Protector: https://amzn.to/3T8j3IZ
Power - CyberPower USP (battery backup): https://amzn.to/3IxUpwF