Beginner-Friendly NAS for Your Smart Home: UGREEN NAS DXP4800 Plus
Deep dive into the UGREEN NASync DXP4800 Plus, including the benefits of a NAS, features of this device, hardware and software setup, and key use cases for your smart home.
Introduction
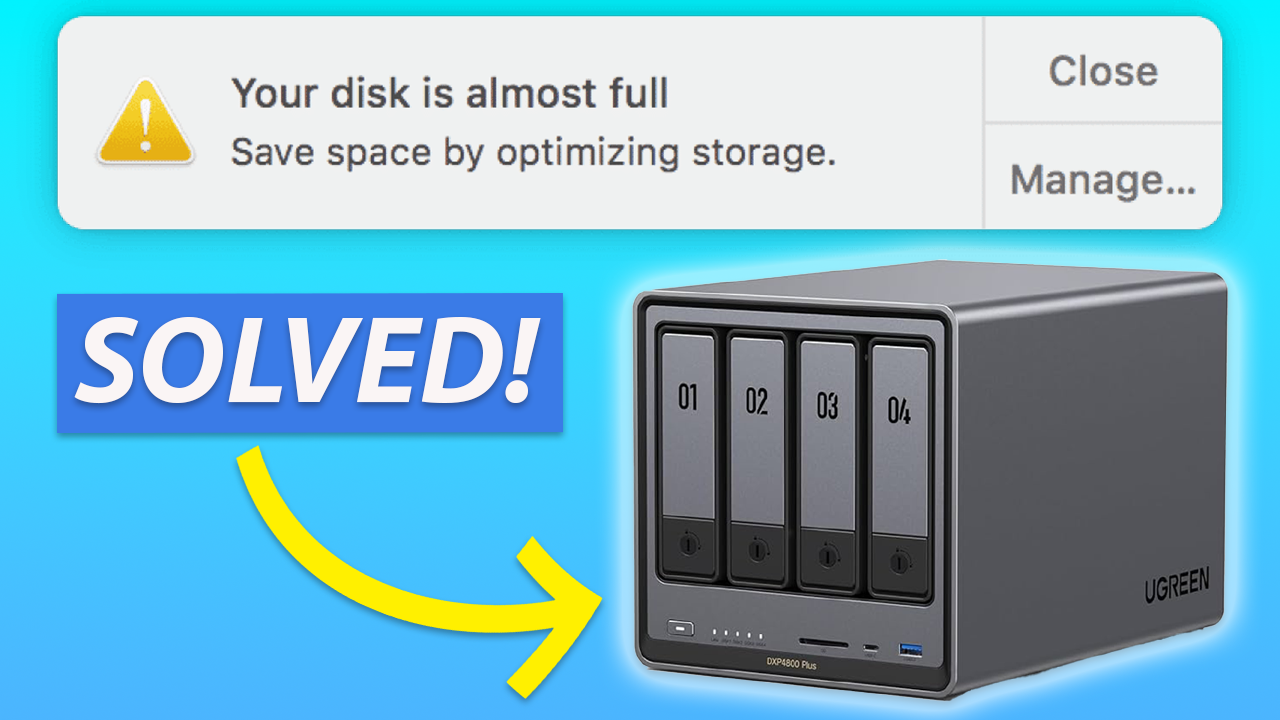
If you’ve ever seen a screen telling you that your computer or phone is running low on storage space, then you know how frustrating that can be. It may seem like you’re in a constant battle with your device, endlessly removing, then adding, then removing files or apps to free up space. One of the solutions to this problem is a NAS, or Network Attached Storage, like this 4-bay storage device from UGREEN.
I’m going to show everything you need to know about this, including the benefits of a NAS, features of this device, hardware and software setup, and key use cases like AI photo recognition. I’ve used several different brands, models, and sizes of NAS devices over the years, so I understand what they offer. I’ve also seen how a NAS may be confusing or intimidating if you’re just starting out. This UGREEN NAS is beginner-friendly, and I’ll keep things simple with step-by-step instructions.
Main Points
What is a NAS?
Thanks to UGREEN for sponsoring this video and supporting the channel.
So, what exactly is a NAS? Well, it’s essentially a helpful way to solve the data storage limitations that you may face on your computer. It works like cloud storage, but stores all of your data locally on your own hard drives, so your stuff — like documents and media files — is safe. From a computer, you can access your NAS like any other folder for managing files. You also have the option to enable remote access, allowing you to manage your files no matter where you are.
NAS was one of those things that seemed kind of intimidating before I got started, but then I quickly saw how beneficial it was and couldn’t believe I ever lived without one. I’ve used a NAS to automatically and wirelessly backup the data on our computers, store thousands of music, movies, and TV shows and play them on our TV, and to just offload large files — like video recordings from my YouTube channel — onto the NAS to free up limited space on my computer.
Unboxing
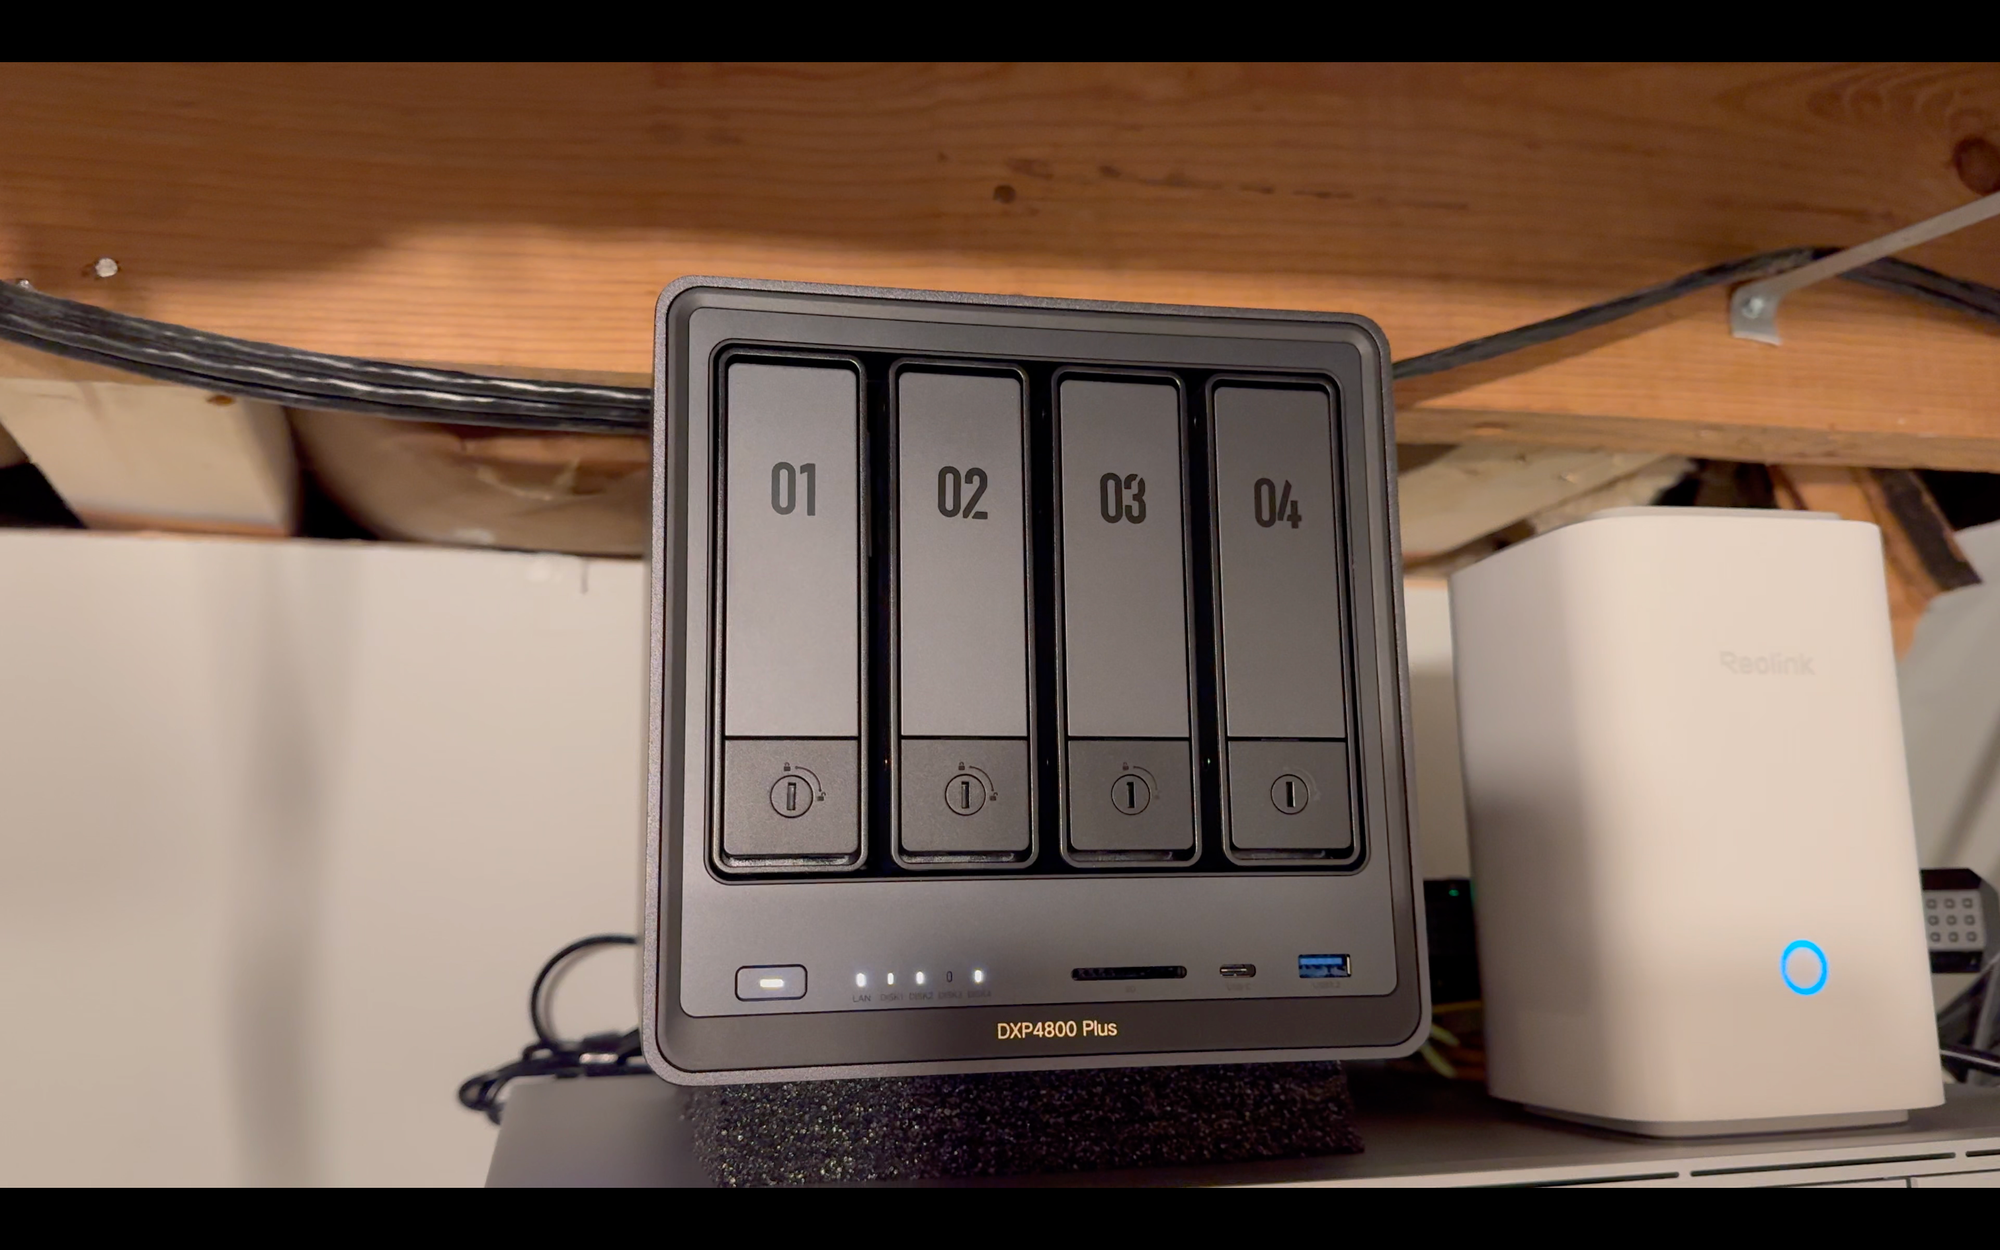
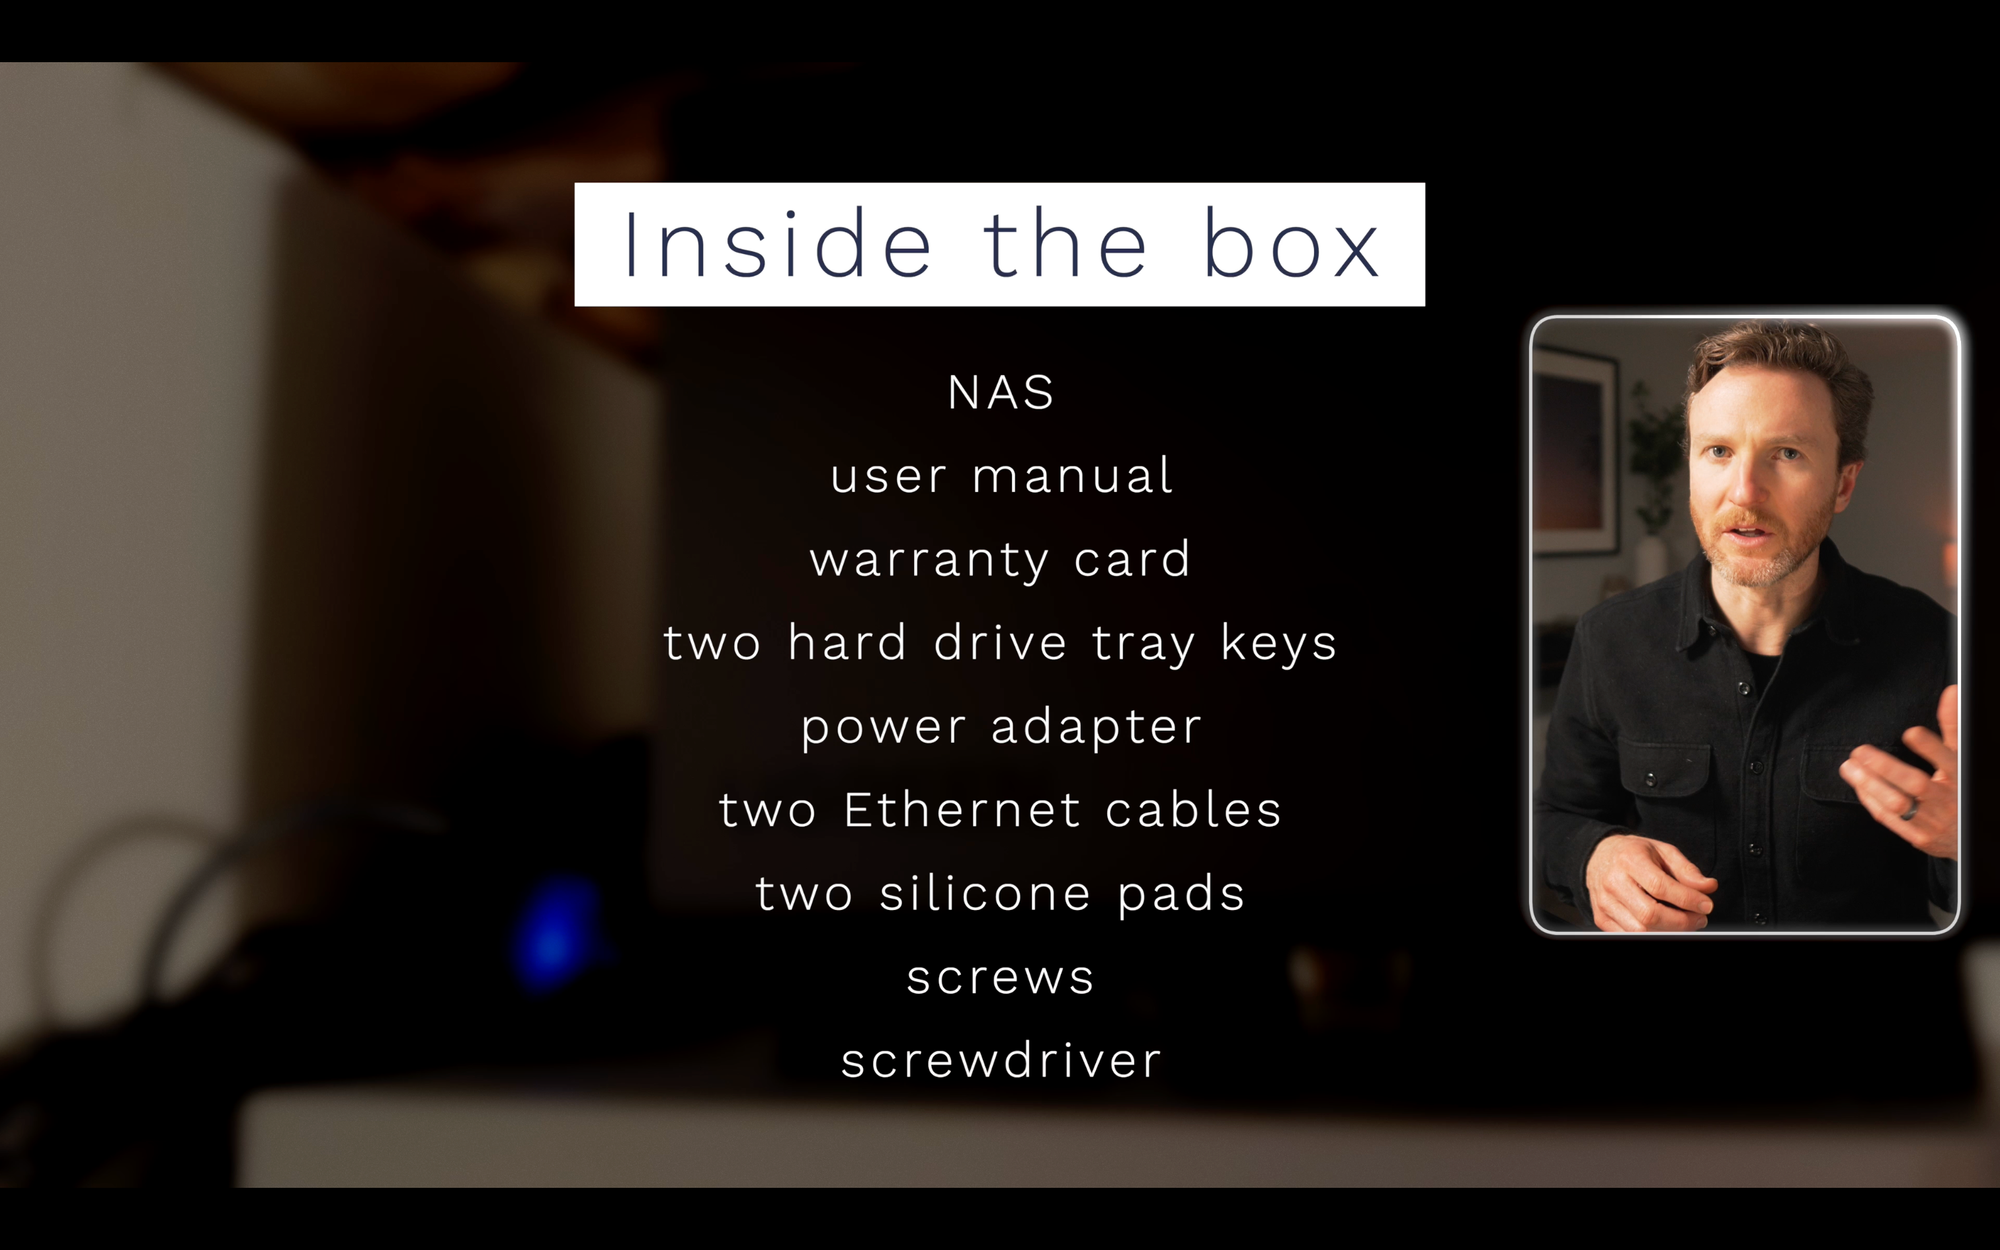
Let’s take a closer look at this particular device, the UGREEN NASync DXP4800 Plus Network Attached Storage. Inside the box you get the NAS itself, user manual, warranty card, two hard drive tray keys, a power adapter, two Ethernet cables, two silicone pads for thermal conduction if you are installing M.2 SSDs (which is optional), and screws and a screwdriver for 2.5-inch hard drive installations. The screws and screwdriver are not needed if you are installing common 3.5-inch hard drives, like I am. You will need to purchase the hard drives separately, and I’m using four, 4TB Western Digital WD Red Plus hard disk drives, or HDDs.
UGREEN NASync DXP4800 Plus Network Attached Storage: Unboxing
Features
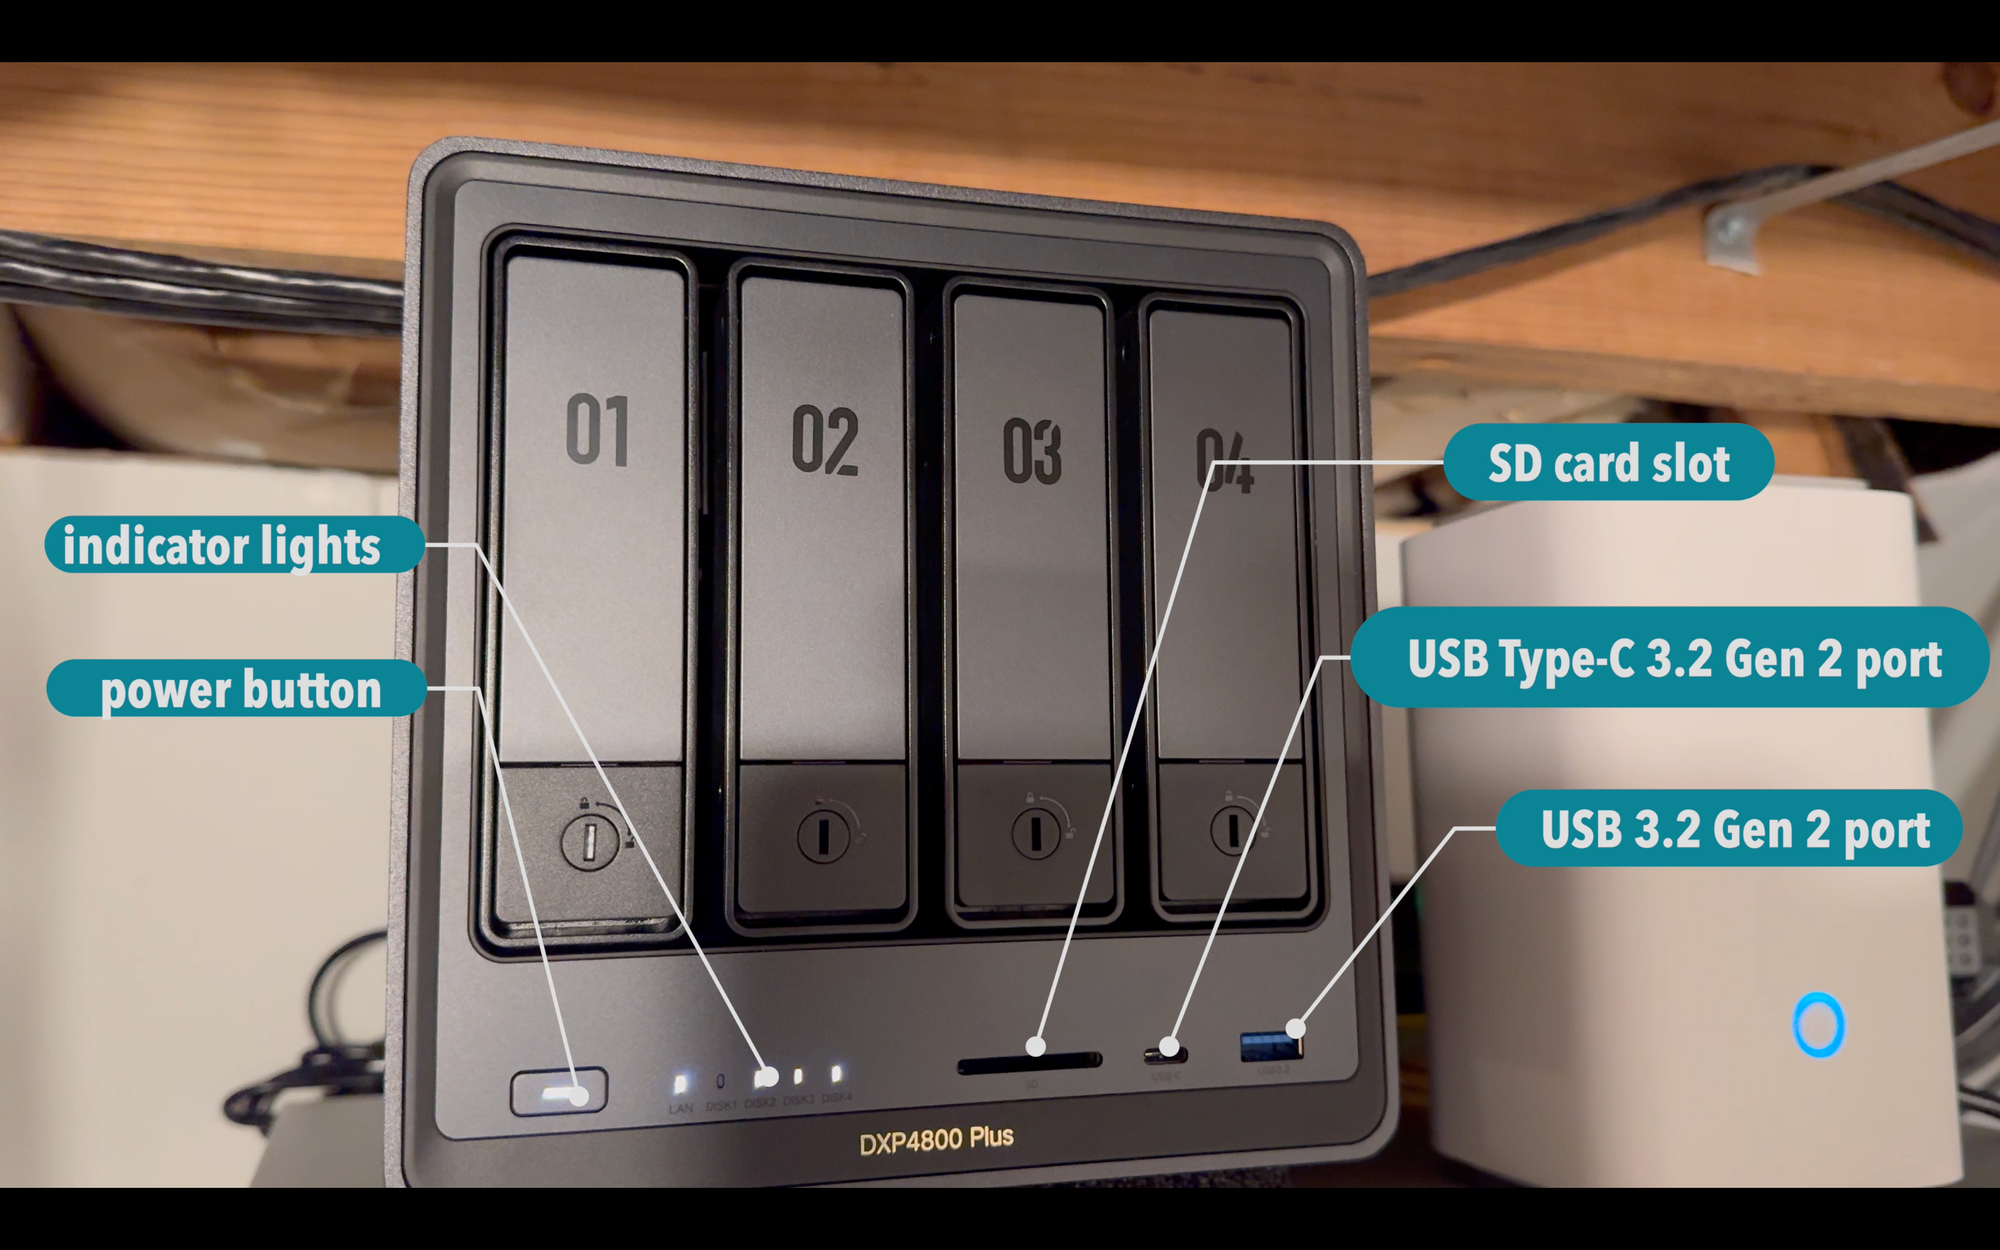
This UGREEN NAS is a 4-bay desktop storage device, and it’s pretty slim for its size. Each bay has a safety lock, and can accommodate 2.5-inch or 3.5-inch HDDs. You access the bays from the front of the device. Also on the front is the power button, indicator lights, SD card slot, a USB Type-C 3.2 Gen 2 port, and a USB 3.2 Gen 2 port.
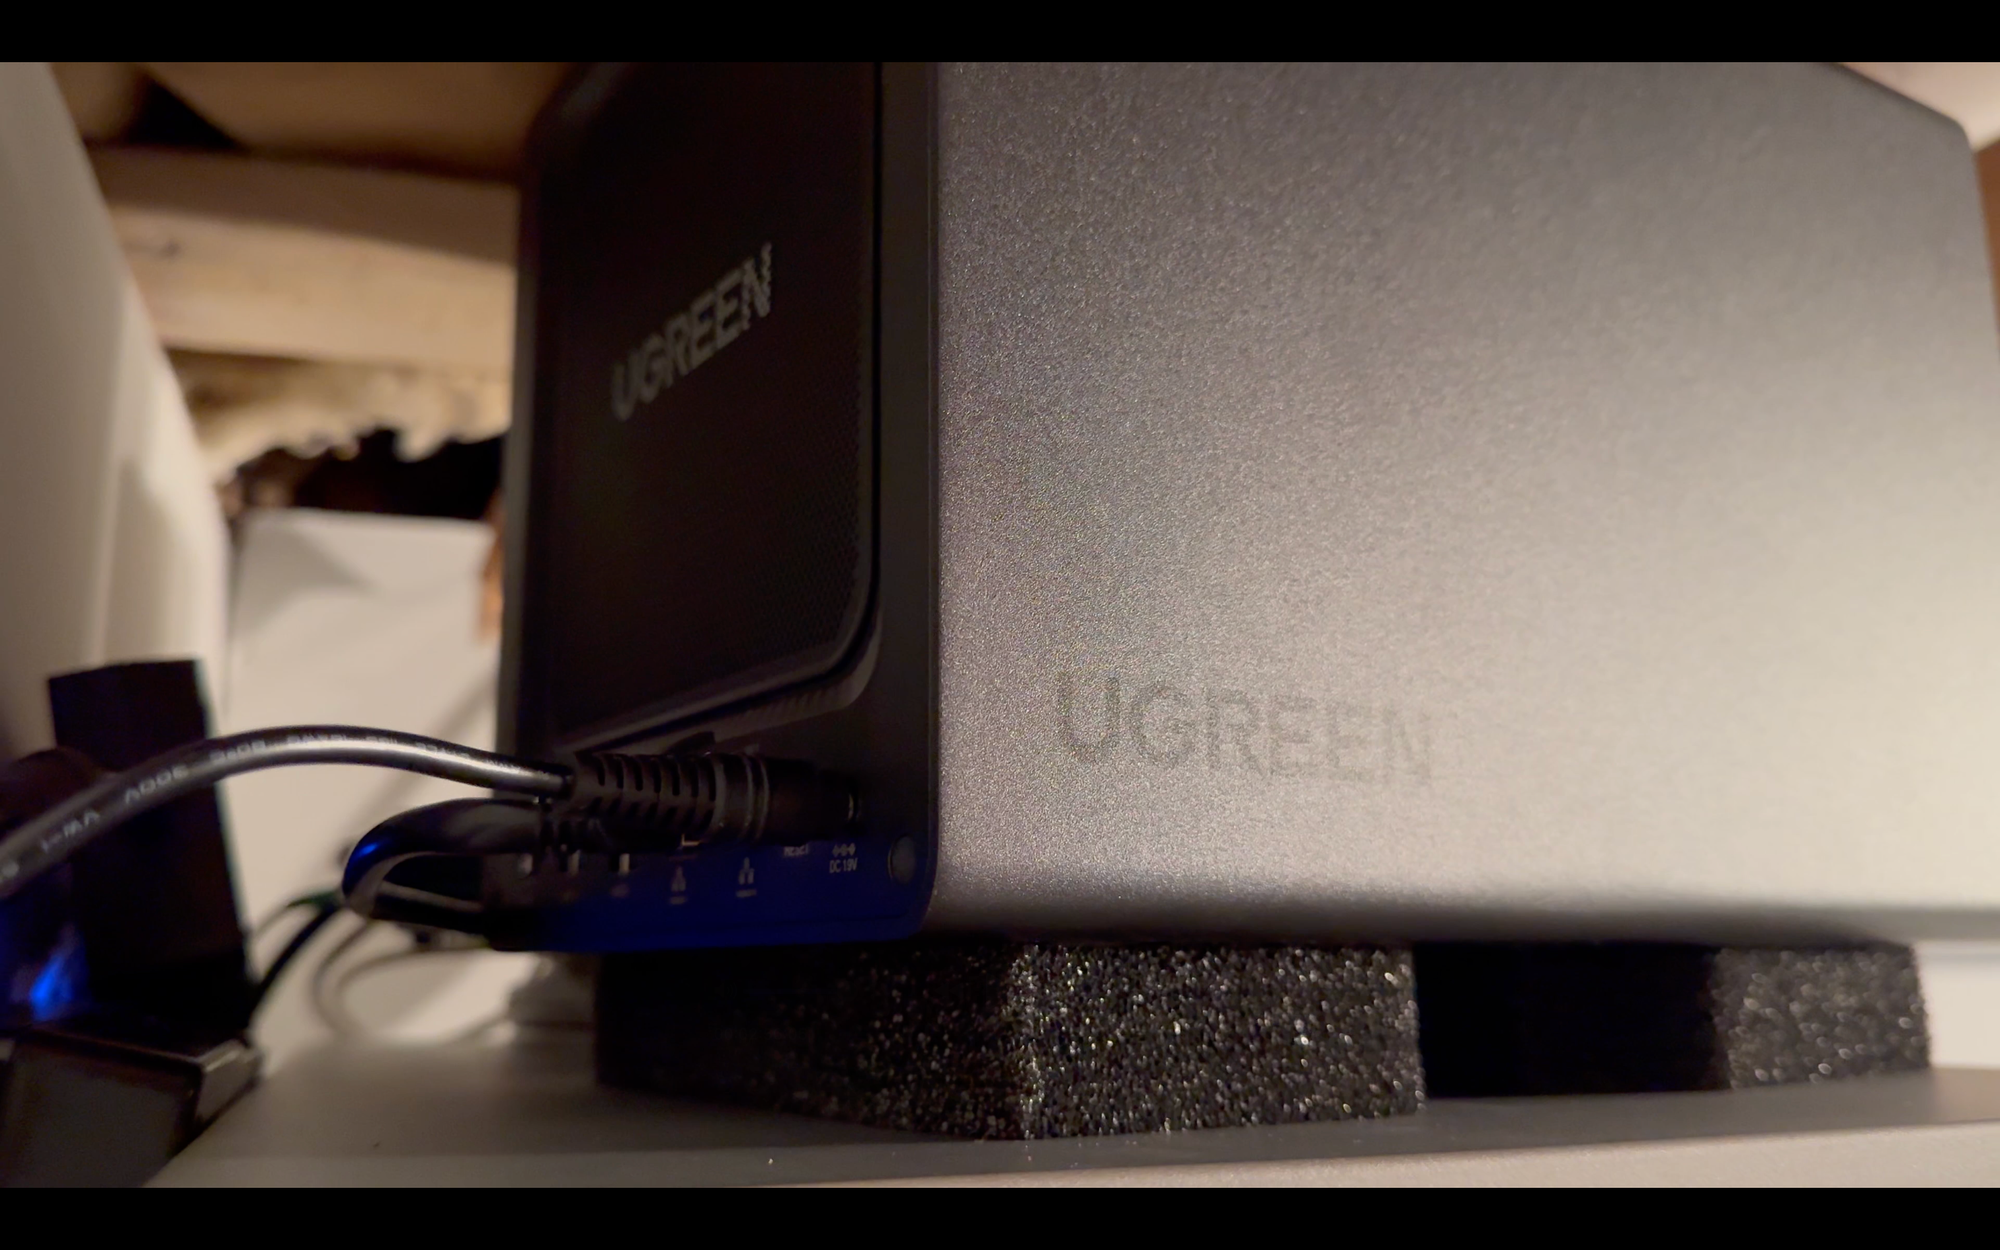
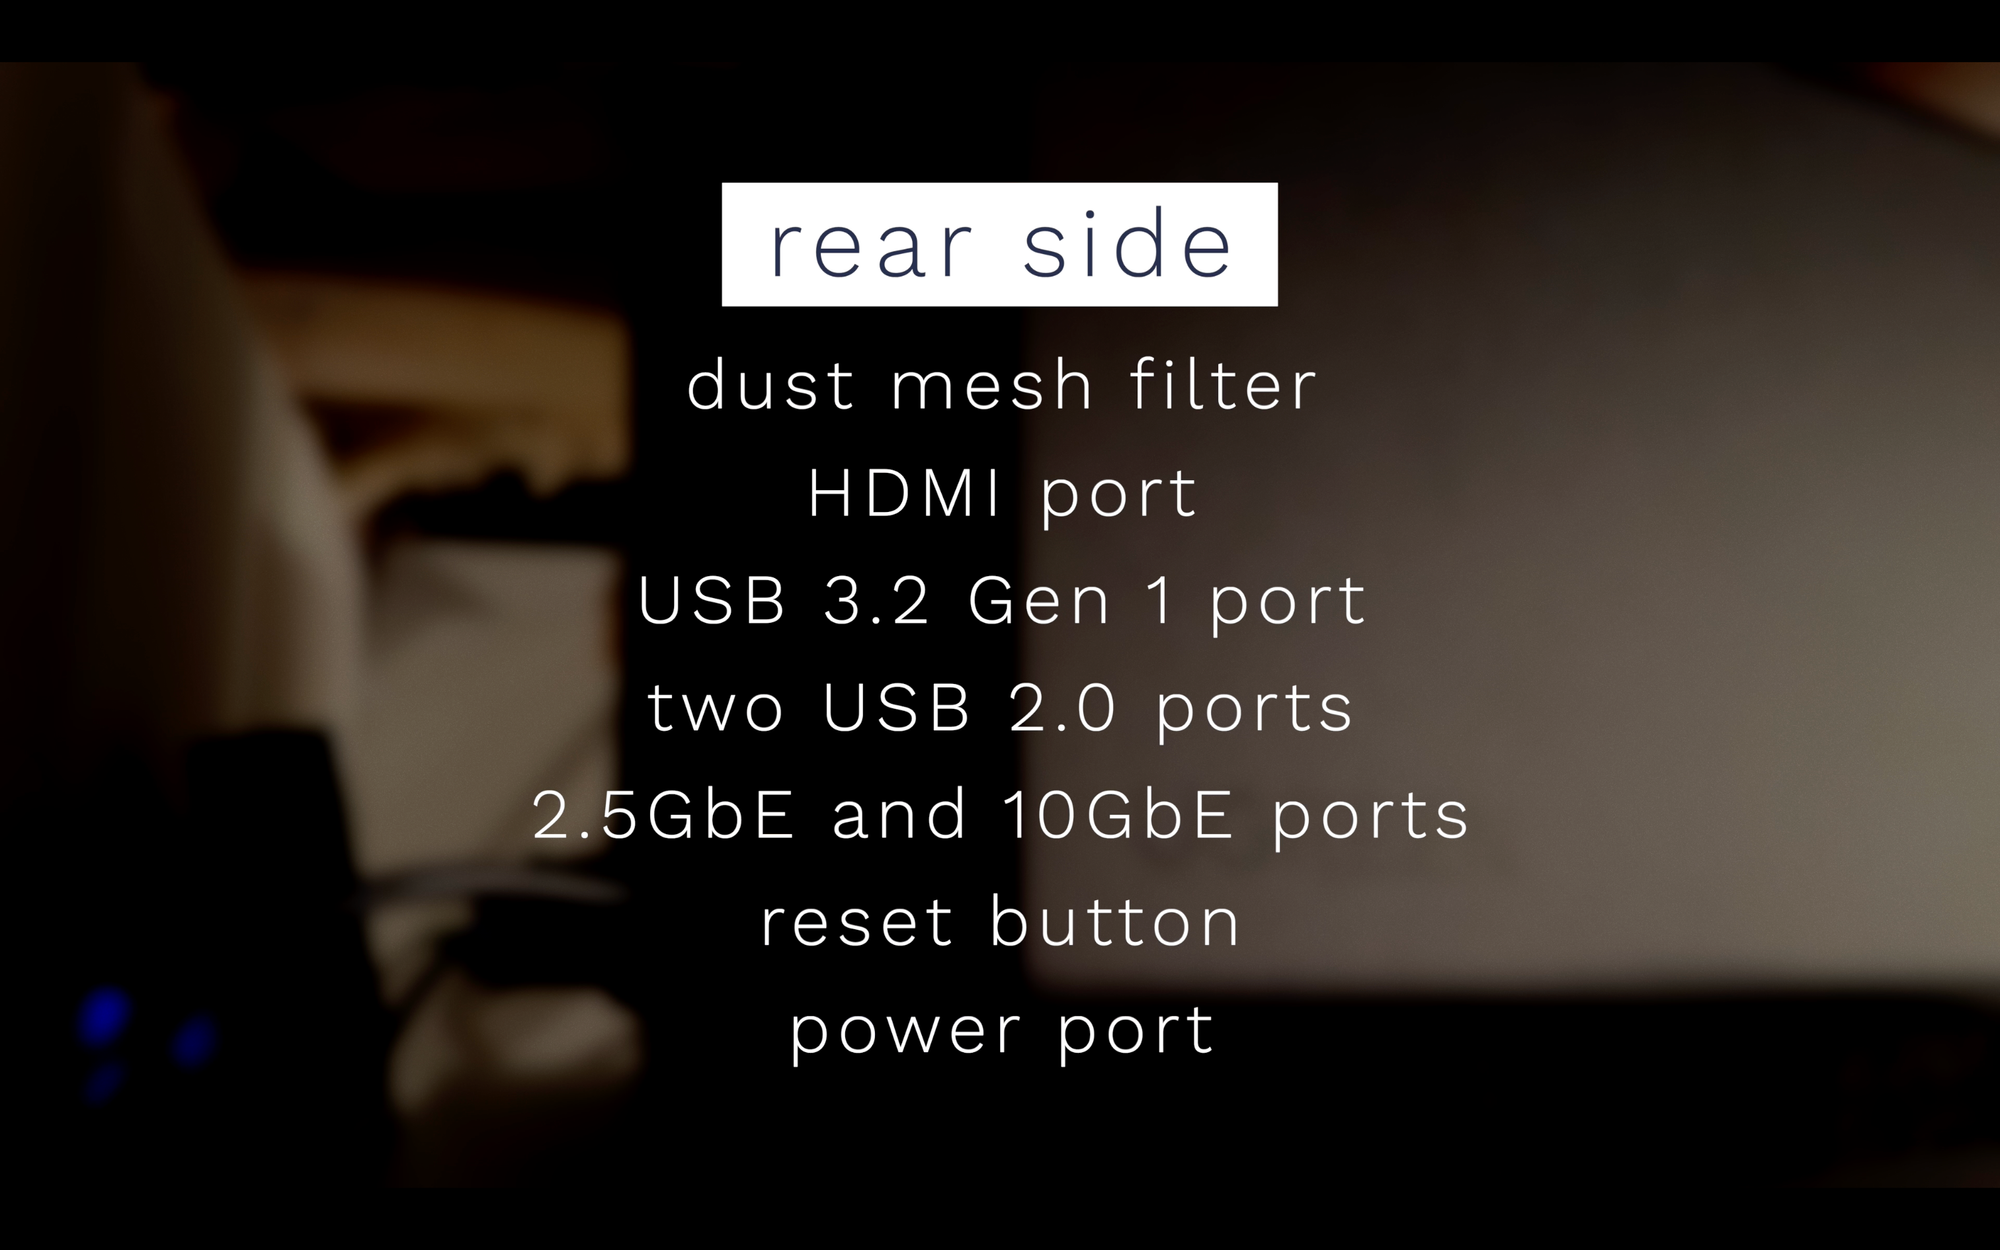
On the back of the NAS is a dust mesh filter that attaches magnetically. Below that is an HDMI port, USB 3.2 Gen 1 port, two USB 2.0 ports, 2.5GbE and 10GbE ports, a reset button, and the power port. If you do plan to install M.2 SSDs, this can be done on the bottom of the device.
This UGREEN NAS has a maximum storage capacity of up to 112TB. That is equivalent to storing millions of photos and documents, or tens of thousands of movies. It supports download speeds up to 1250MB/s, meaning a 1TB file can be downloaded in less than 15 minutes. Inside is a 12th Gen, 5-core Intel processor for handling multi-tasking.
UGREEN NASync DXP4800 Plus Network Attached Storage: Features
Hardware Setup
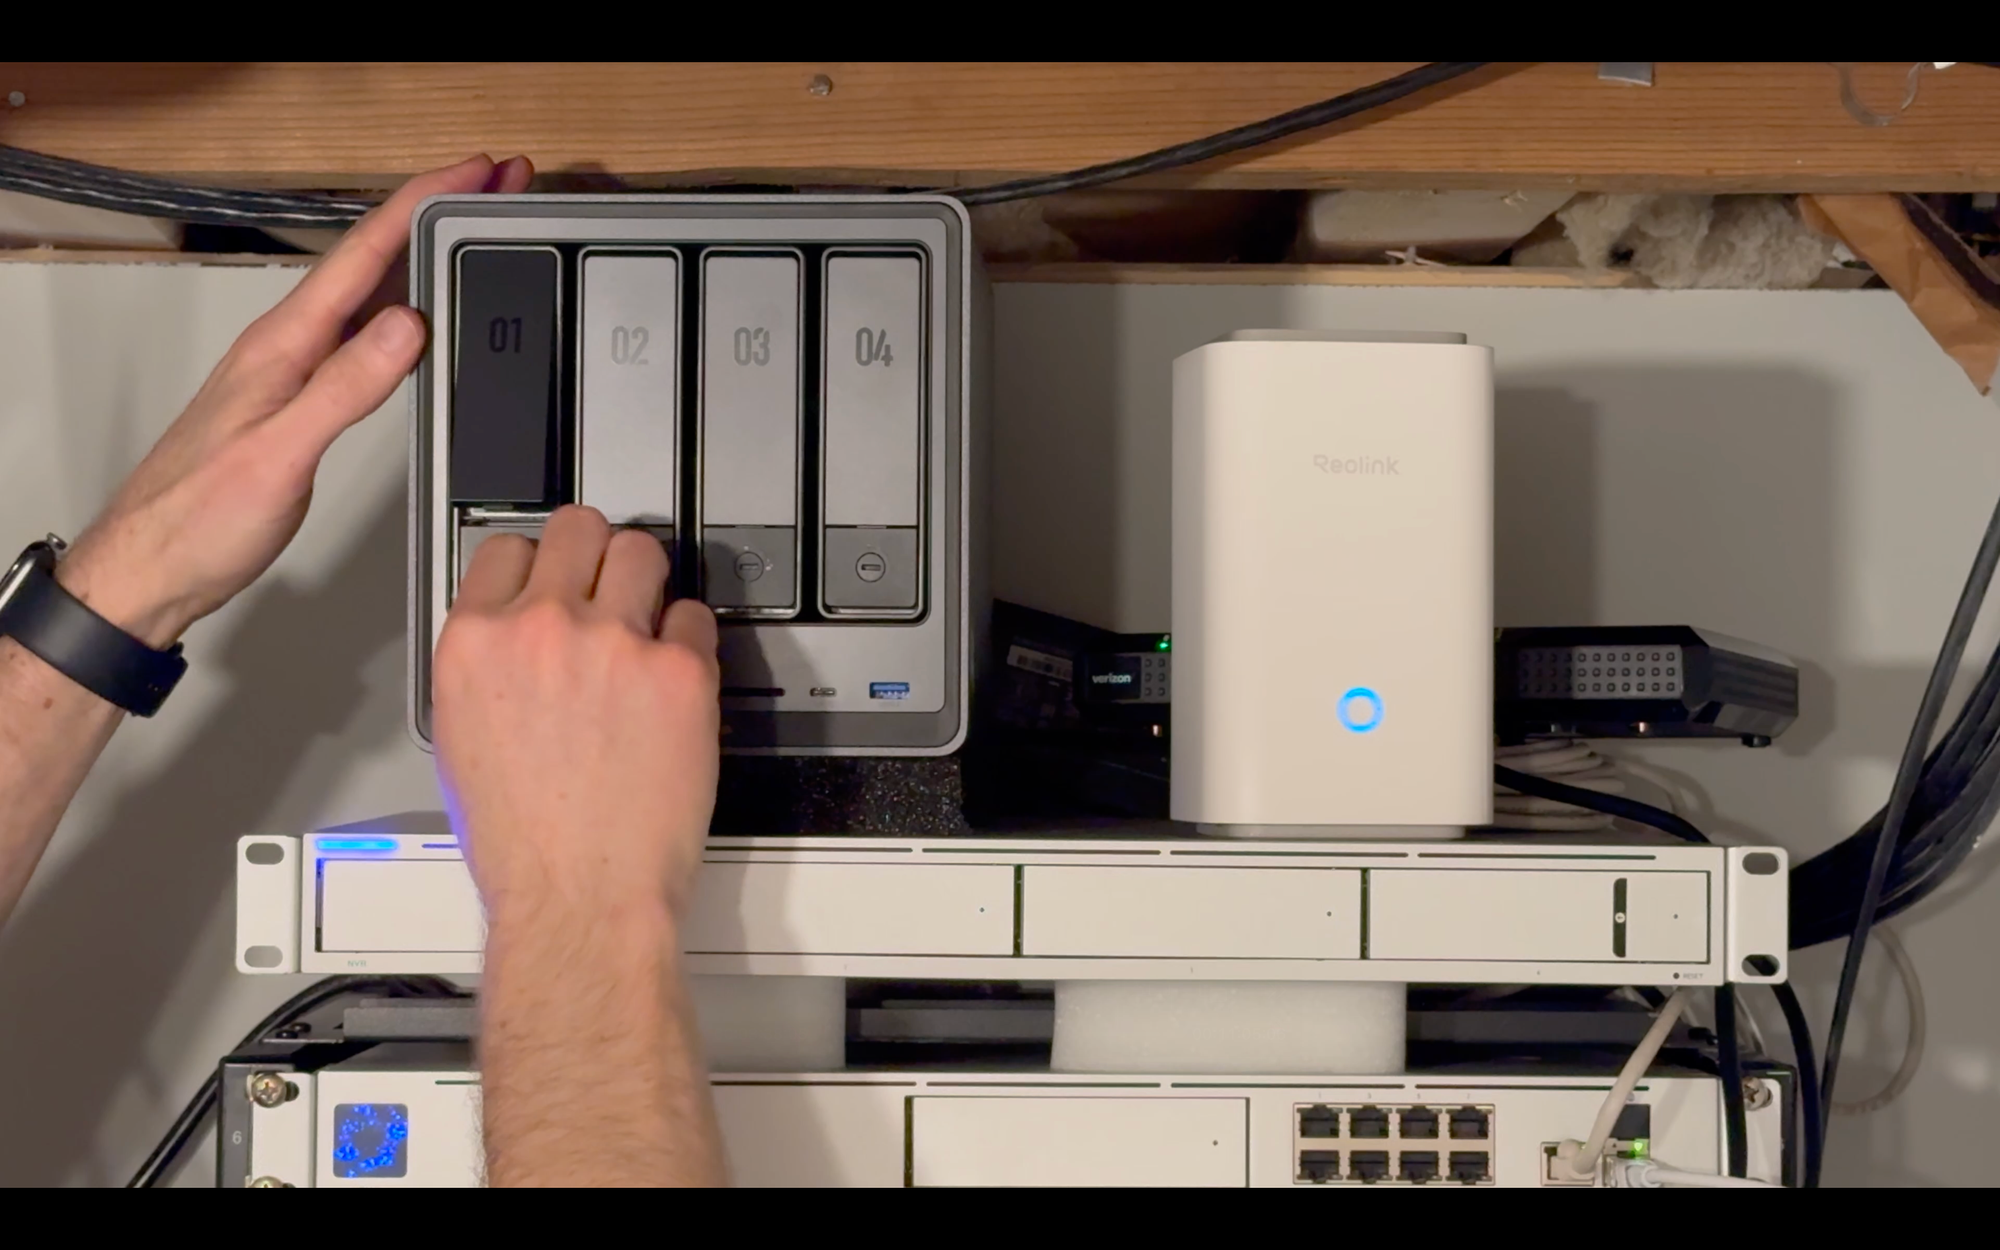
Alright, let’s get this NAS setup. Thankfully, it’s super easy to do, even for beginners. To set up the NAS, you’ll begin by opening the hard drive trays and installing the hard drives. Do not yet plug the NAS into power or Ethernet. Use the provided key to unlock the hard drive trays if needed (mine were already unlocked). Press the buckle at the bottom to pop the handle out, and then pull out the tray.
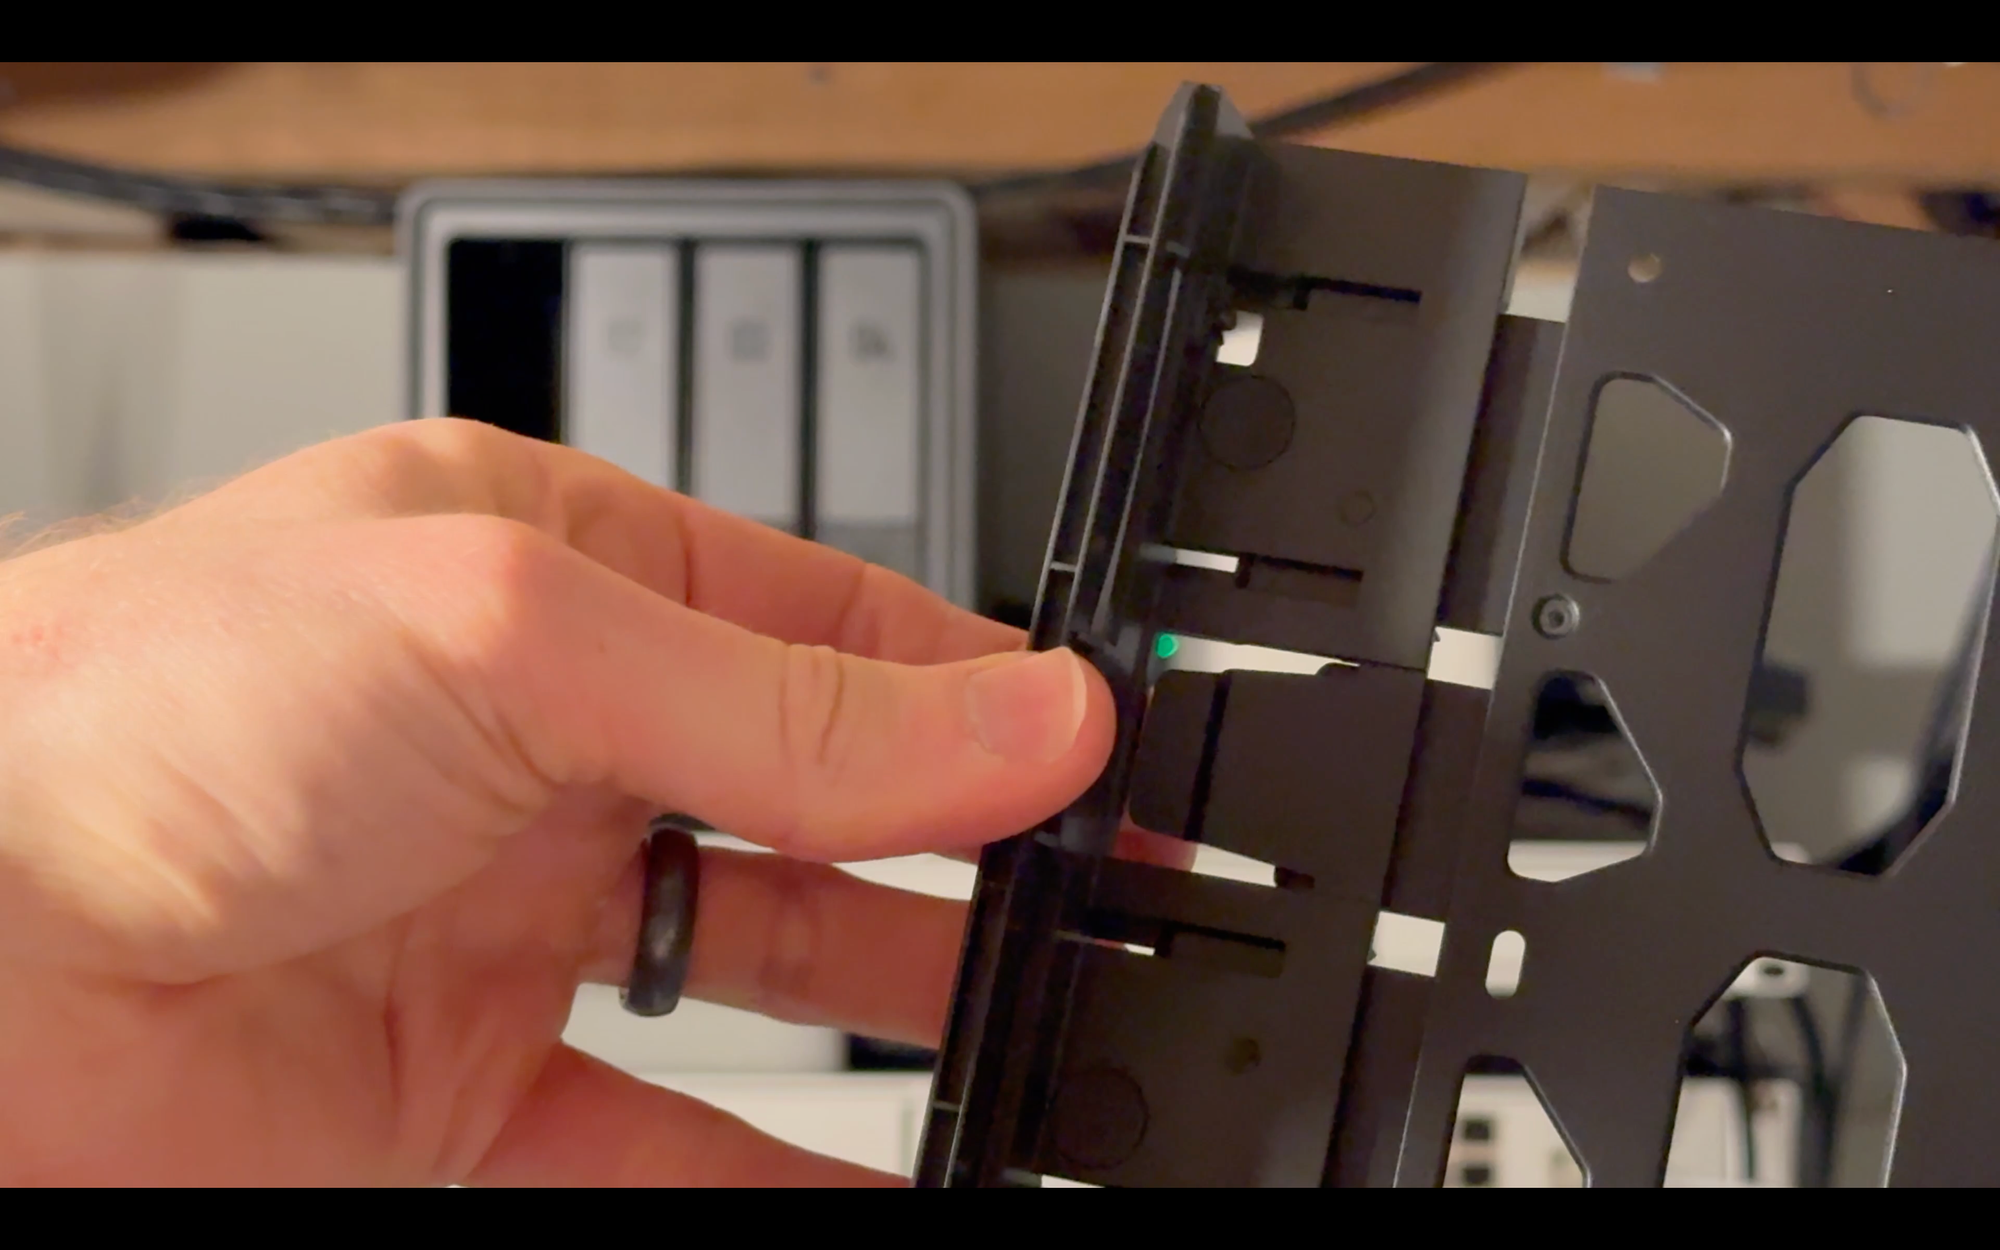
Press the marked buckle on the tray to pull the clamp arm, creating space to insert the hard drive. I’m going to focus on how do this with 3.5-inch drives. When you place the hard drive on the tray, make sure the four fastening pins (two on each side) align with the screw holes on the drive, and that the hard drive pins face down and out the back. Then, push the clamp arm to secure the drive, and insert the loaded drive tray into the empty drive bay, and lock it. I repeated this four times, once for each of the four bays. Once you realize how to do the first one, it takes just a few seconds to do the rest.
Once the hard drives are installed, connect an Ethernet cable between the NAS and a LAN port on your router. I plugged mine into a 24-port switch that is connected to my router. You can use either the LAN 1 or LAN 2 ports on the back of the NAS. Then, connect the power supply to the NAS, and press the power button on the front of the device to turn it on.
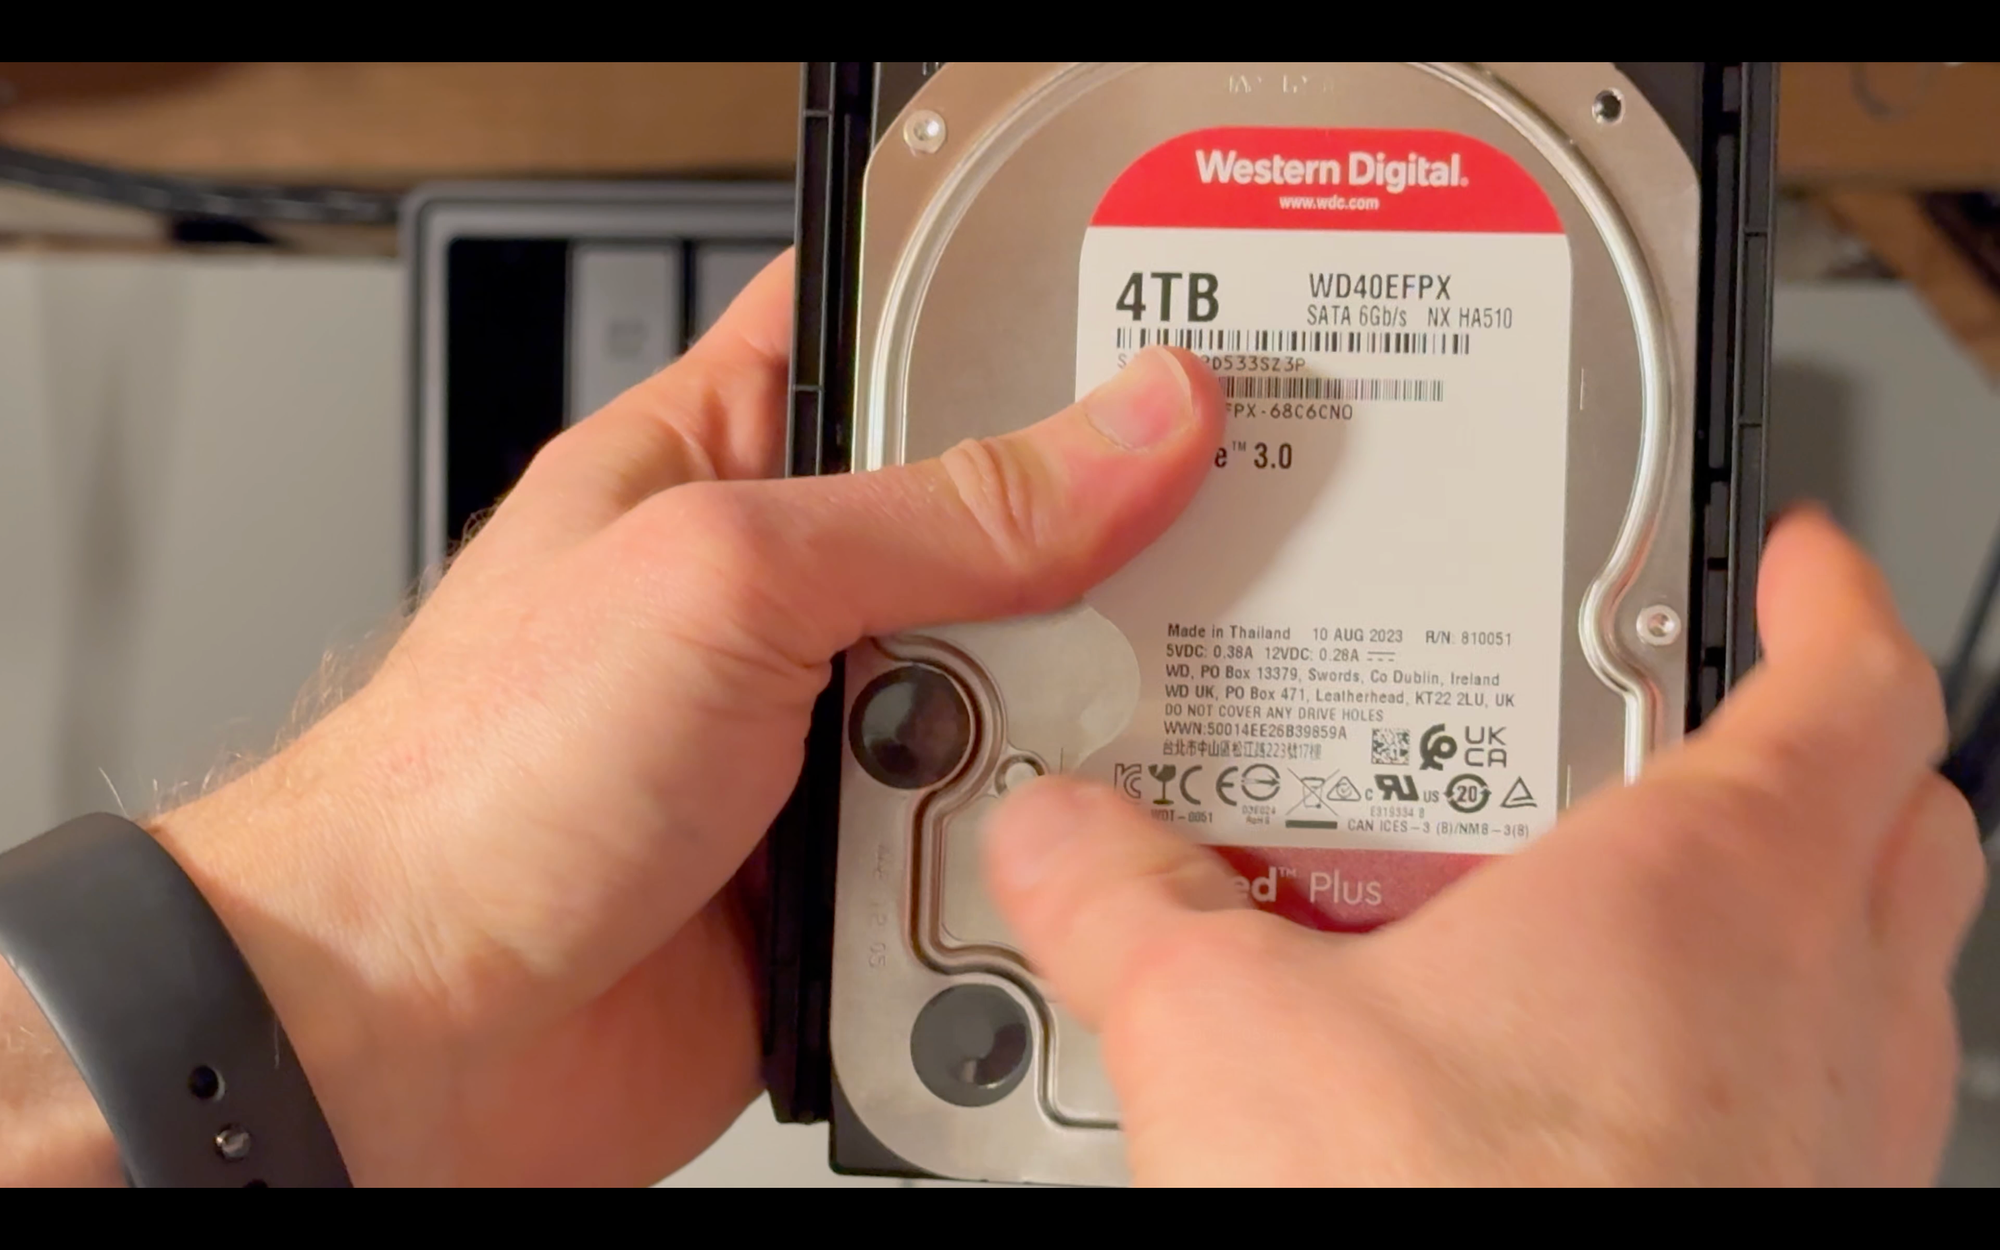
UGREEN NASync DXP4800 Plus Network Attached Storage: Hardware setup
Software Setup
With your NAS powered on, visit the URL find.ugnas.com from a computer that is on the same LAN as the NAS. This page will automatically search for the NAS, and it found mine right away. Once found, I clicked Connect.
Once connected, you will start the initialization process. Give your NAS a name, and create an admin account user name and password, which you will use to manage the device. Then, you have the option to register a UGREEN Cloud account so that you can access your NAS remotely. To do this, you’ll provide an email address, enter the verification code sent to your email, and create a password. Then, you can choose your preferred system update settings. It will then take up to 20 minutes to configure the NAS, though it was about 5 minutes for me.
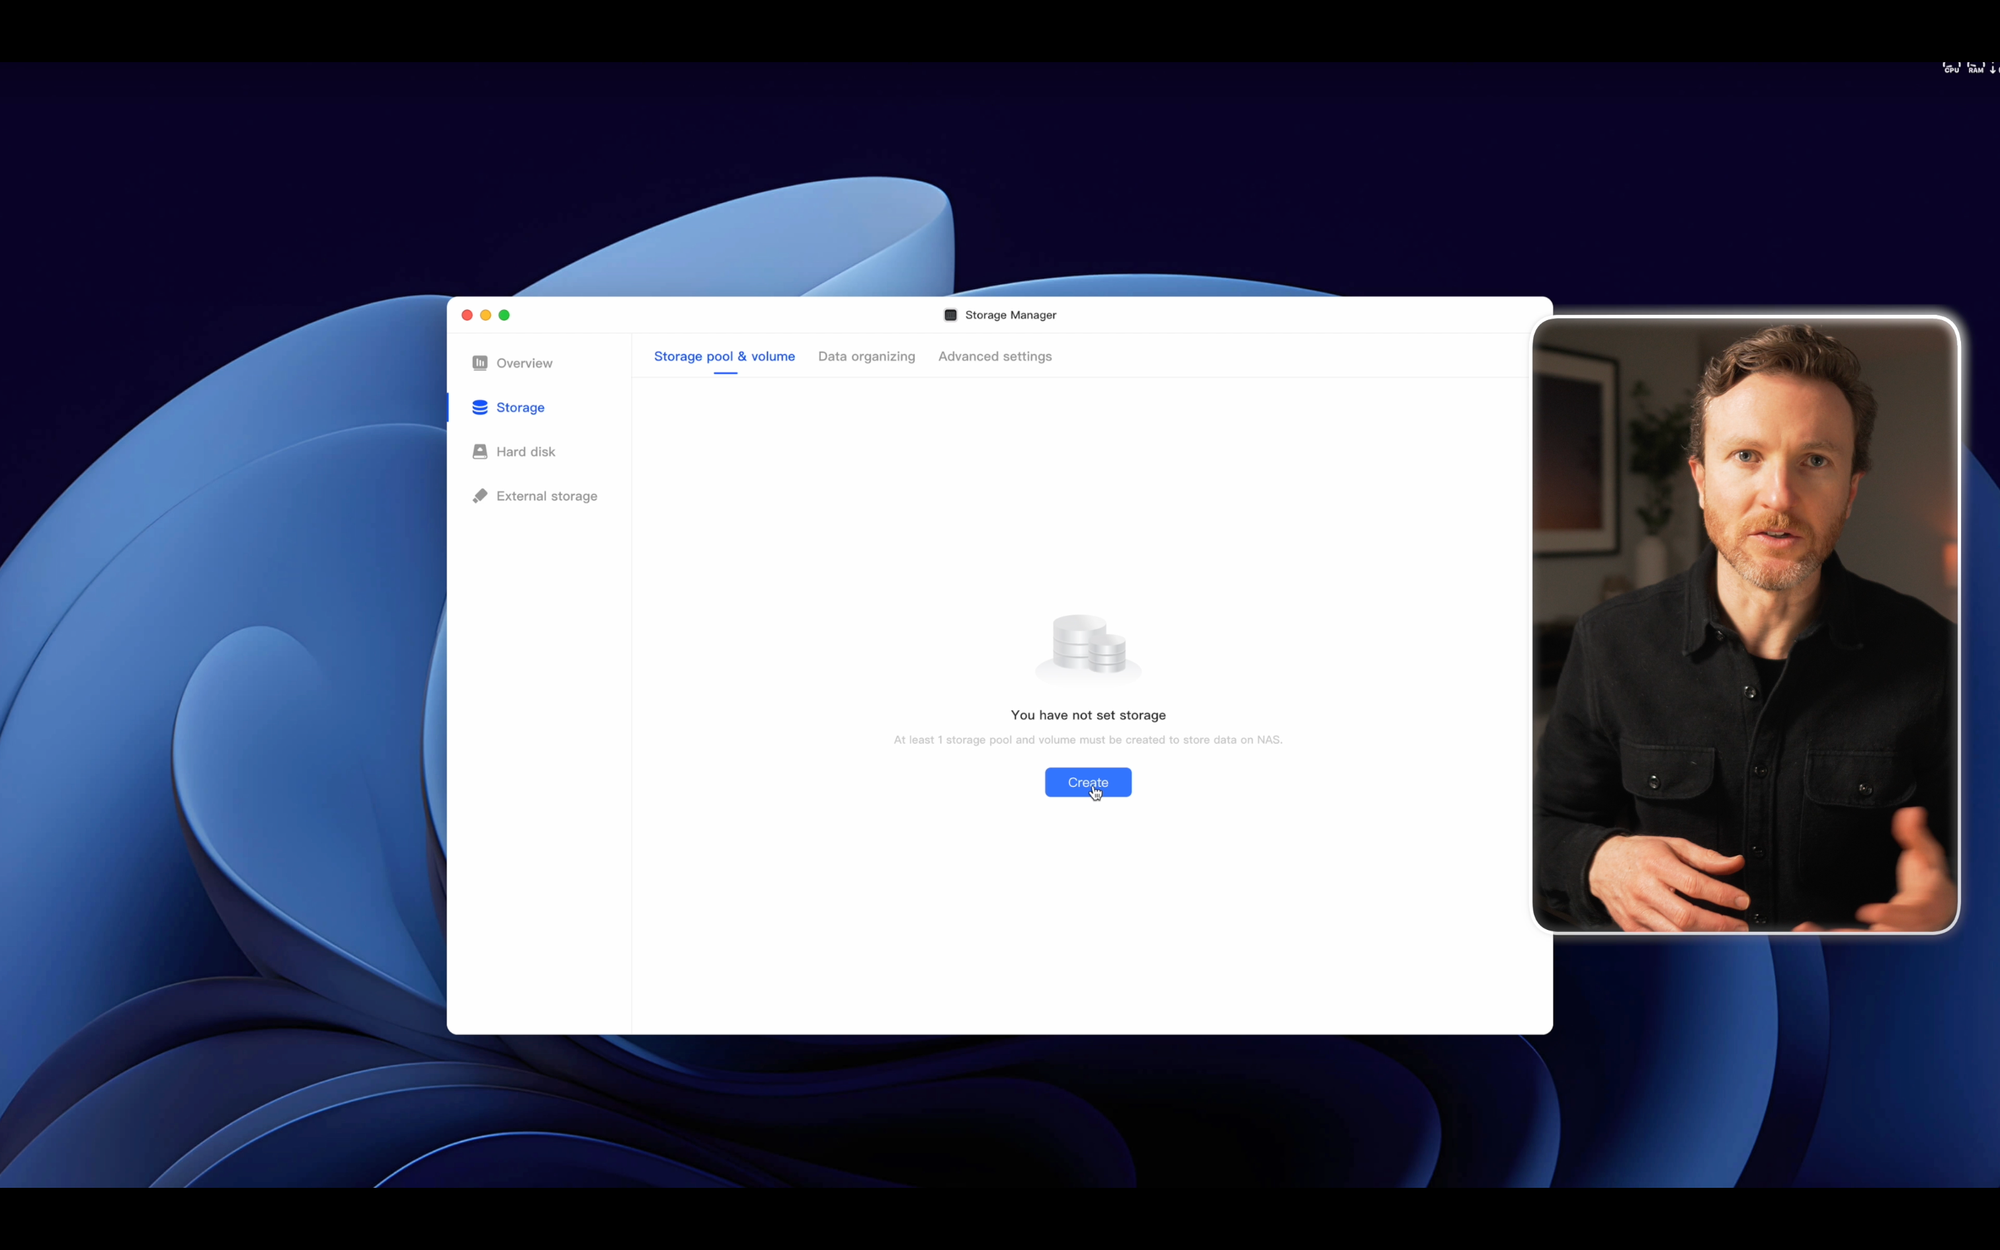
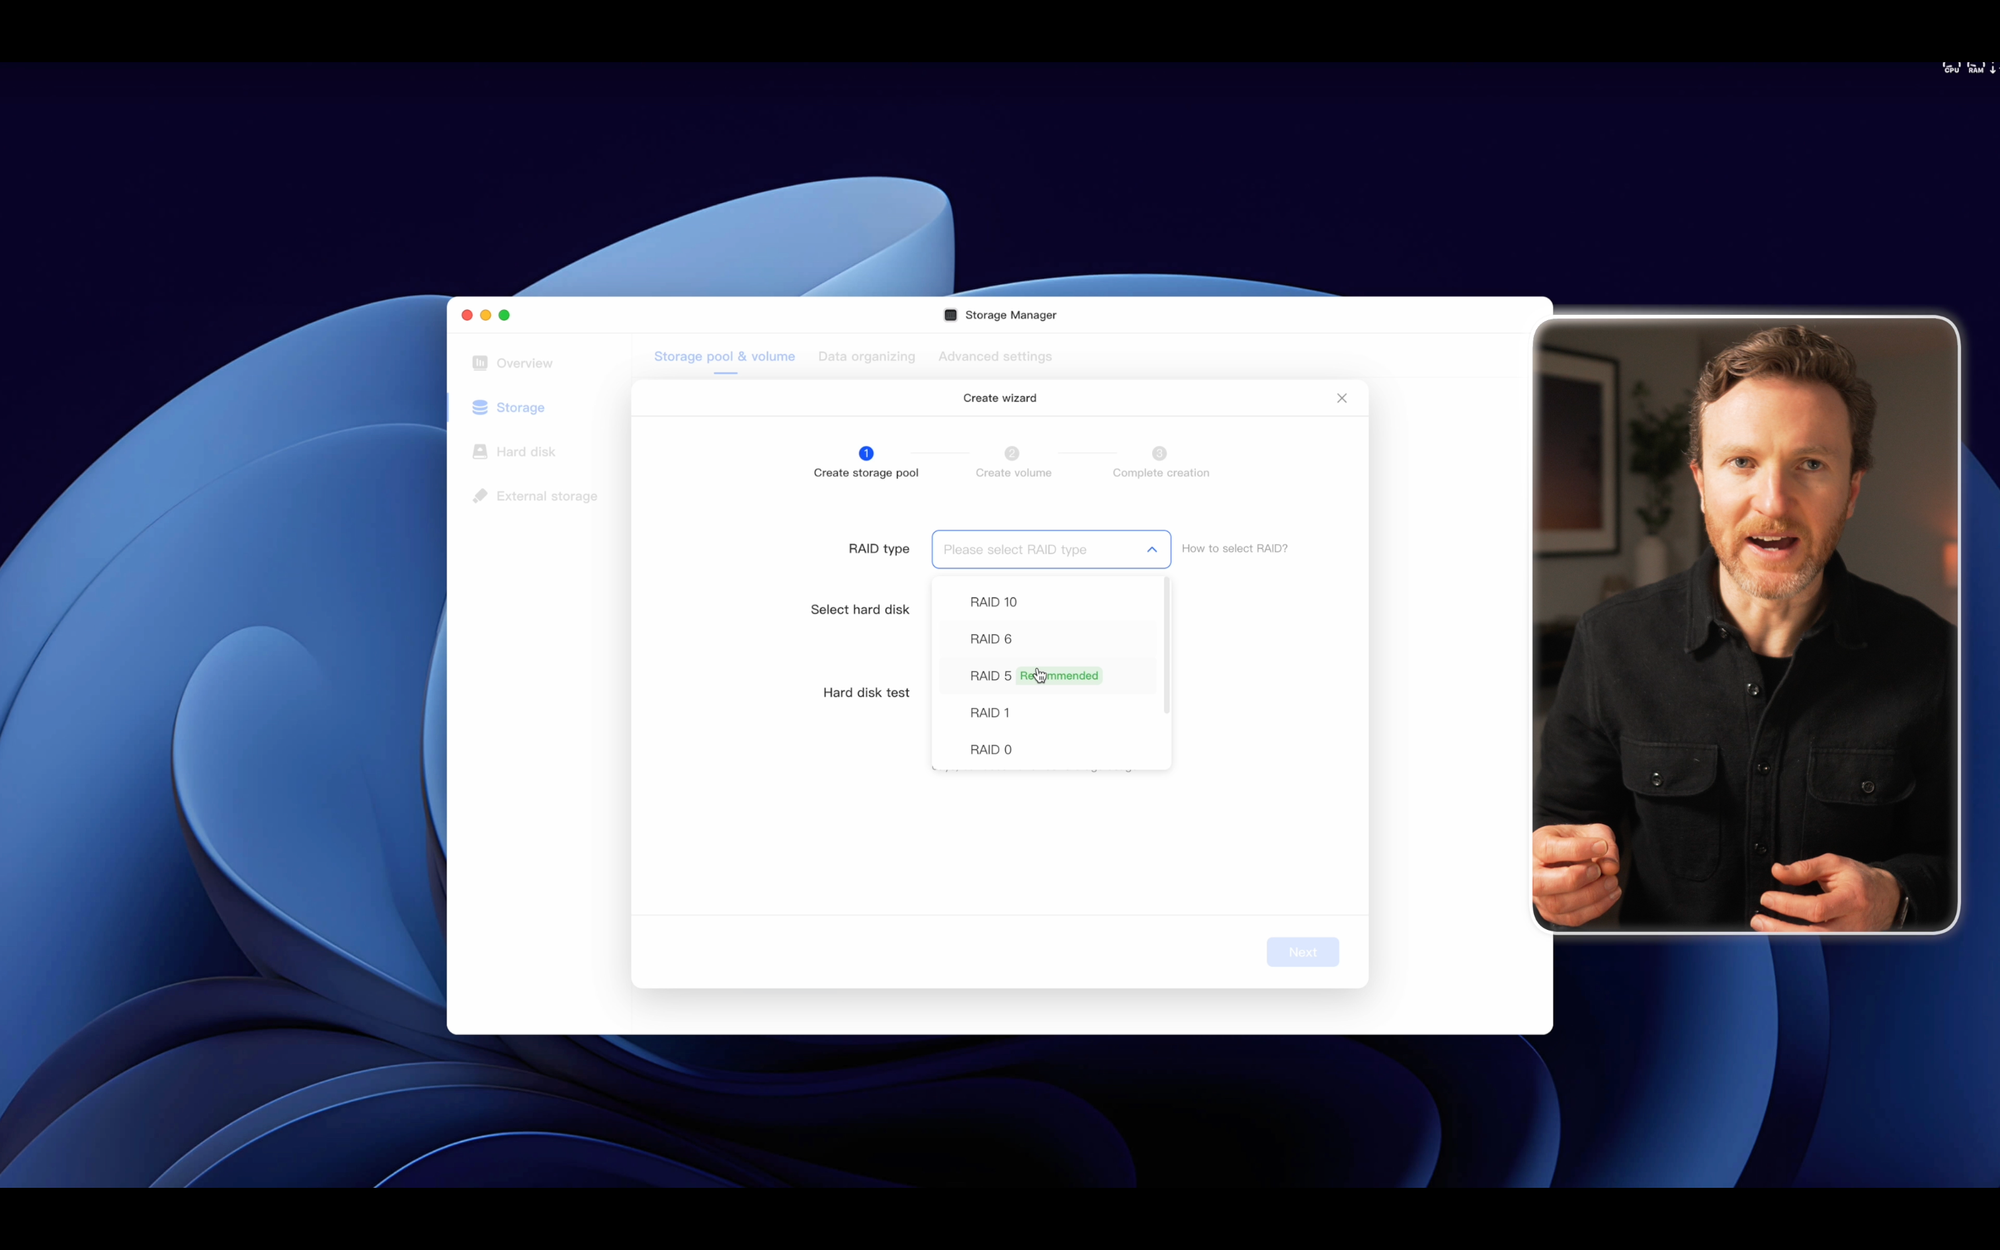
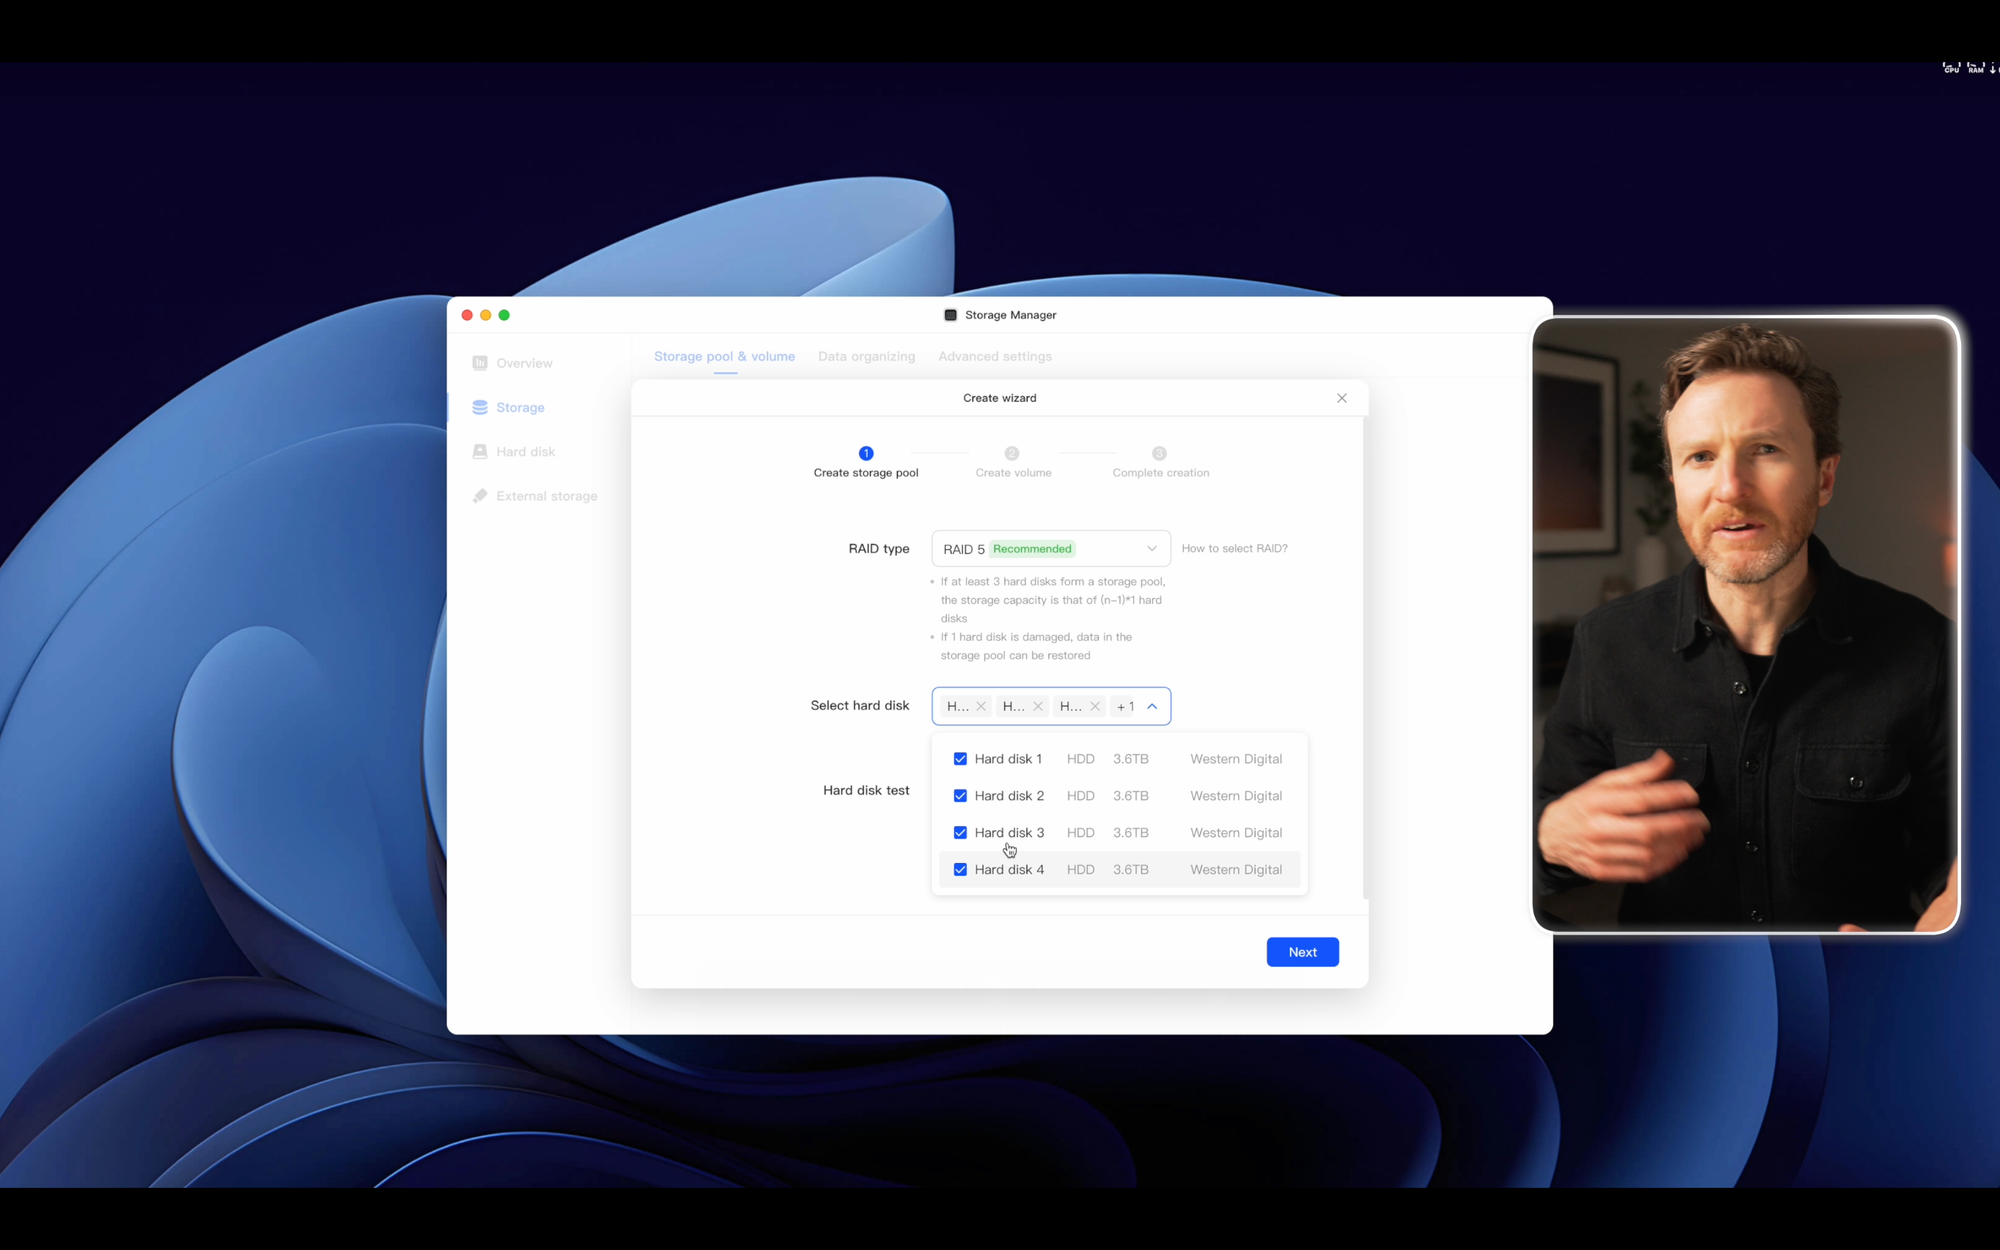
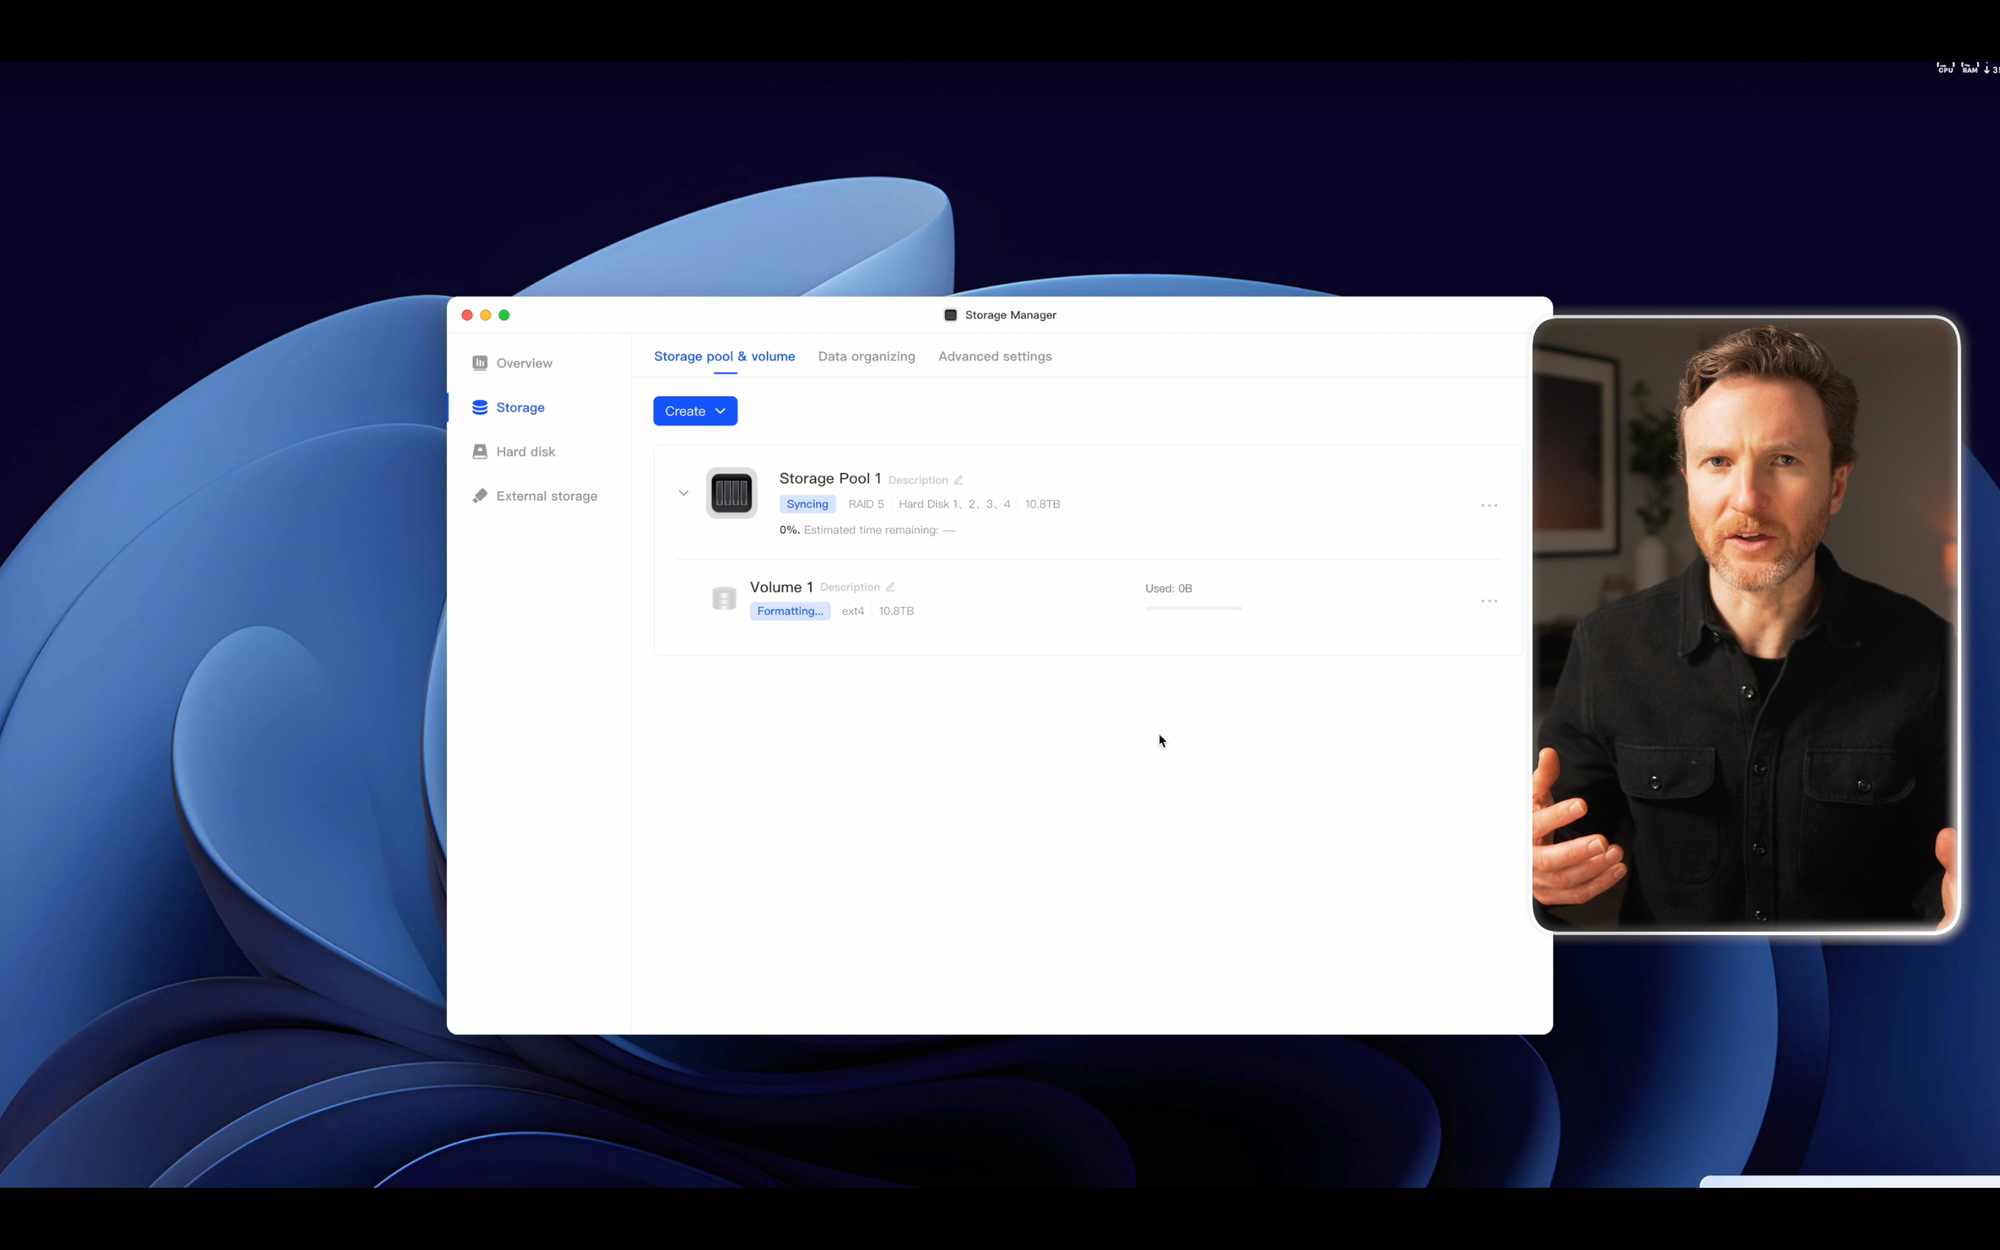
At this point, you can now access the online user interface for managing the device. The first thing you’ll want to do is to create a storage volume, which you’ll be prompted to do. Simply click Create, and select your RAID type. Since I have four HDDs, I selected RAID-5. Without getting into all the nuances of different RAID configurations, RAID-5 essentially means that my storage volume will be the size of 3 of my 4 drives. Each of my drives is 4TB, so that means I’ll have up to 12TB of available storage space, though in reality it’s always a bit less. The fourth drive will be used for recovery, protecting against single-disk failure.
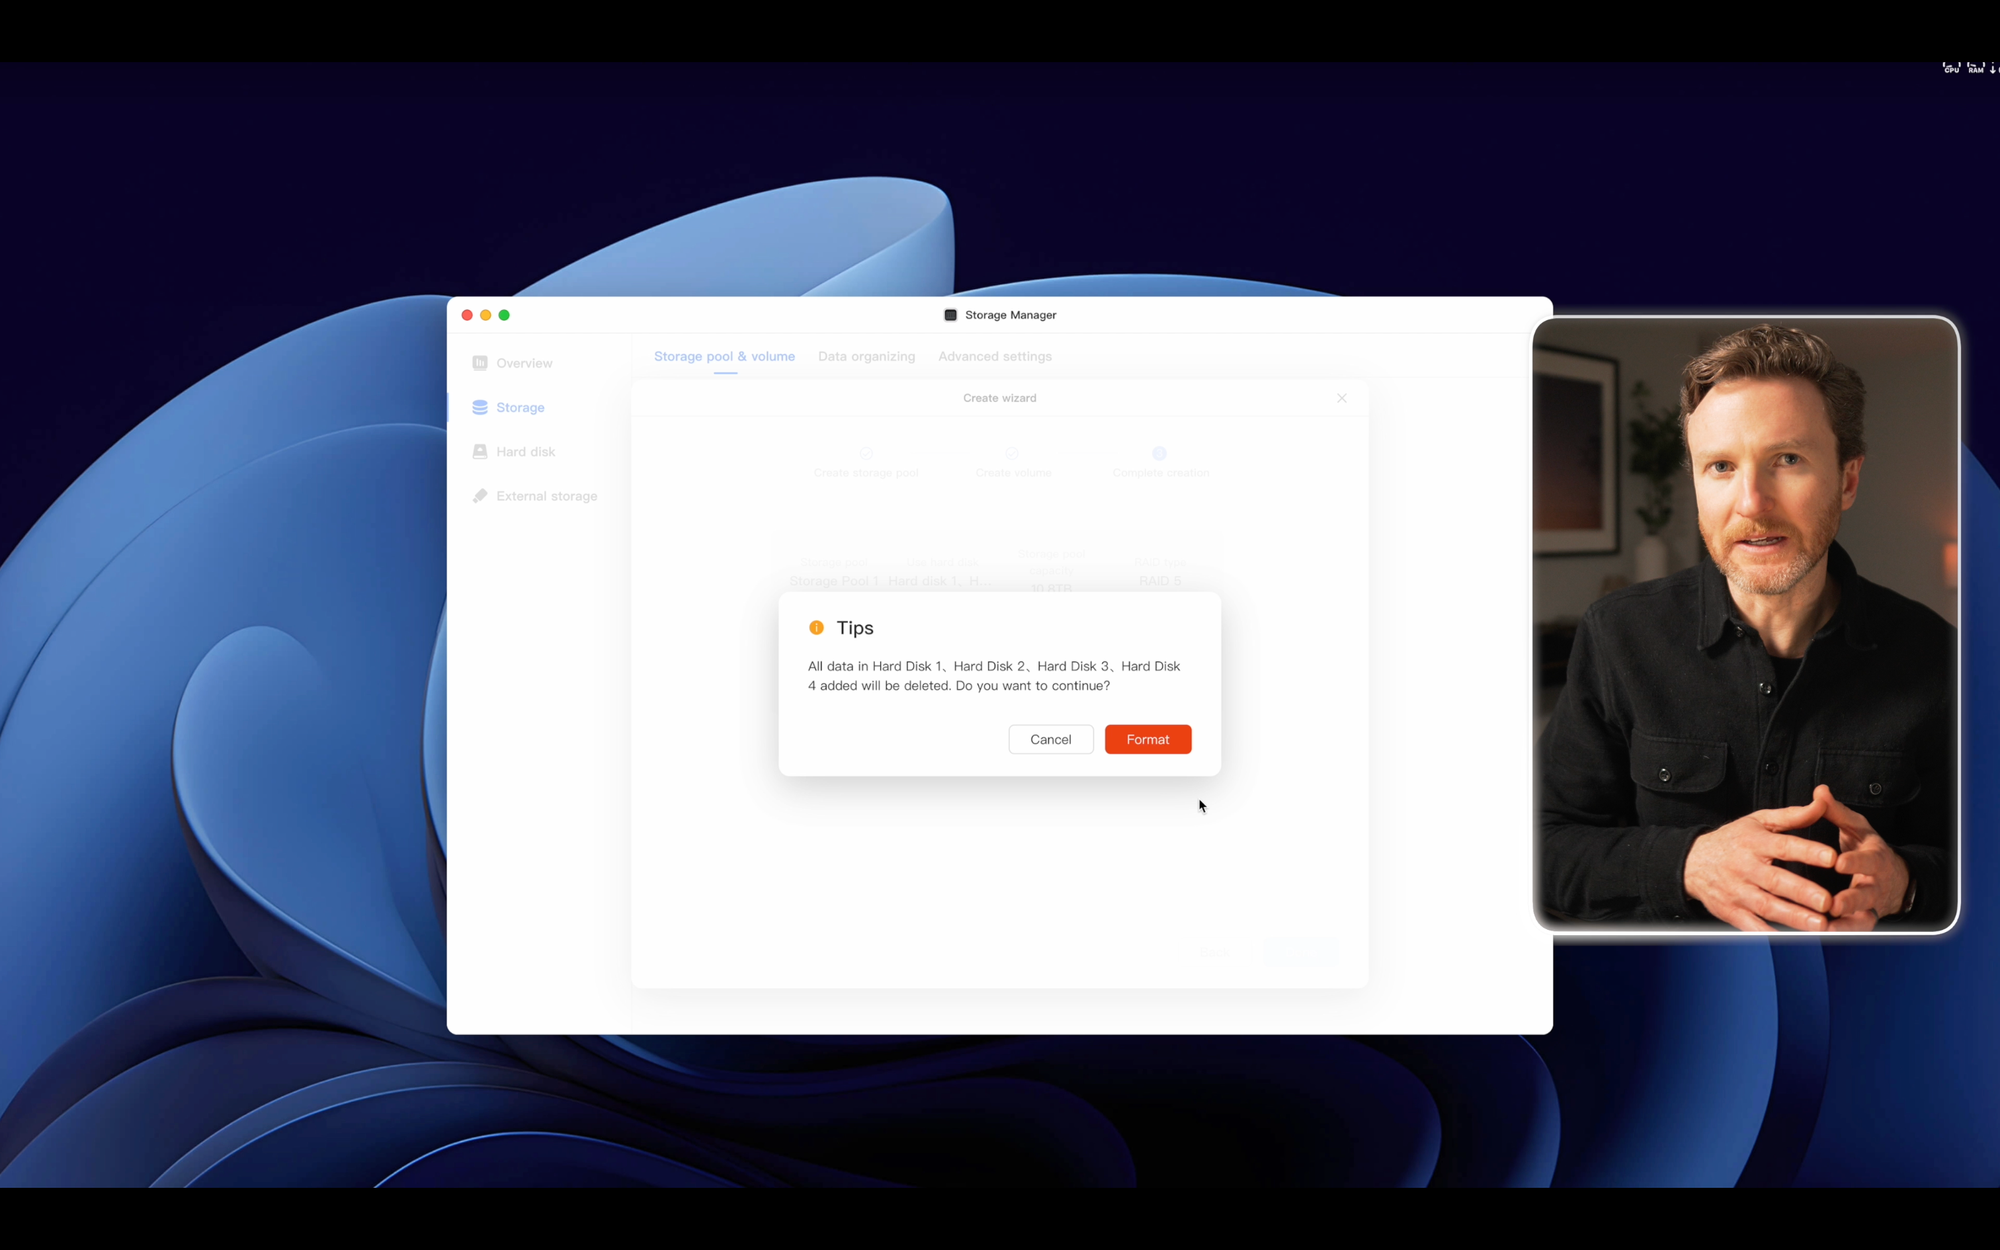
Once you choose your RAID configuration, select the hard disks to be included. You’ll see the available capacity on the next screen, which was just over 11TB in my case. Once you finish, you’ll see a warning that any data on the drives will be deleted. I’m using brand new drives, so this wasn’t a concern for me. It’ll ask for your password to confirm that you want to format the drives. Then, it will begin creating the storage volume. Keep in mind that this process takes a while (about 8 hours in my case). But it all happens in the background — you don’t have to be active on the computer managing anything. You can just check back from time-to-time to see when it’s done.
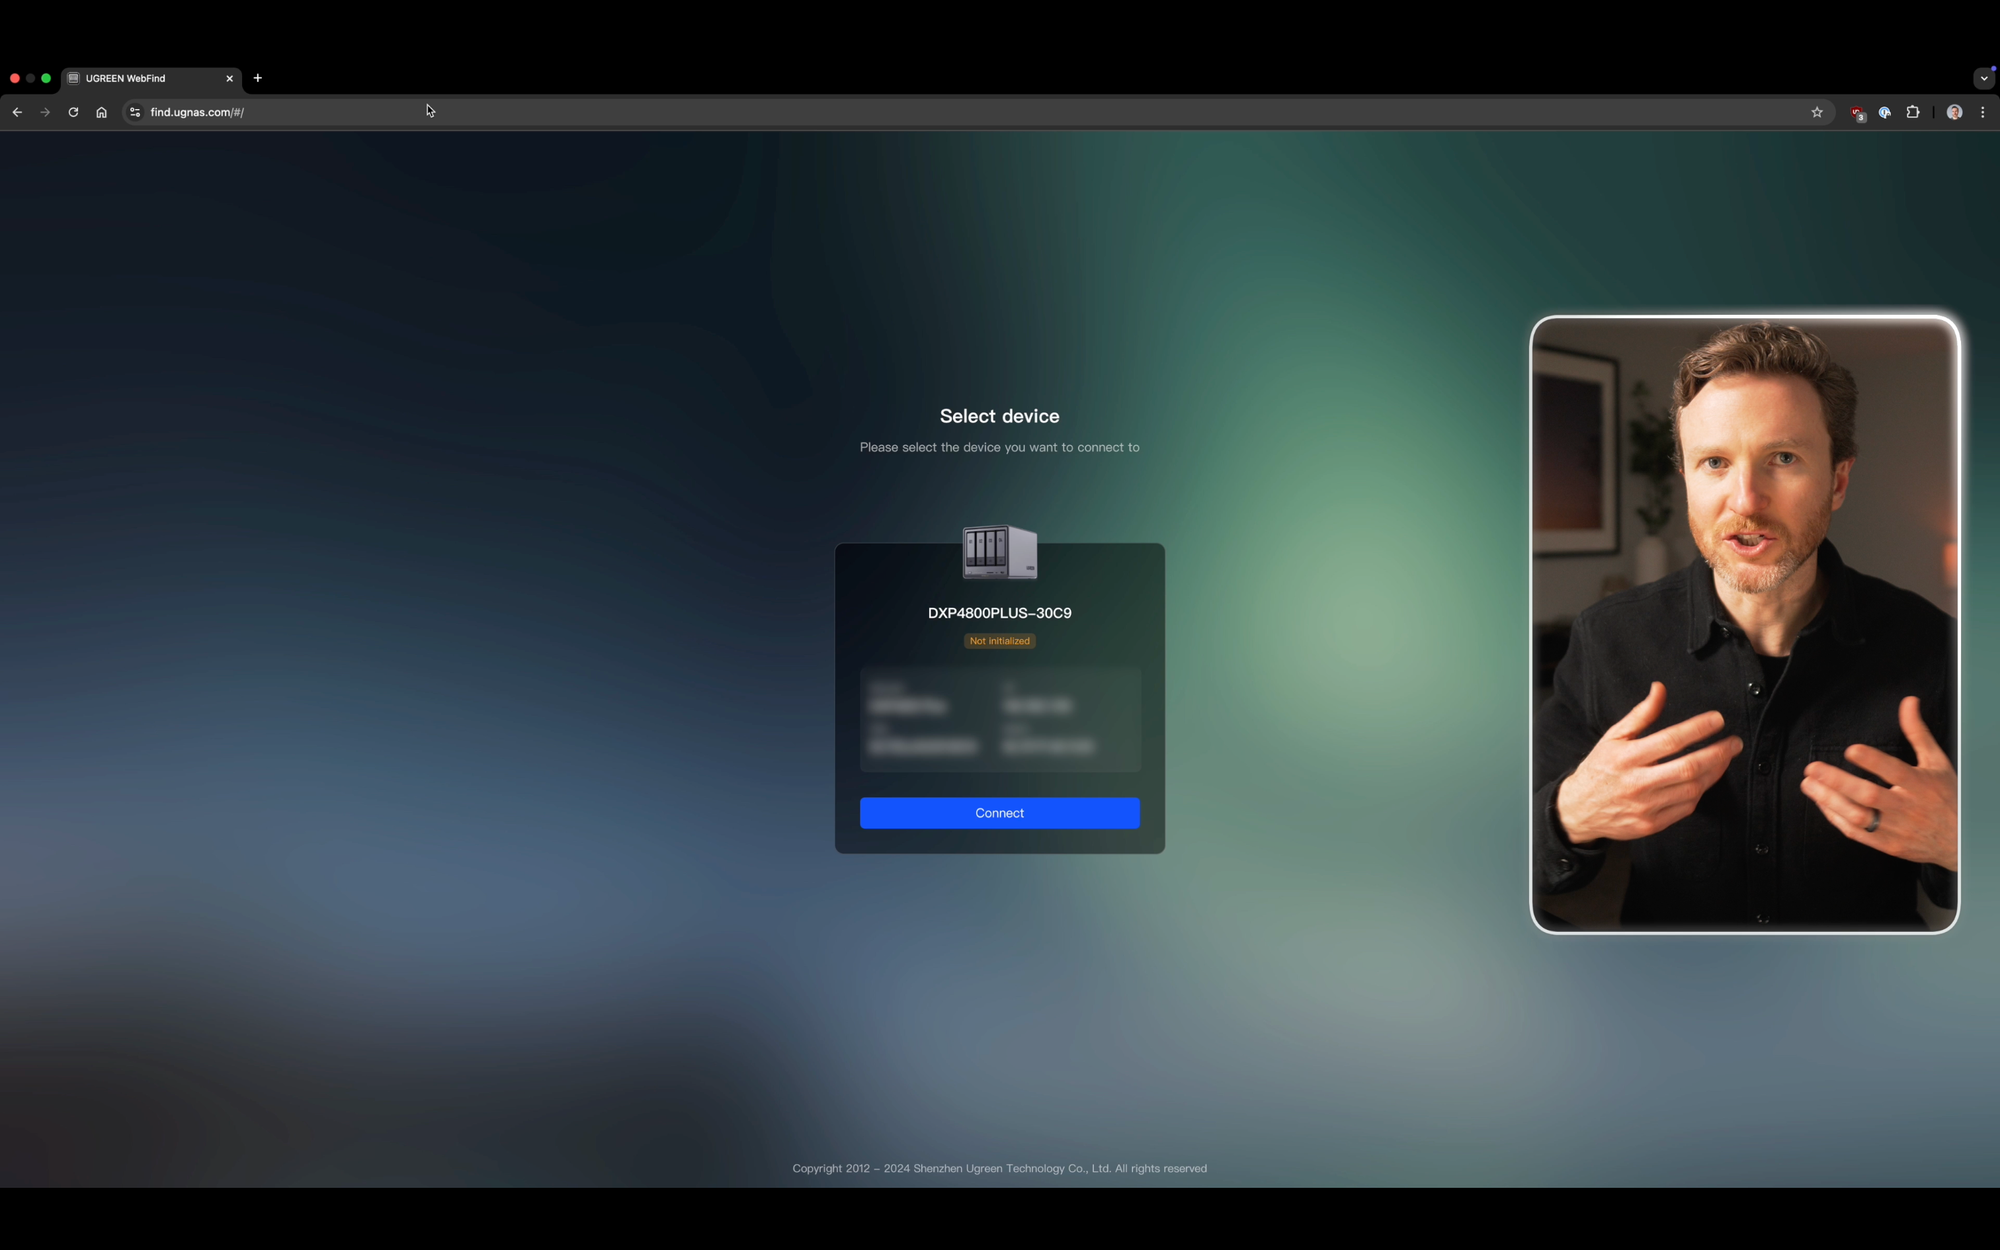
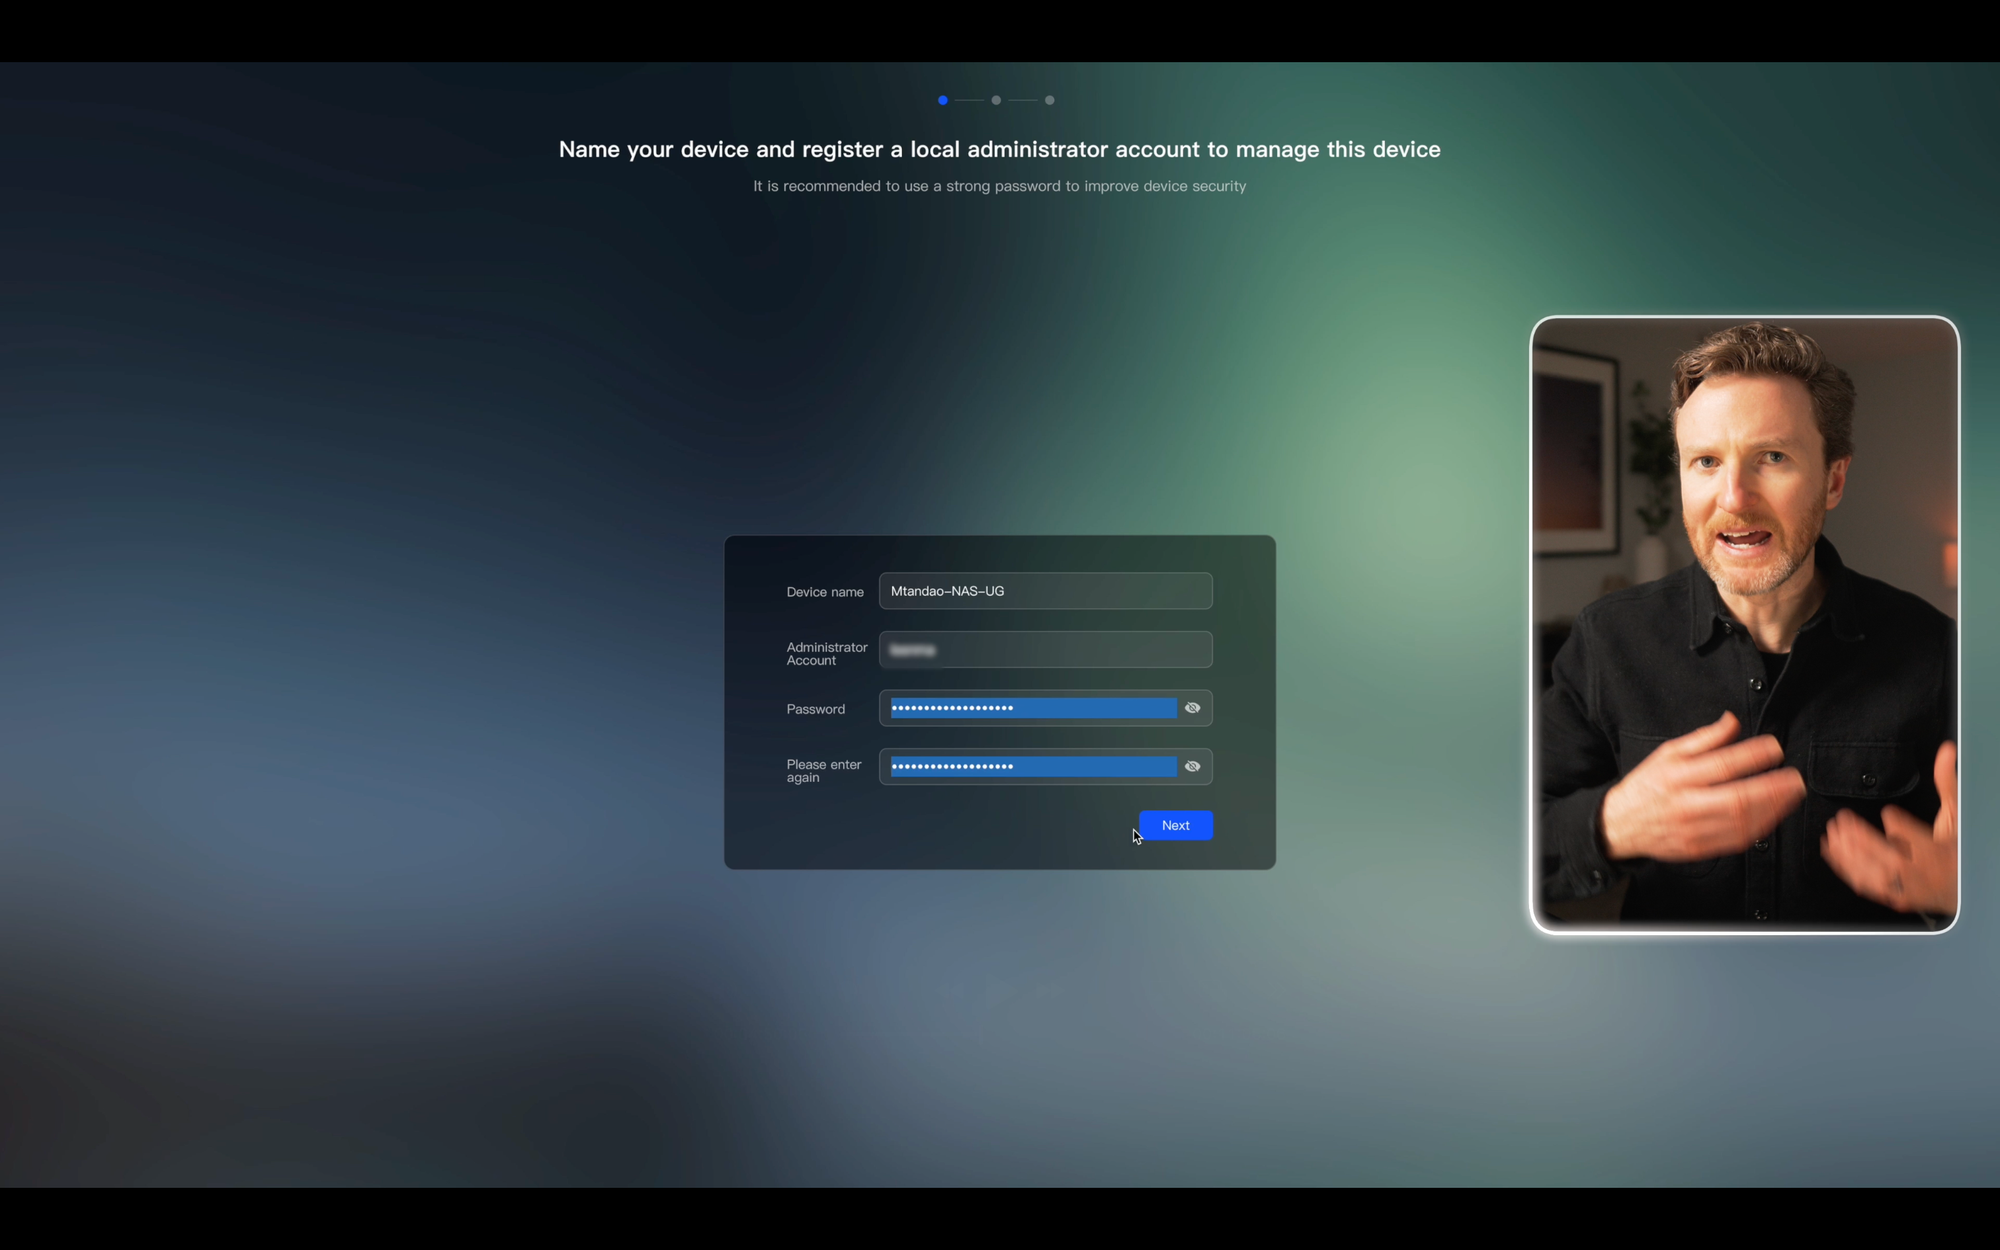
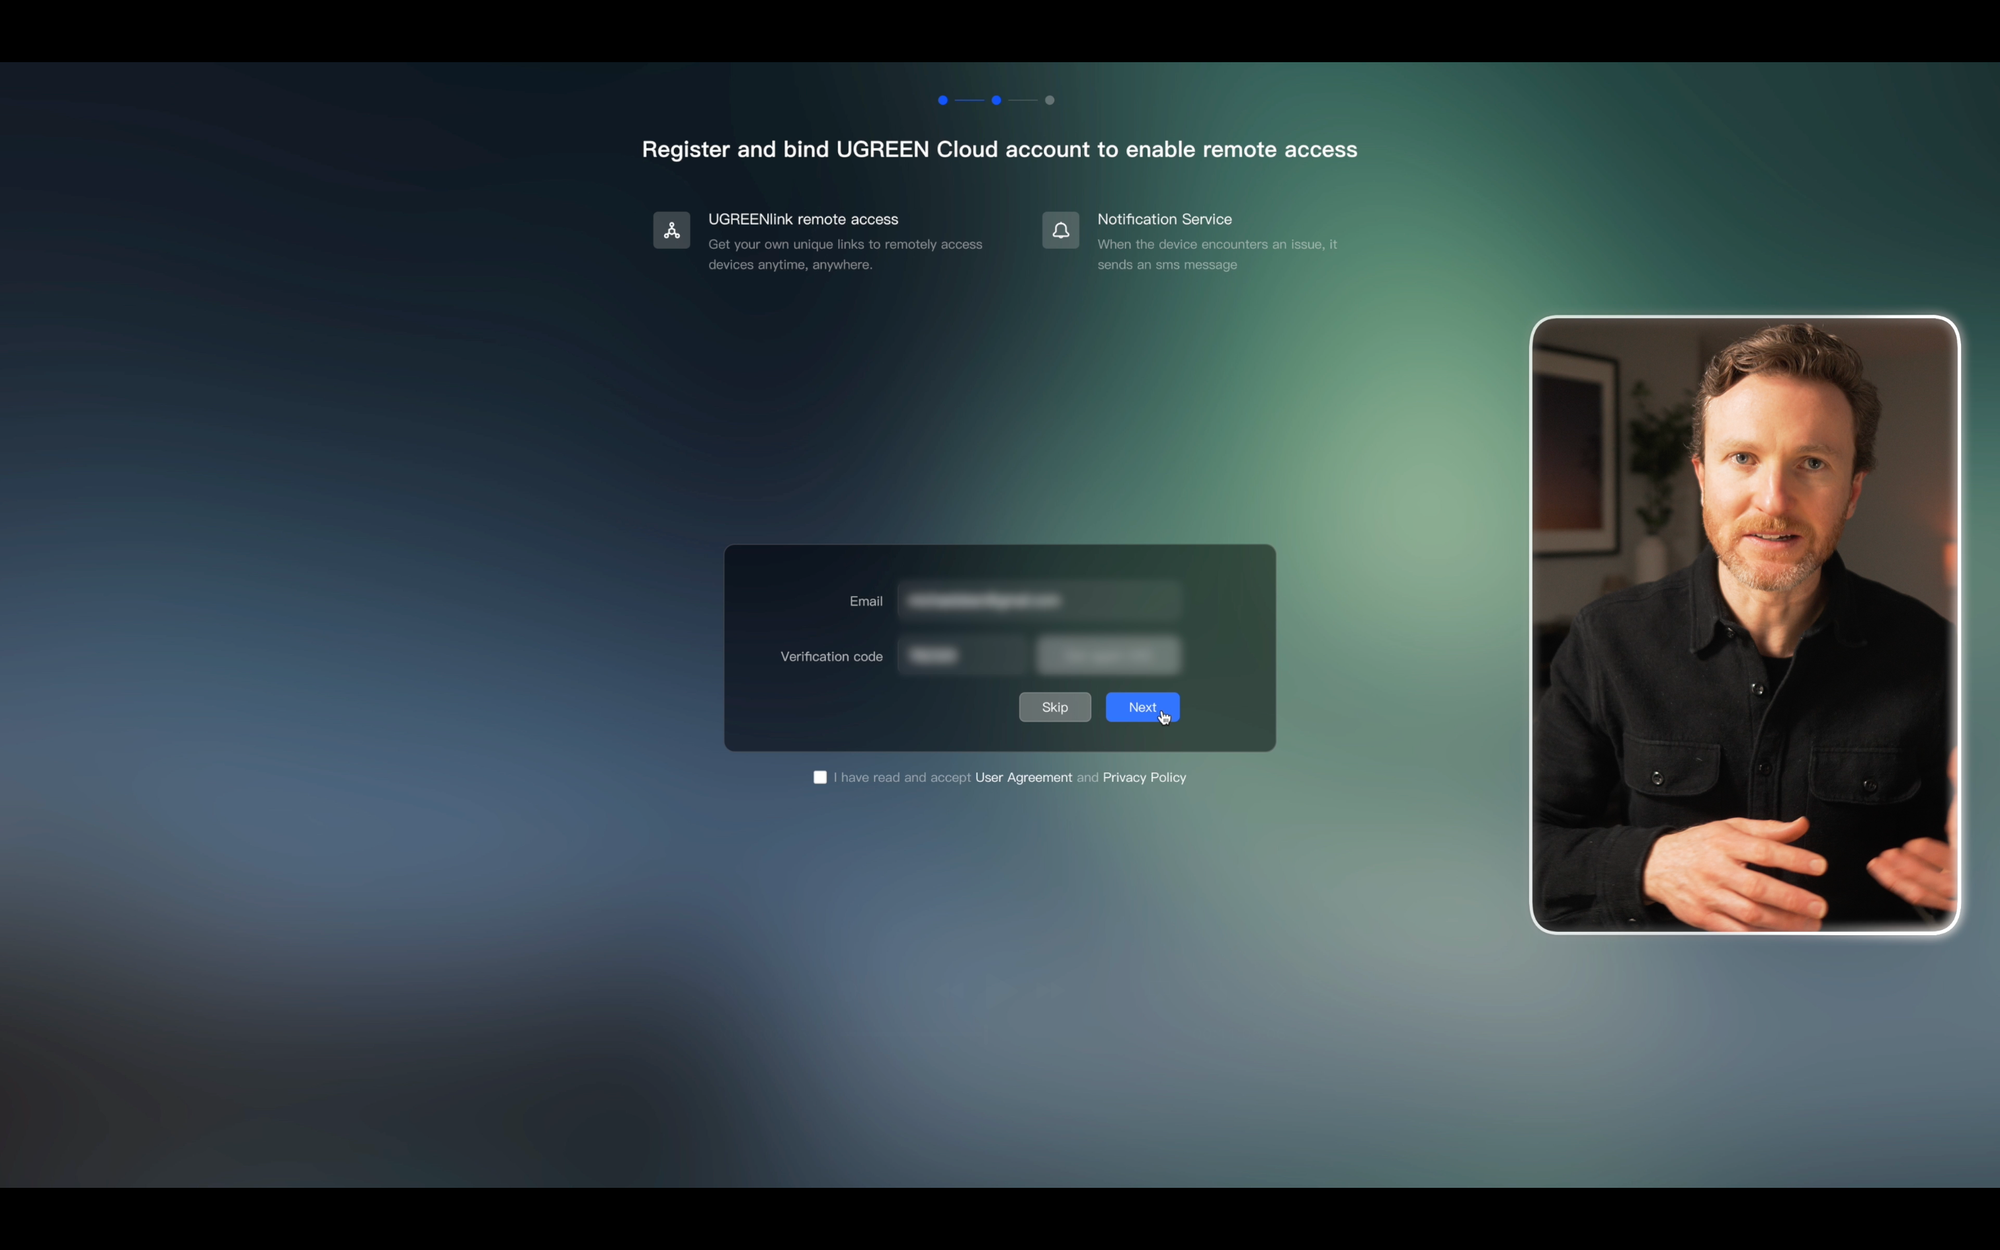
UGREEN NASync DXP4800 Plus Network Attached Storage: Software setup
Uploading Files
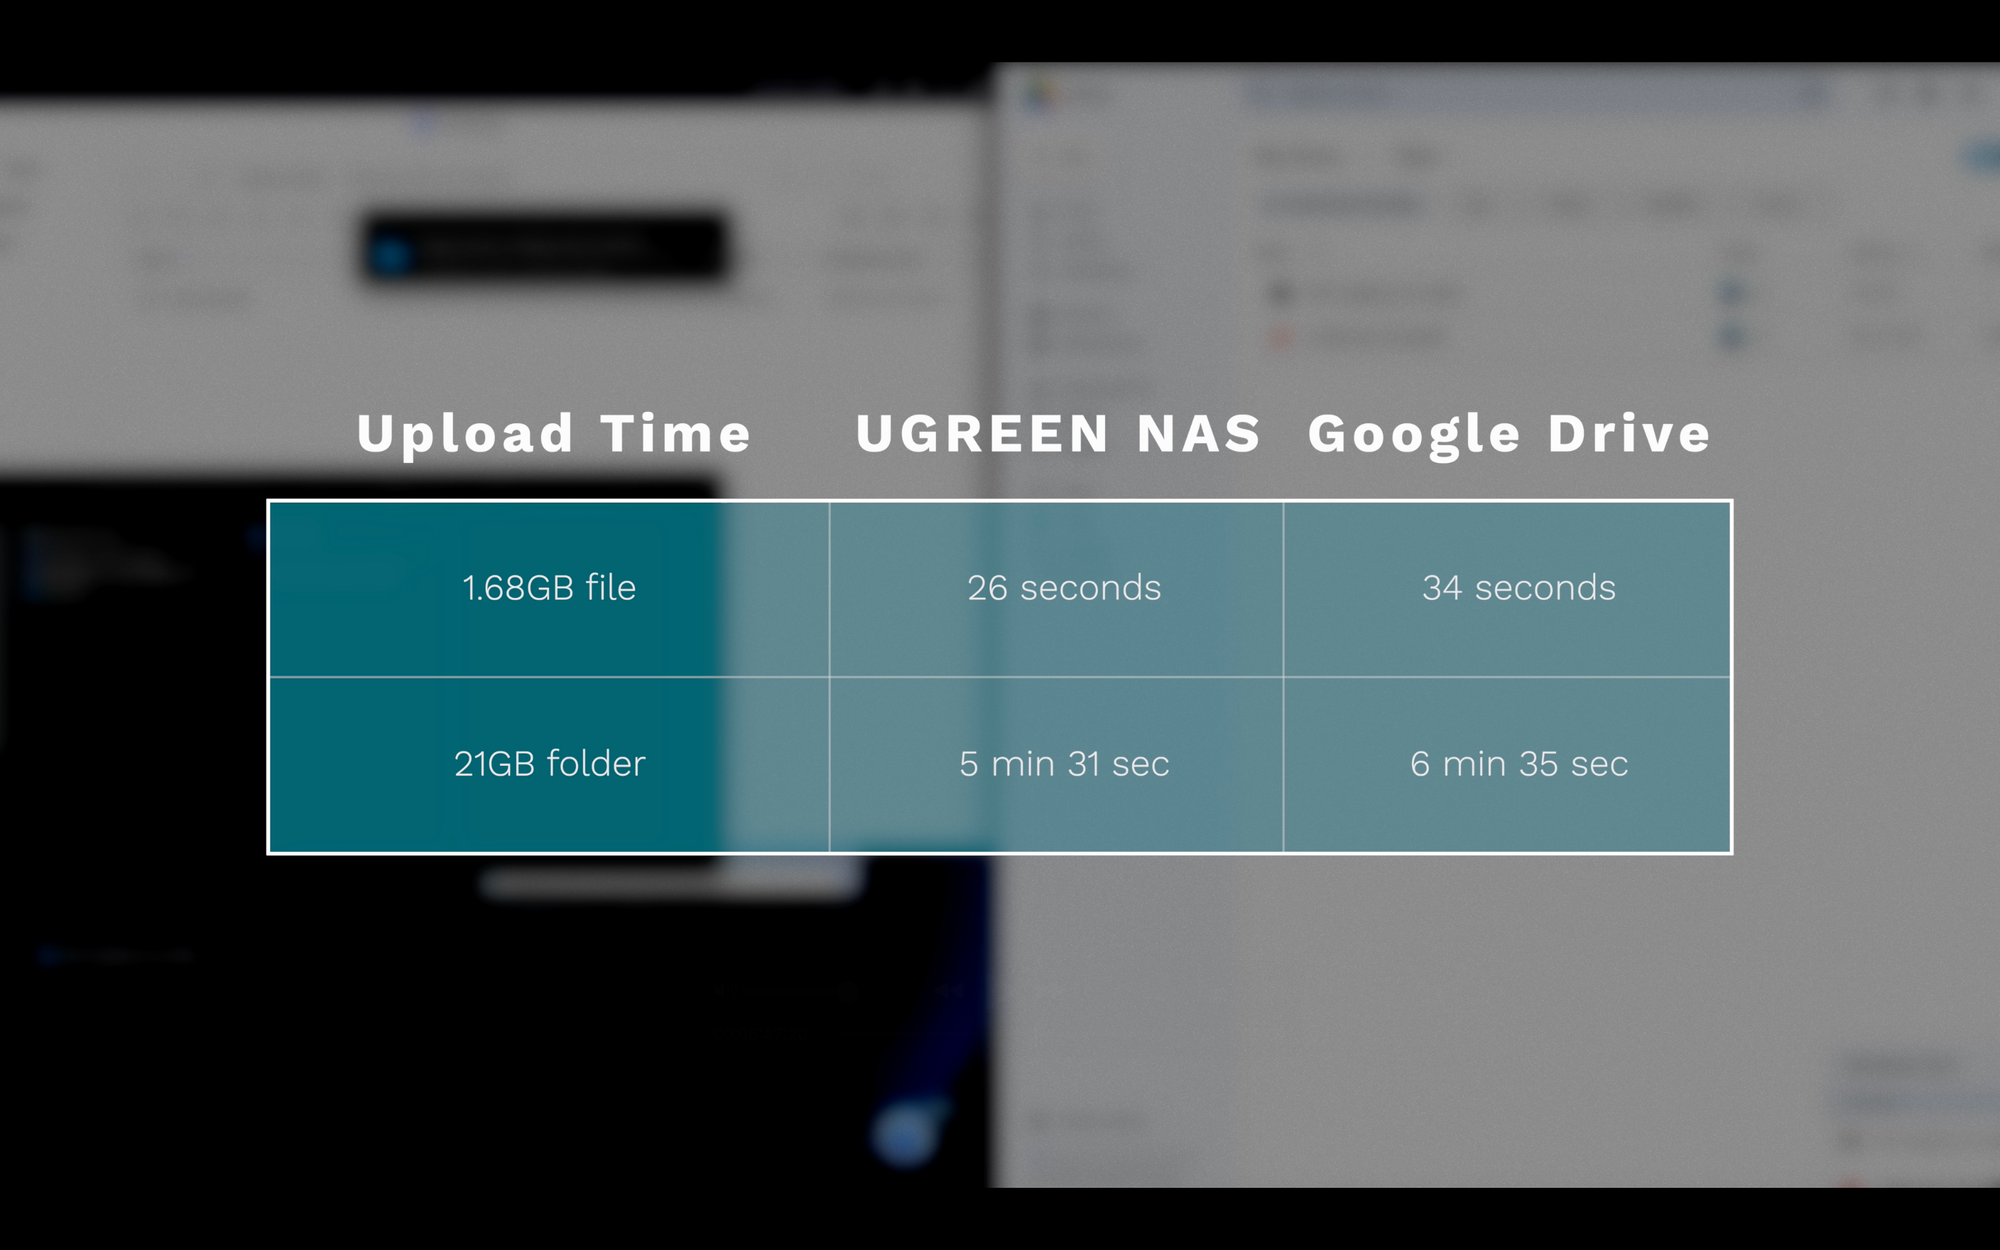
Once the storage volume is complete, you can start uploading files. I was curious how long it would take to upload different file size. I decided to test uploading a 1.68GB video file and a 21GB folder to the NAS via a mounted shared folder, and to Google Drive on the web. In both cases, it was faster to upload to the UGREEN NAS.
The 1.68GB file took 26 seconds to upload to the NAS and 34 seconds to Google Drive. The 21GB folder took 5 minutes 31 seconds to upload to the NAS, and 6 minutes 35 seconds to Google Drive.
| Upload Time | UGREEN NAS | Google Drive |
|---|---|---|
| 1.68GB file | 26 seconds | 34 seconds |
| 21GB folder | 5 min 31 sec | 6 min 35 sec |
UGREEN NASync DXP4800 Plus Network Attached Storage: Uploading files
Accessing Files
You have several options when it comes to accessing your files. The UGREEN NAS supports web, iOS, Android, and TV access. Combined with local and remote access options, you can manage the files on your NAS from pretty much anywhere. In my typical workflow recording and editing videos, I access the NAS through folders mounted to Finder on my Mac. But when I’m away from home or on-the-go, I can also access it using the web interface or the UGREEN NAS app for iOS.
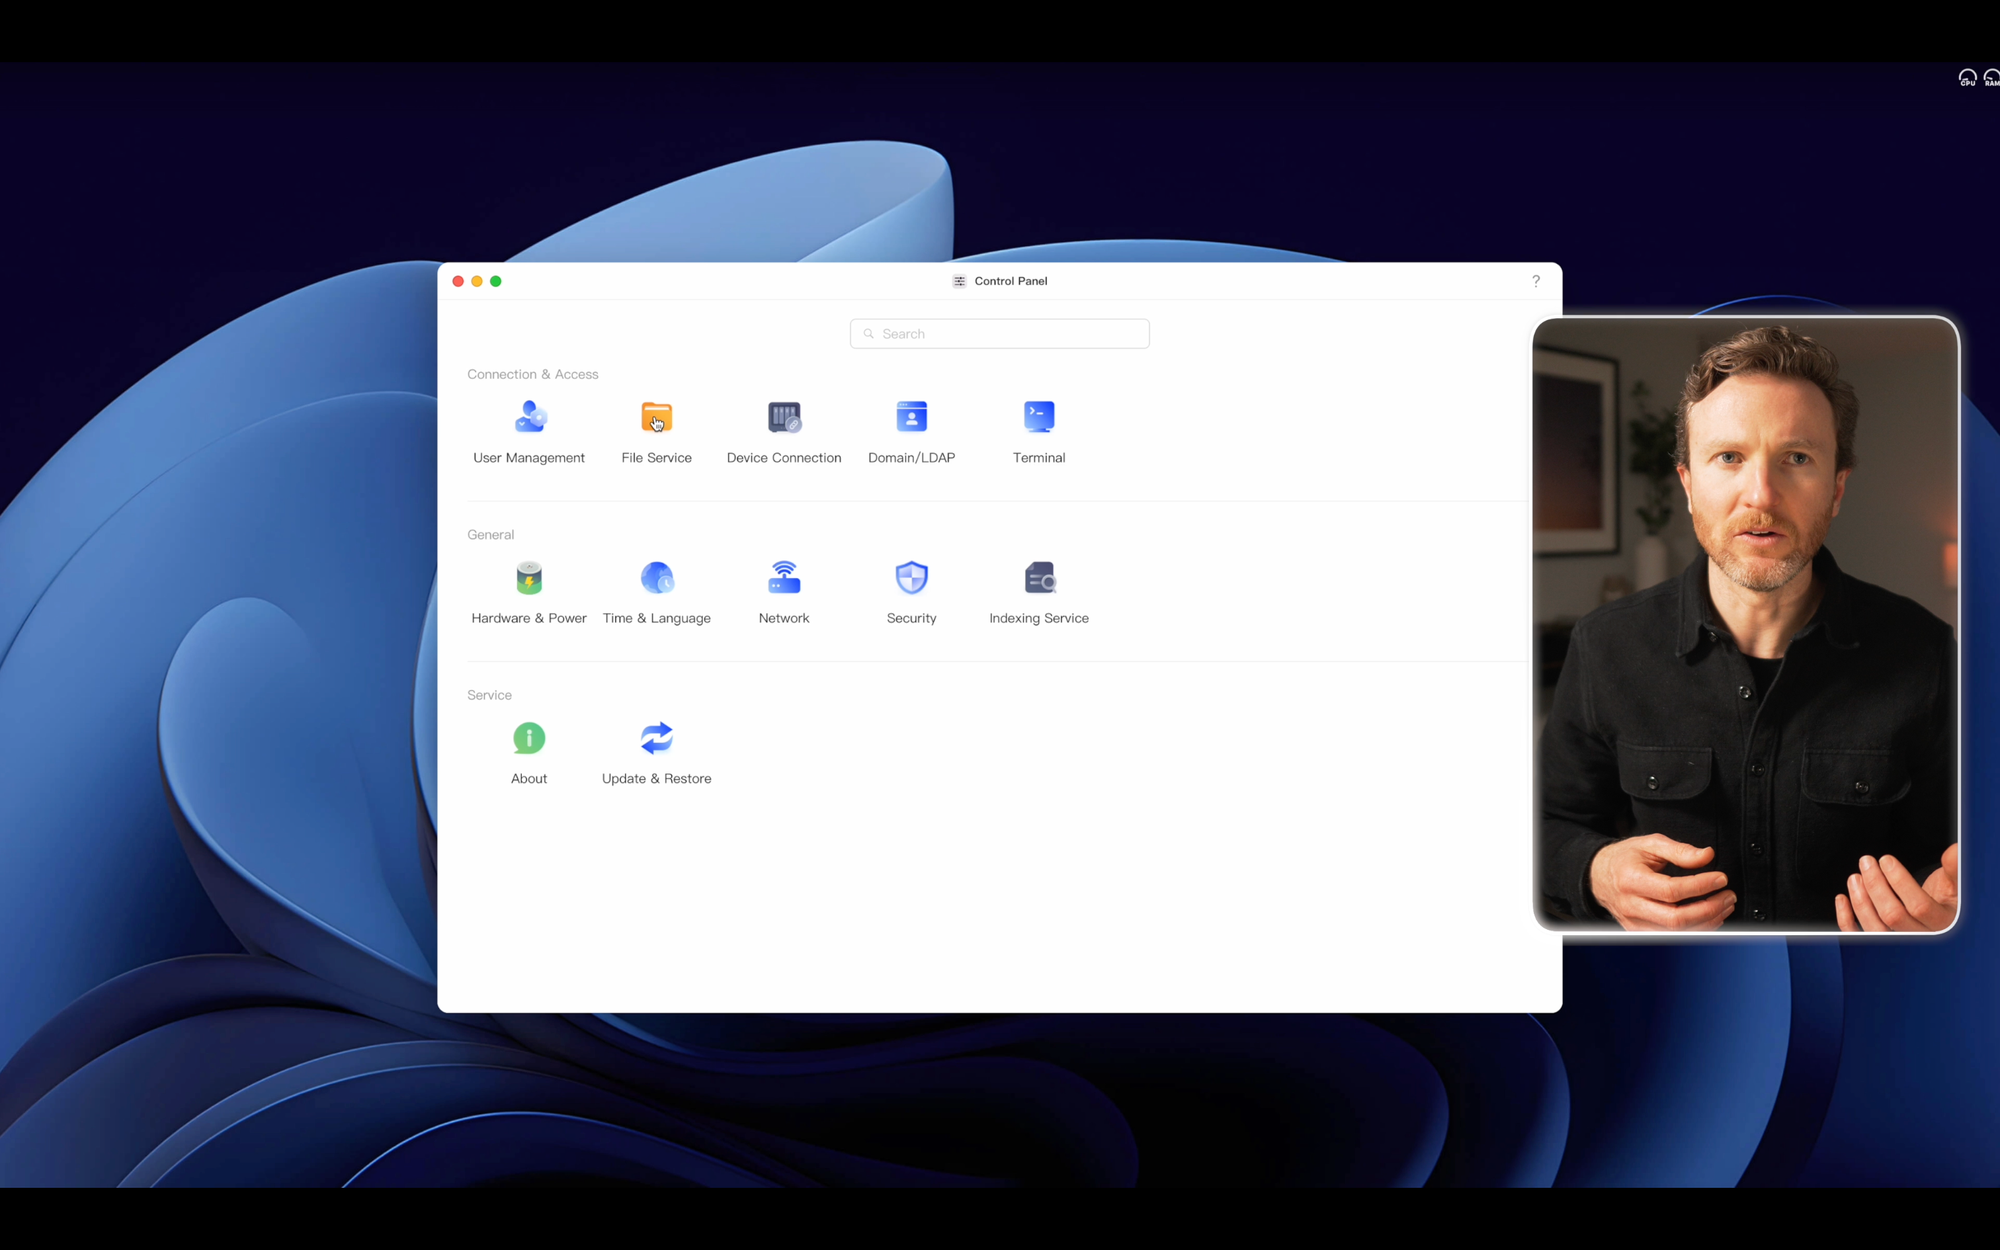
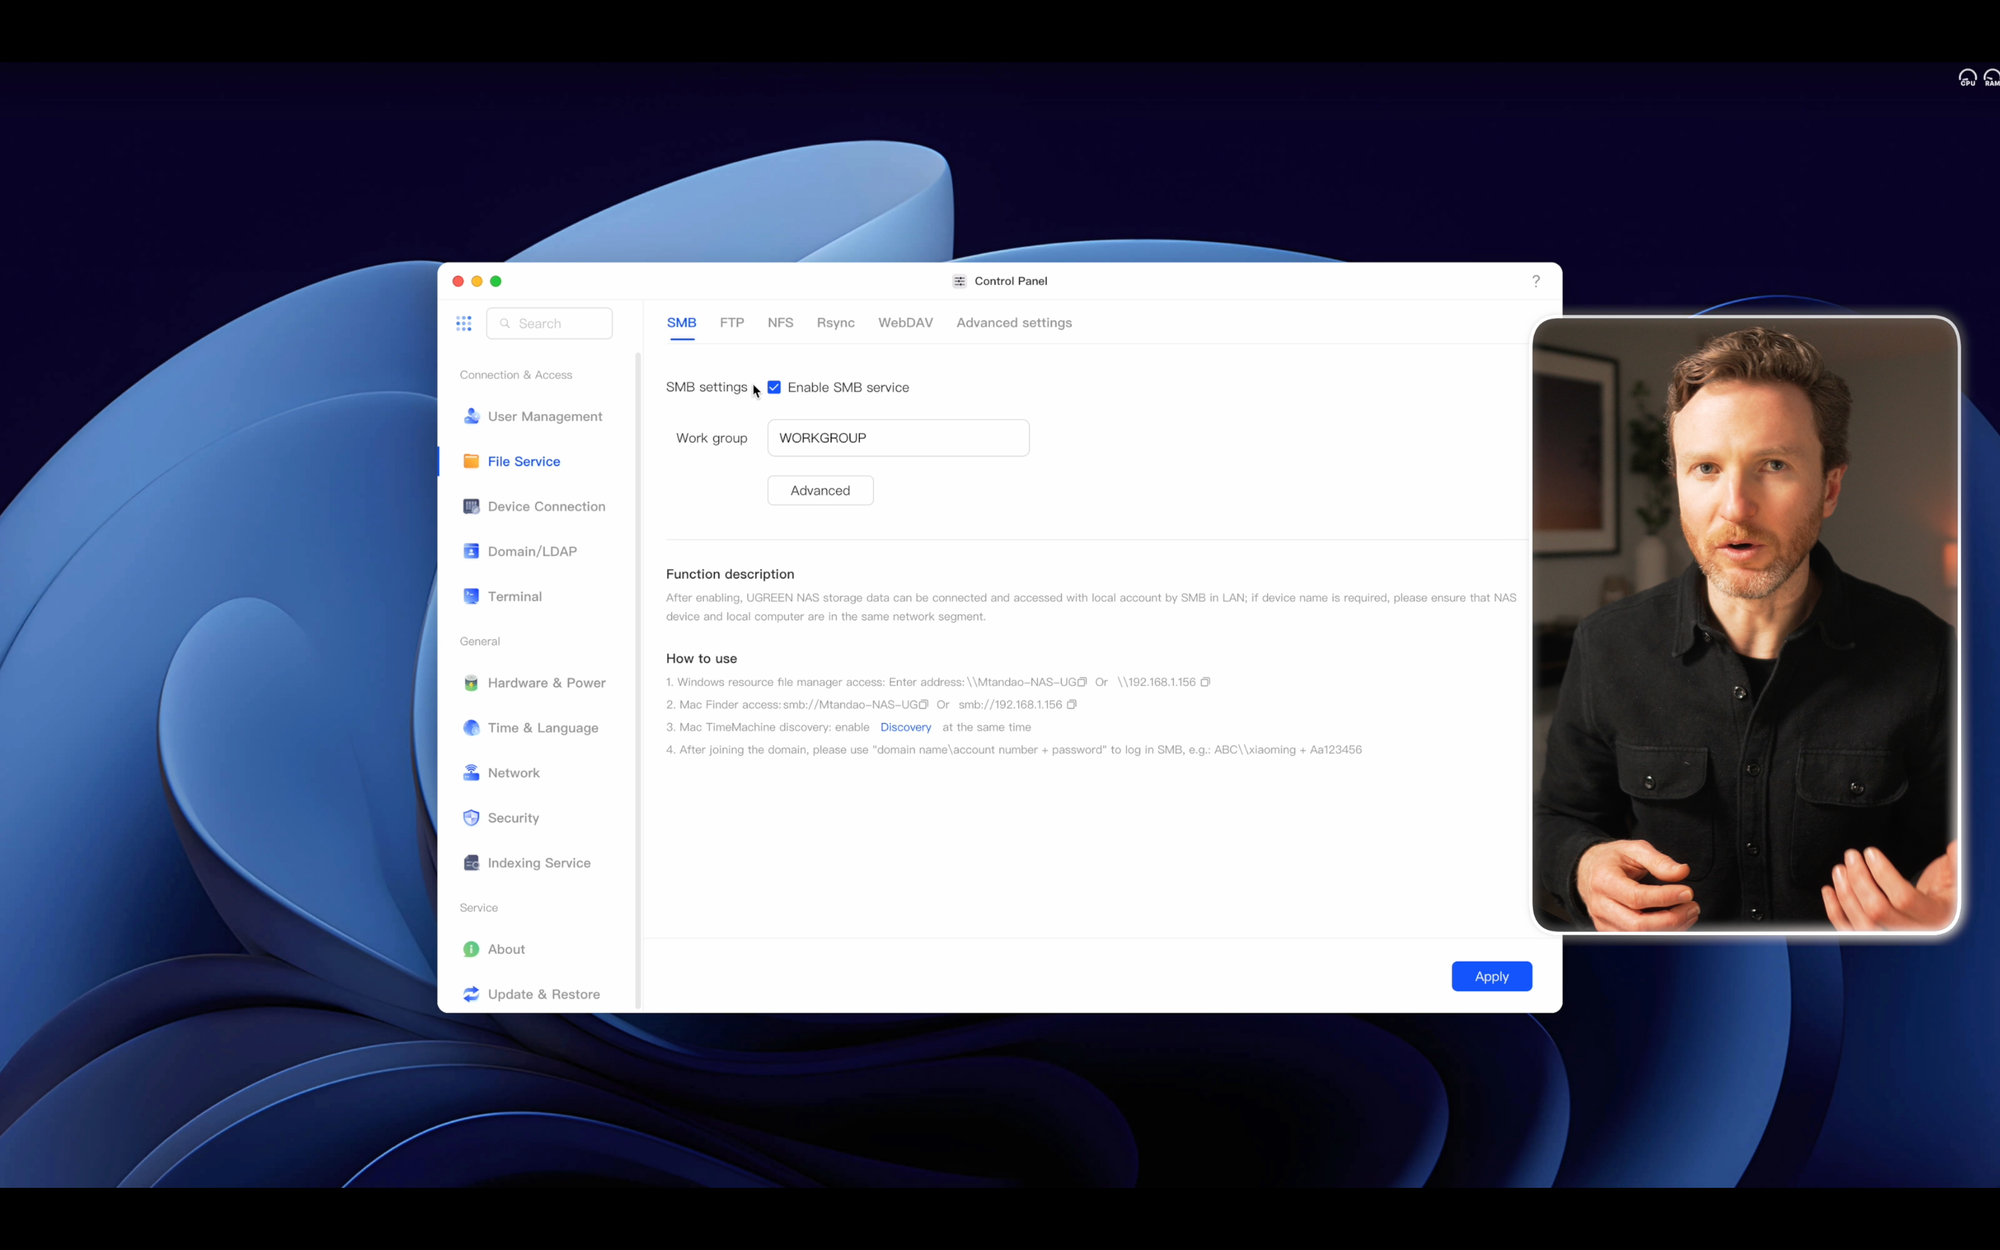
My preferred way is connecting to the NAS from Finder on my Mac, and I’ll show you how to do this. To begin, you need to get the SMB path for your NAS, which is easy to do. Access your NAS from a web browser > open the Control Panel > click File Service > click to Enable the SMB service > click Apply. Under “How to Use,” you can copy the SMB path for Mac Finder access.
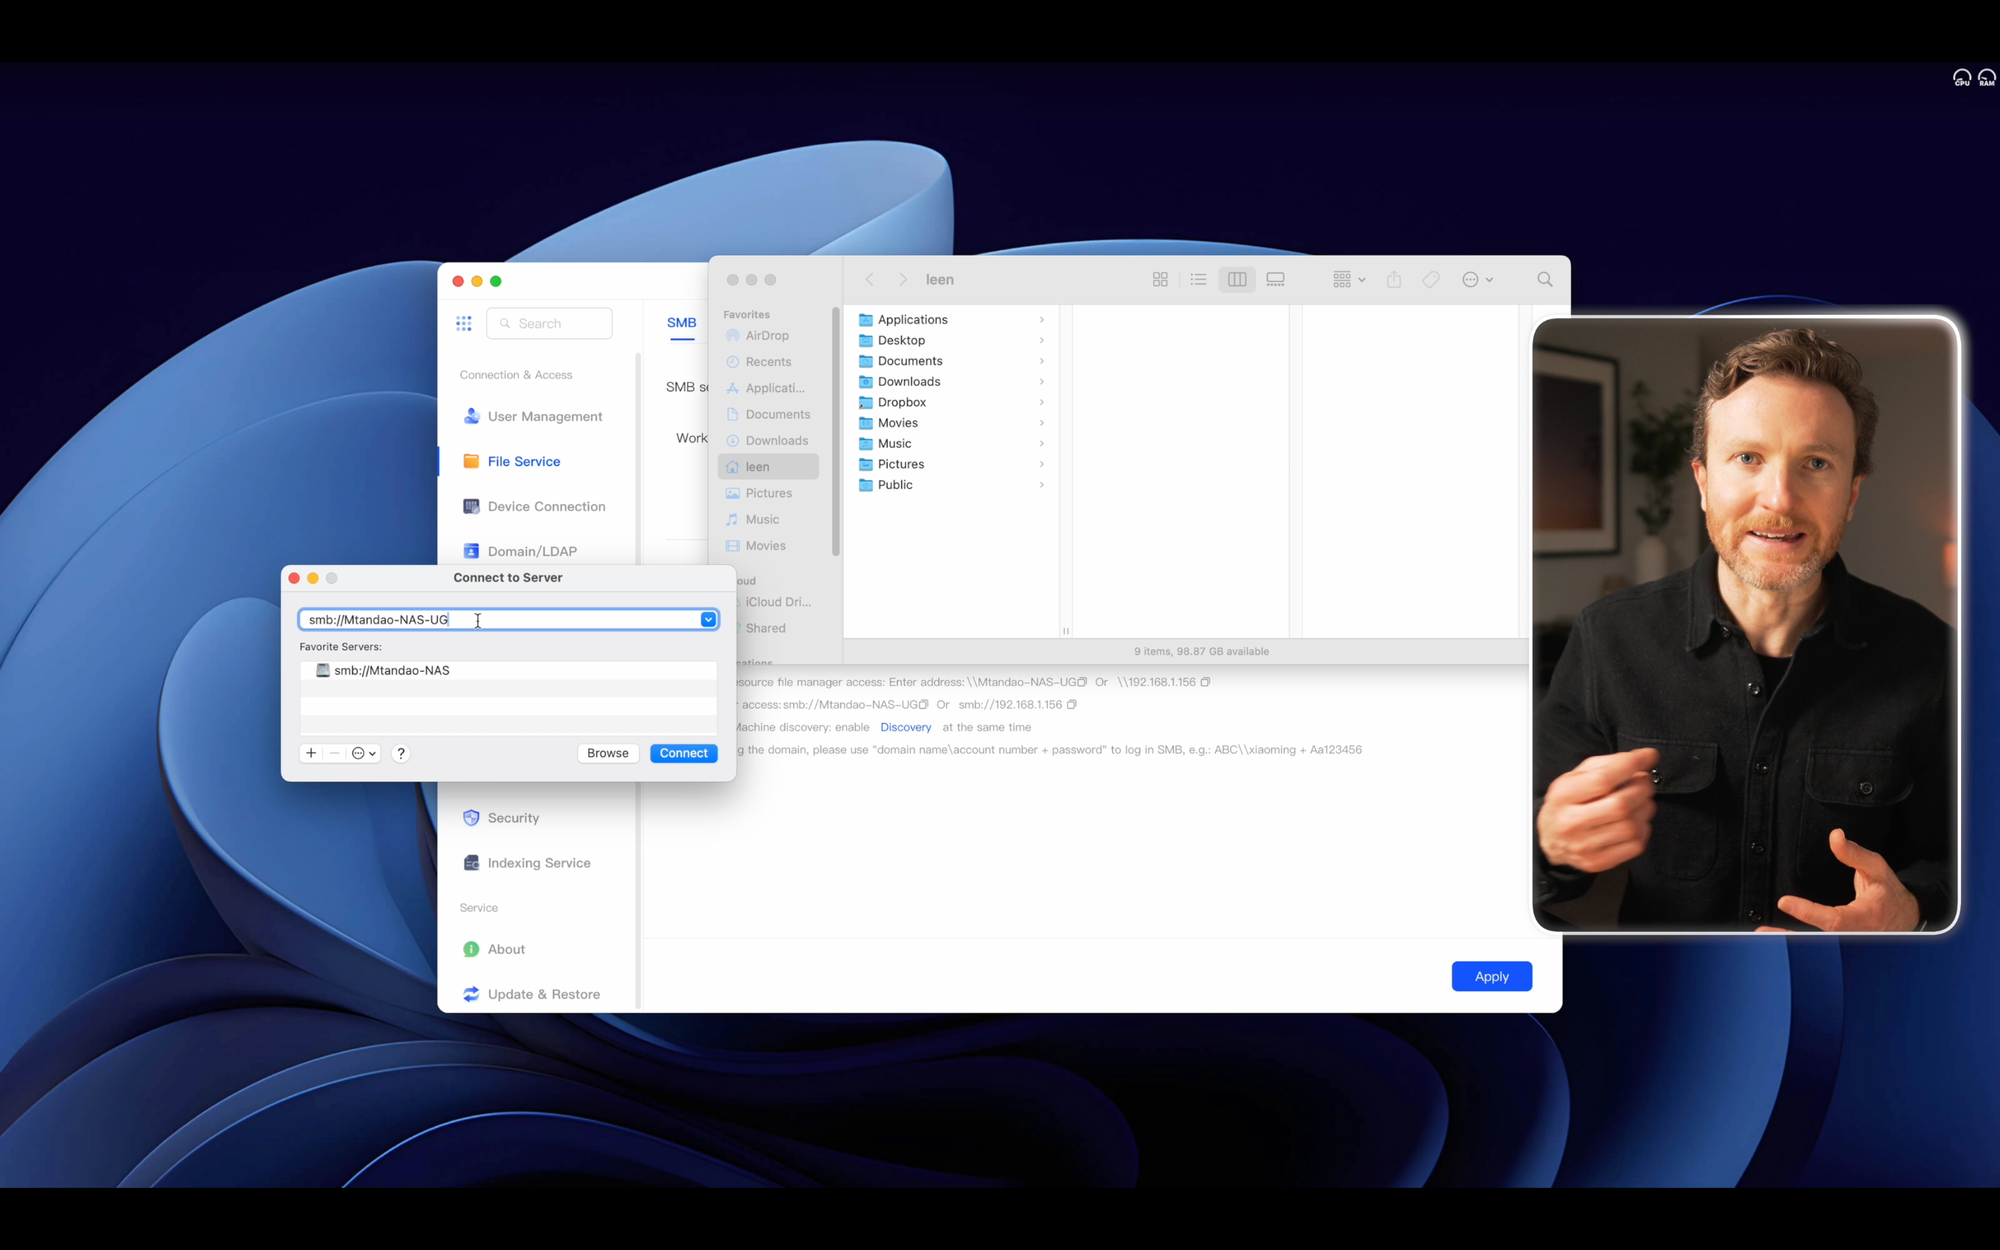
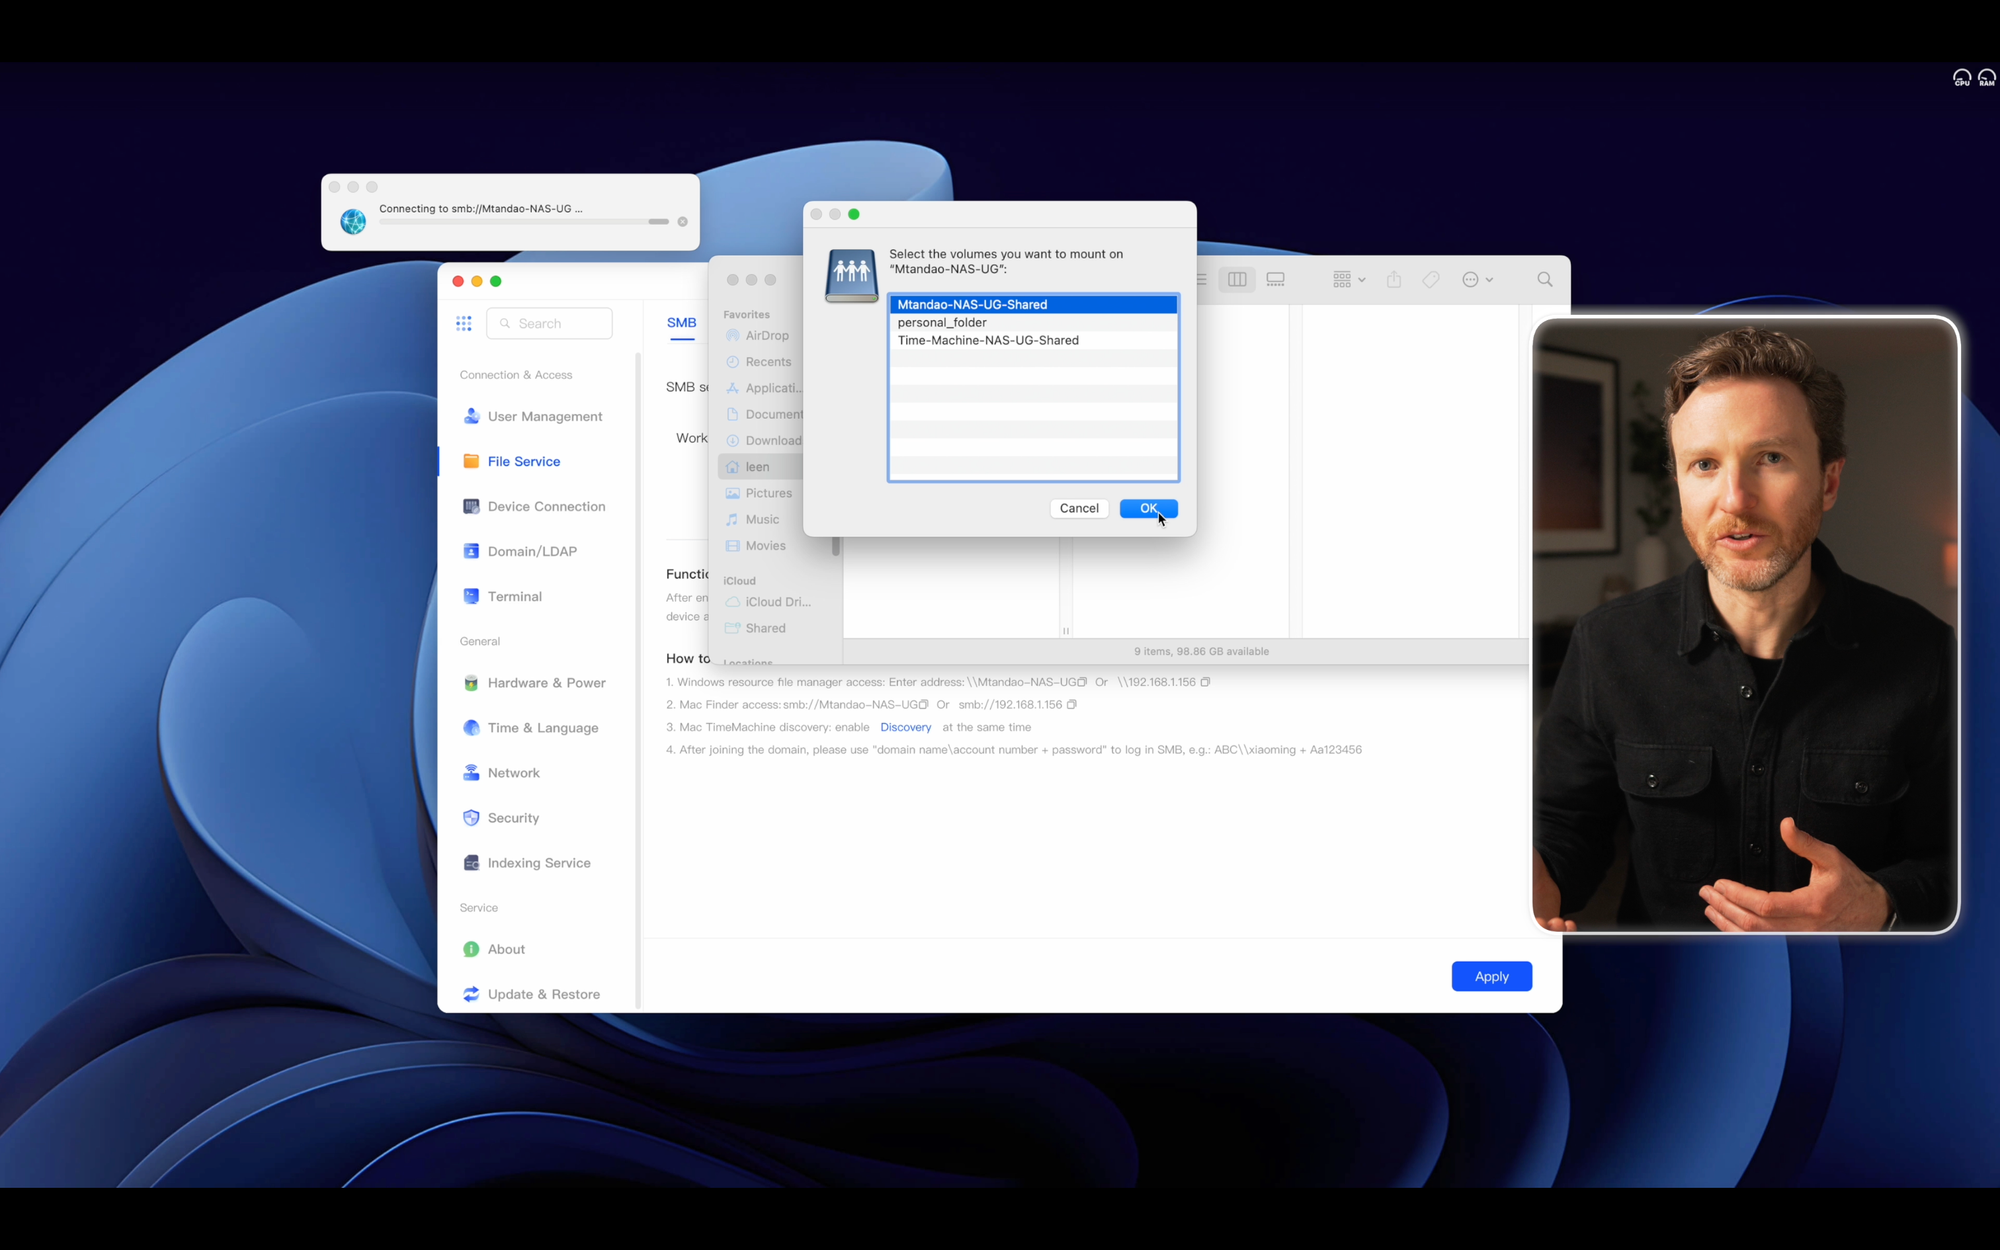
Now, open Finder on your Mac > click Go in the menu bar > Connect to Server > type or paste in the SMB path for your NAS > click Connect > select the volumes you want to mount. If it’s your first time, you’ll also need to enter the username and password you use to access the NAS from the browser. Now, you can drag and drop files and folder to your NAS just like you would any other folder in Finder. I love how easy this is. Similar functionality is also available for Windows users.
UGREEN NASync DXP4800 Plus Network Attached Storage: Accessing files
Creating Time Machine Backups
One common use case for a NAS is to create automated, wireless backups of the data on your computer, instead of remembering to connect an external drive for manual backups. Time Machine makes this easy on a Mac, and it works easily with the UGREEN NAS once you connect it to Finder.
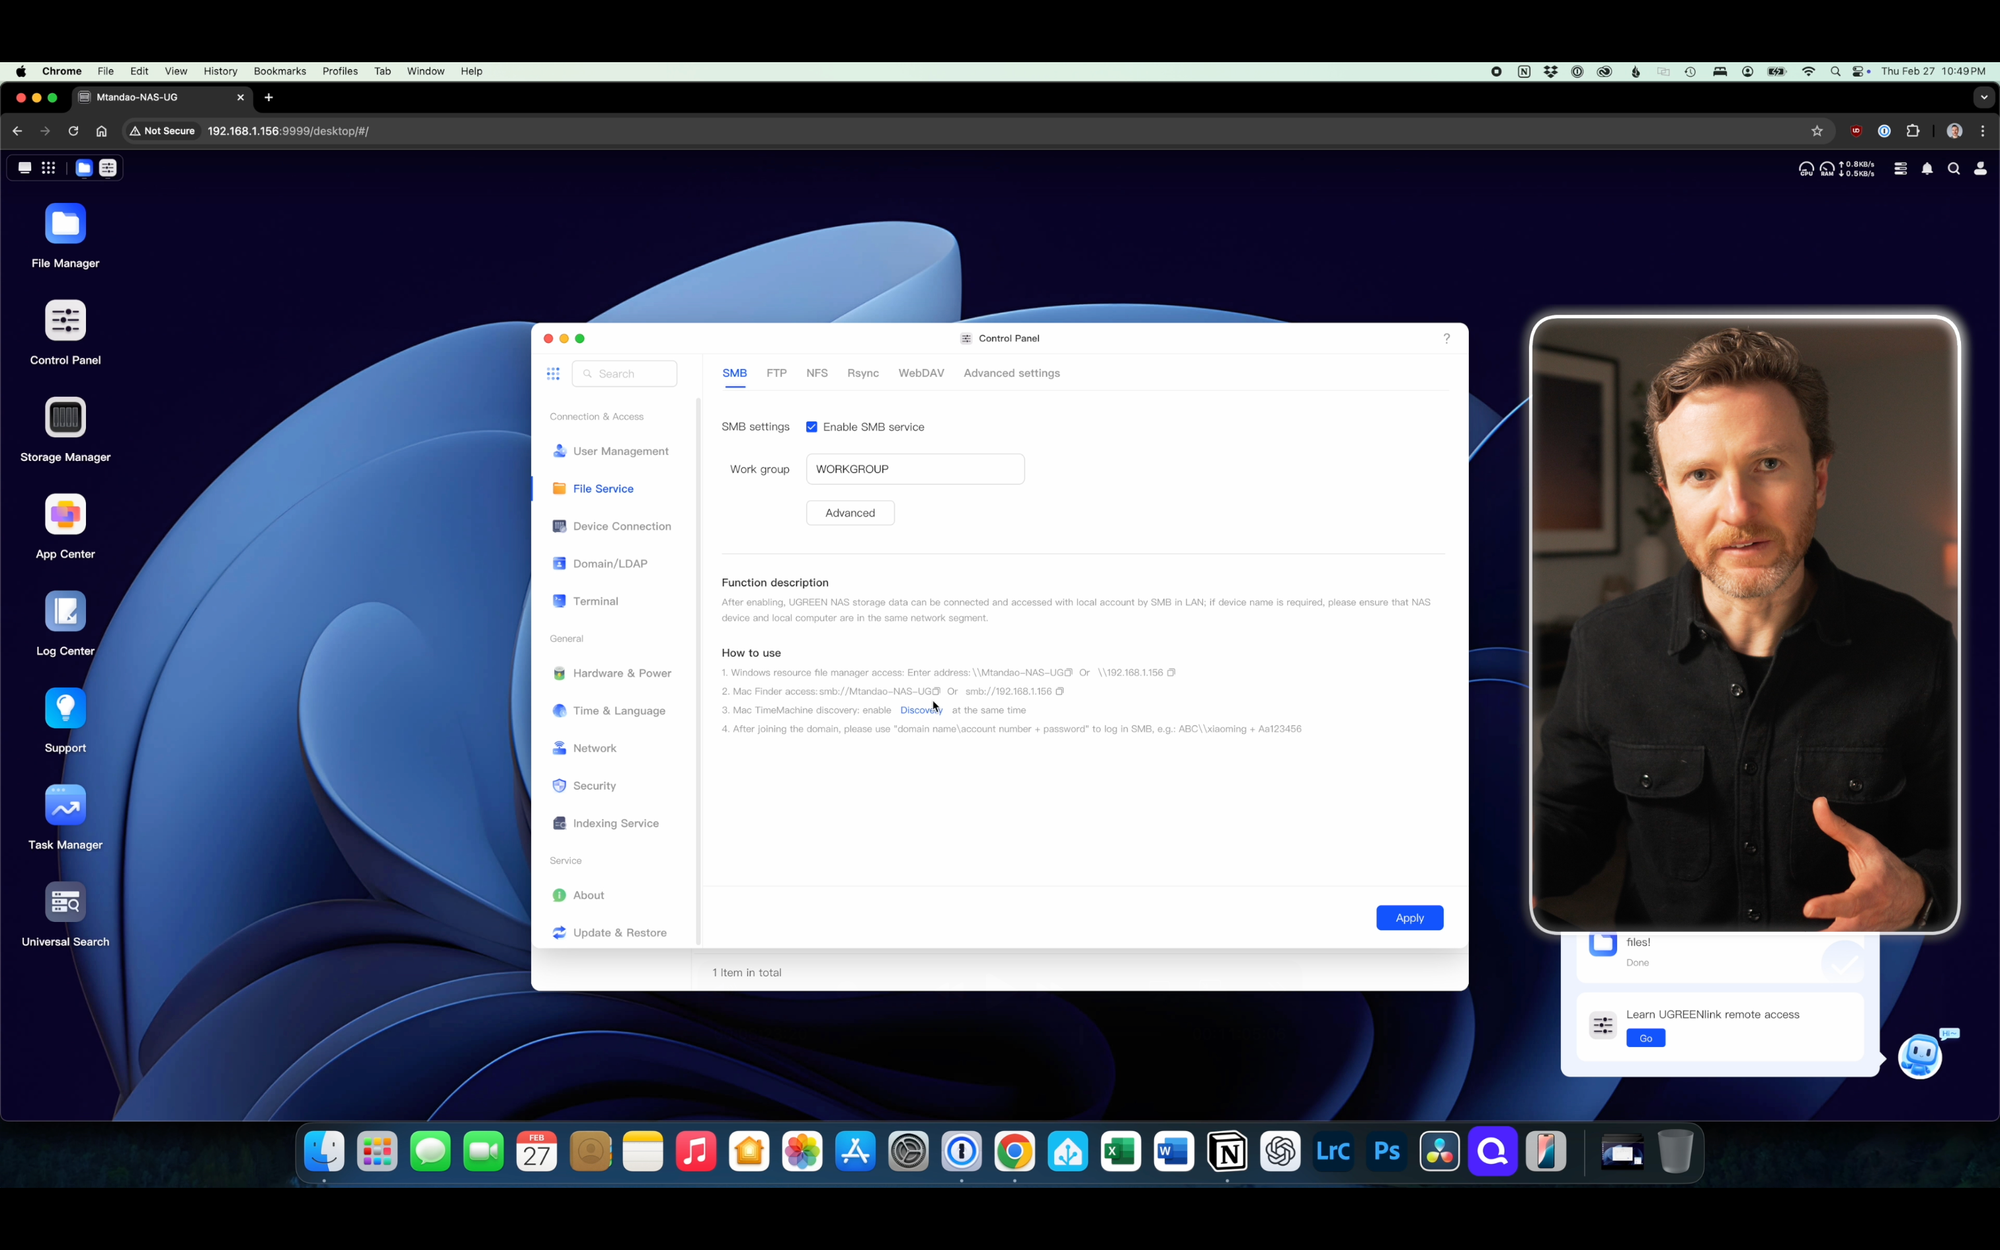
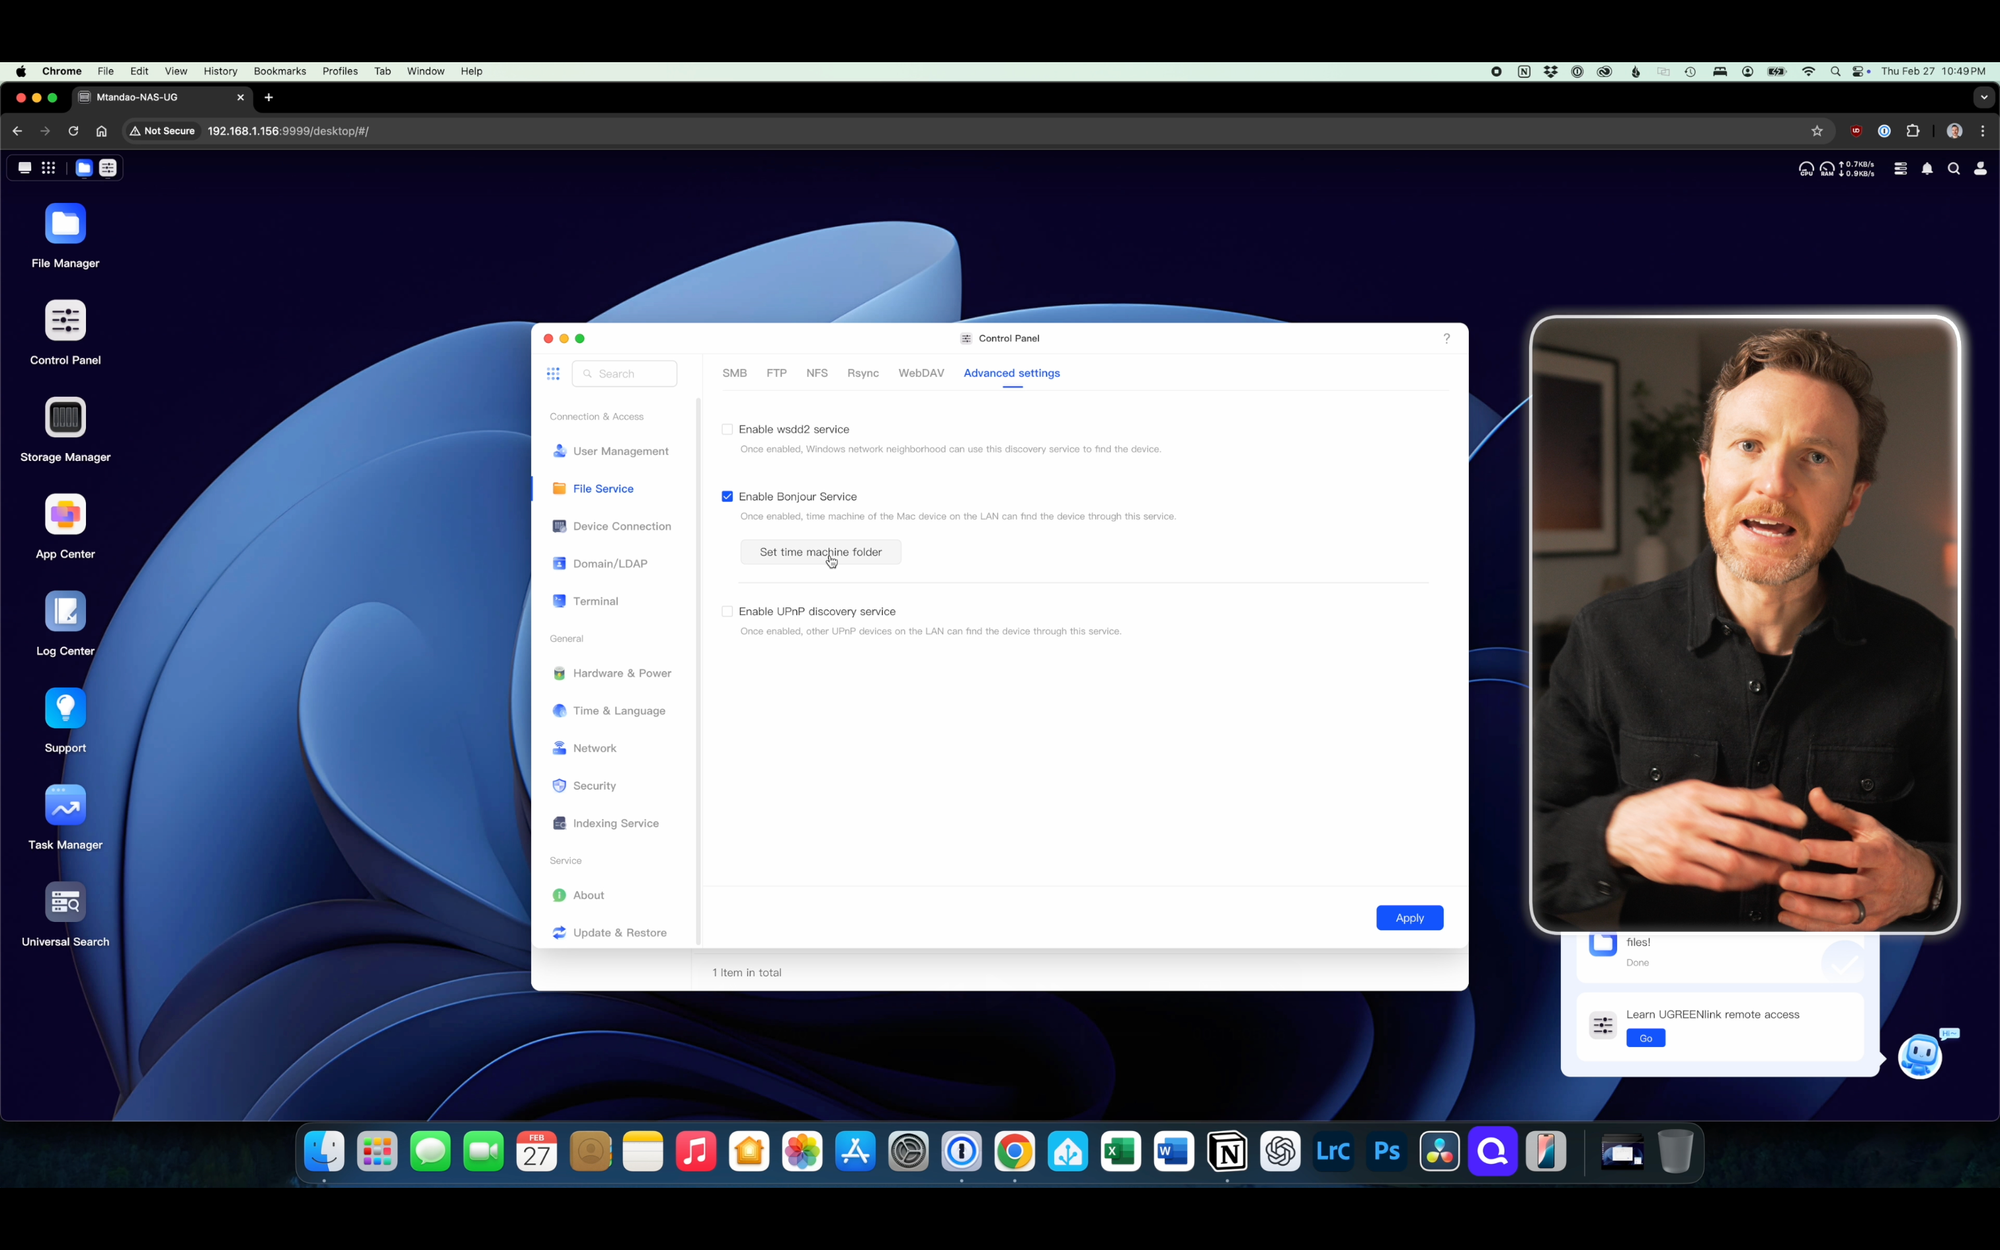
From the web interface of your NAS, open the Control Panel > click File Service > click Discovery under How to Use > click to enable Bonjour service > click to set up a Time Machine folder where your Time Machine backups will be stored. Then, you can open Time Machine on the Mac, click the plus icon, and select the UGREEN NAS that you connected to Finder.
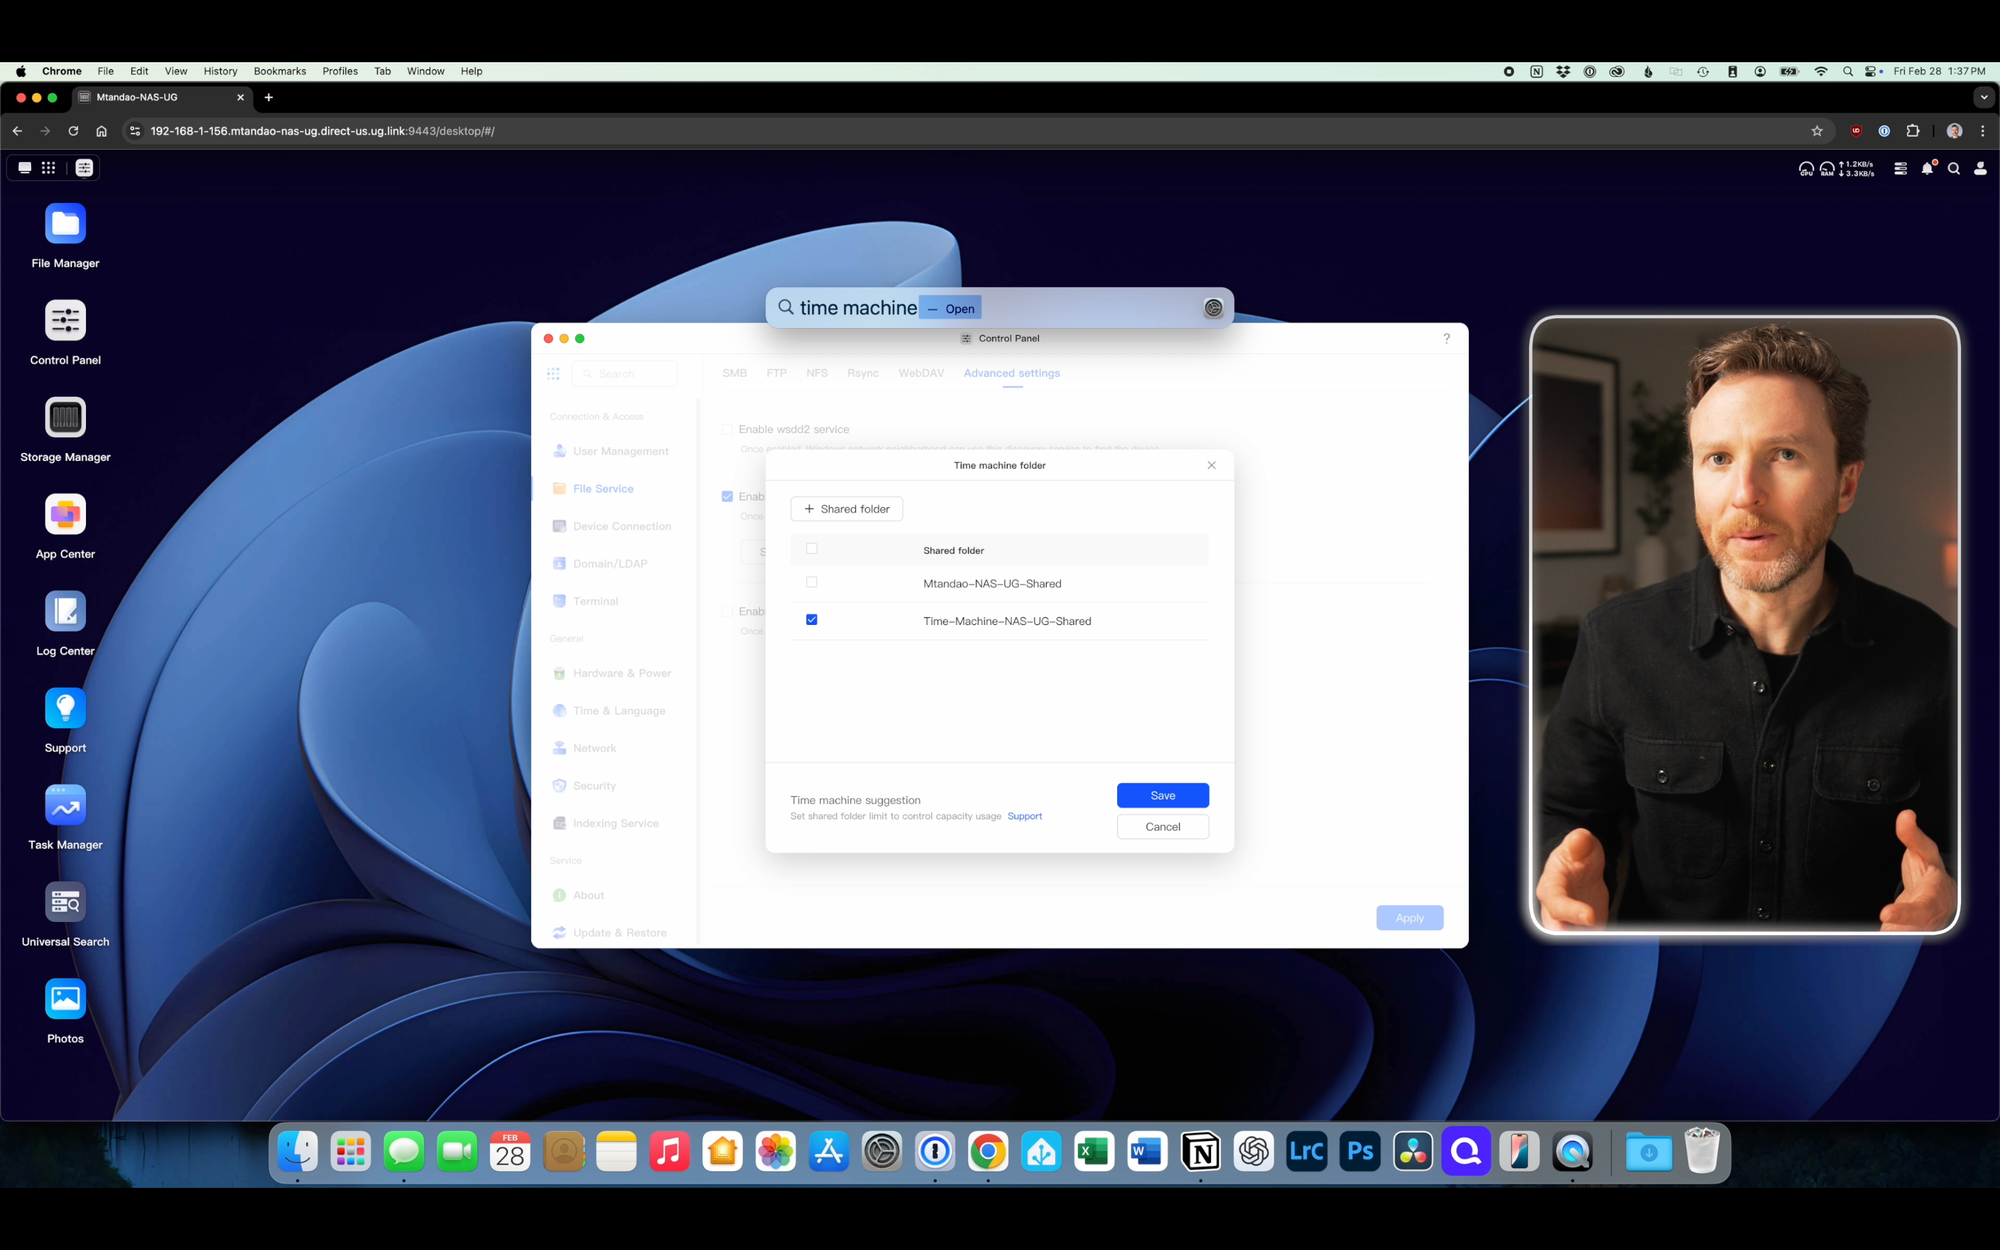
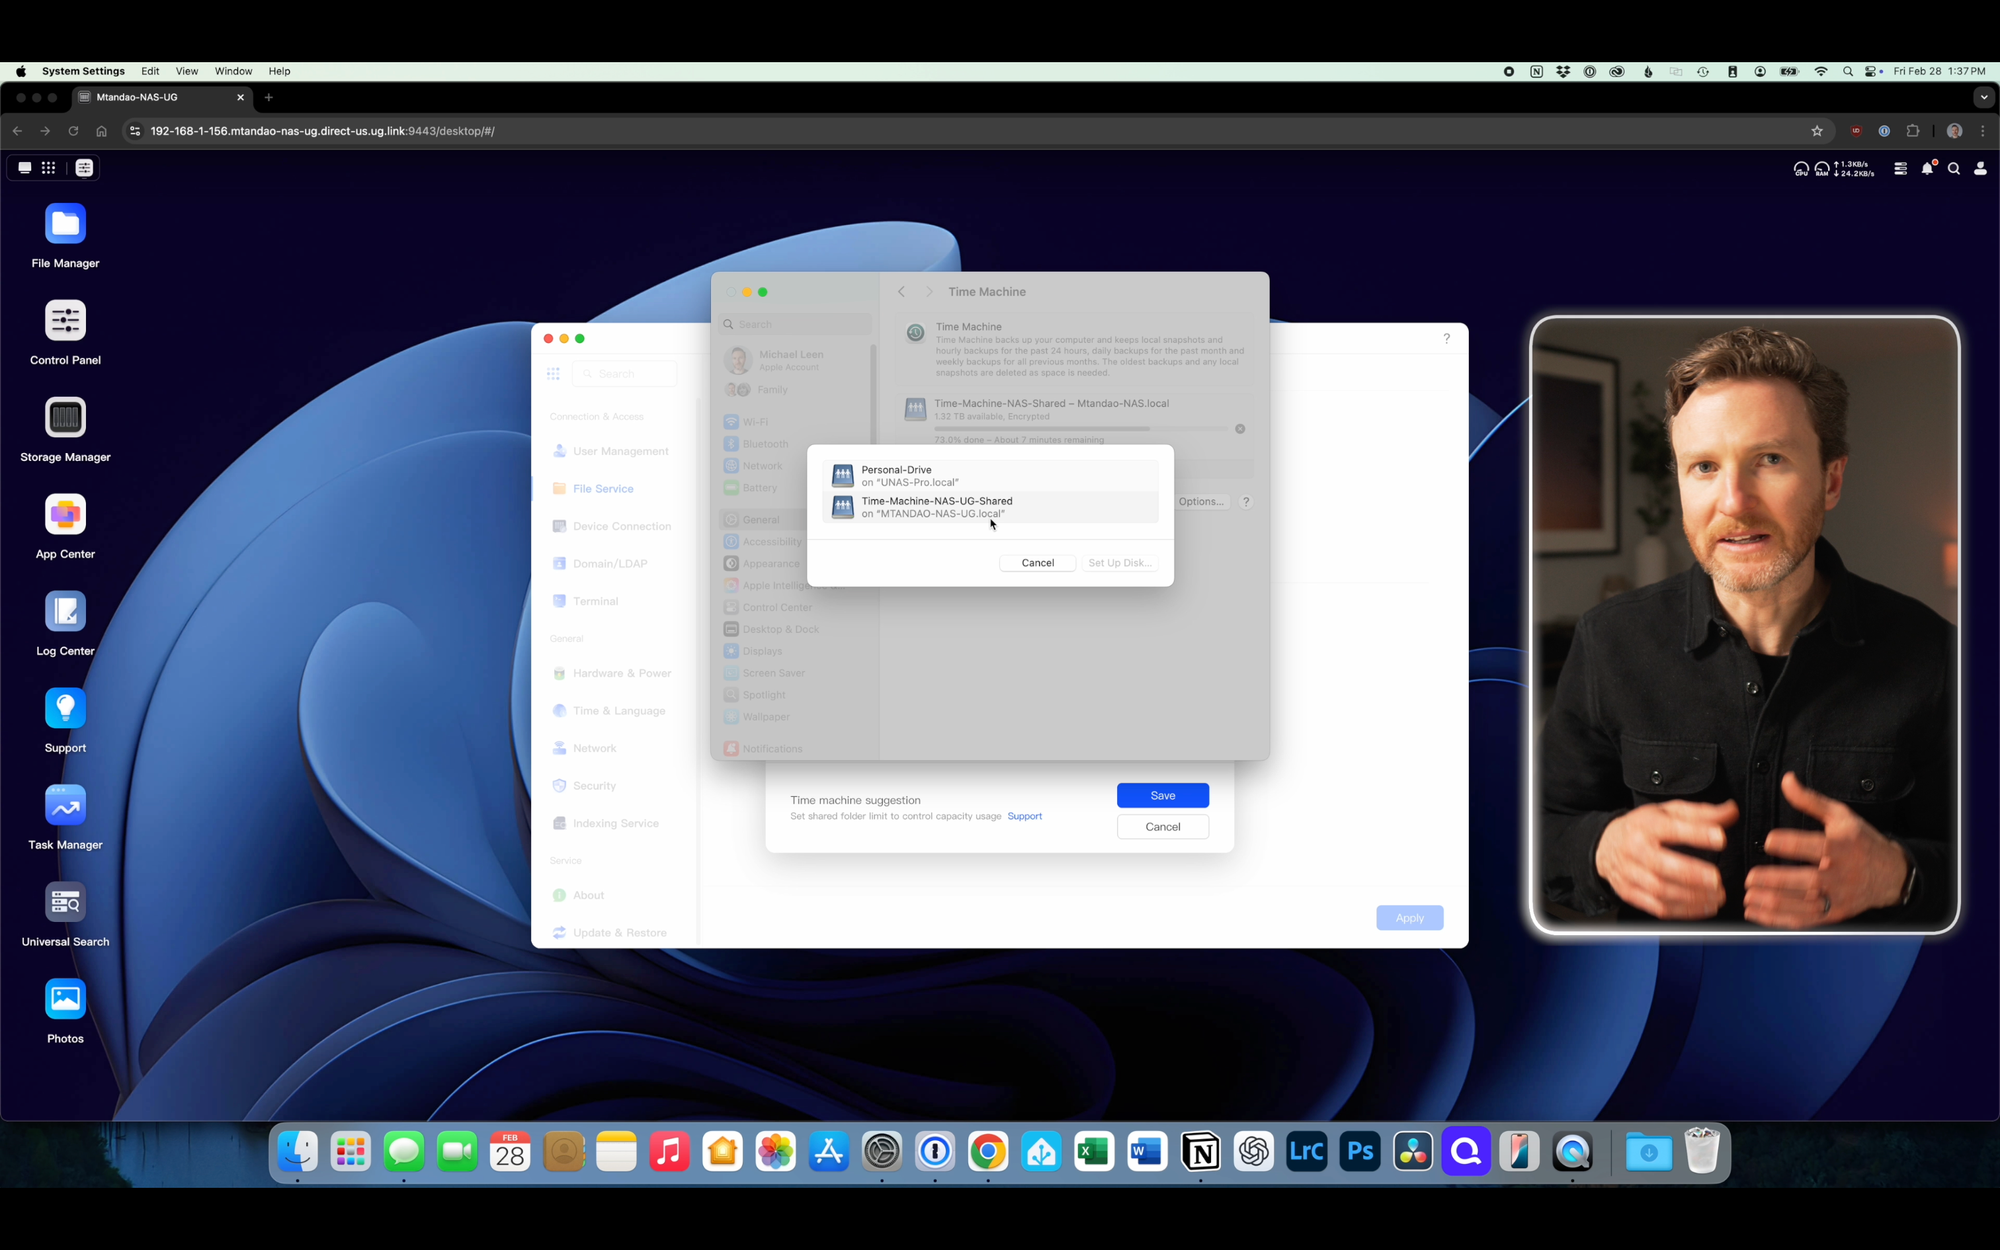
UGREEN NASync DXP4800 Plus Network Attached Storage: Creating Time Machine backups
Managing Photos with AI
Another use case for a NAS is to store the tens of thousands of photos that you’ve probably taken. This NAS has a built-in AI for recognizing and classifying your photos. This allows you to search photos by entering keywords, like pets and vehicles, so you can find what you’re looking for faster. The AI model runs locally without an Internet connection and won't upload personal data to any online servers.
To enable this, open the Photos app > click on the user image > choose Settings > click AI Settings > click to download Scene & Object Recognition and/or Image Recognition. Note that these AI features will keep the hard disk active, so it’s something you can experiment with. Once enabled, give the AI at least a few minutes to analyze your photos, but possibly longer depending on the size of your photo library. Now, when I search for things like “car,” “mountain,” “forest,” “grass,” and “sun” it correctly surfaces the relevant photos.
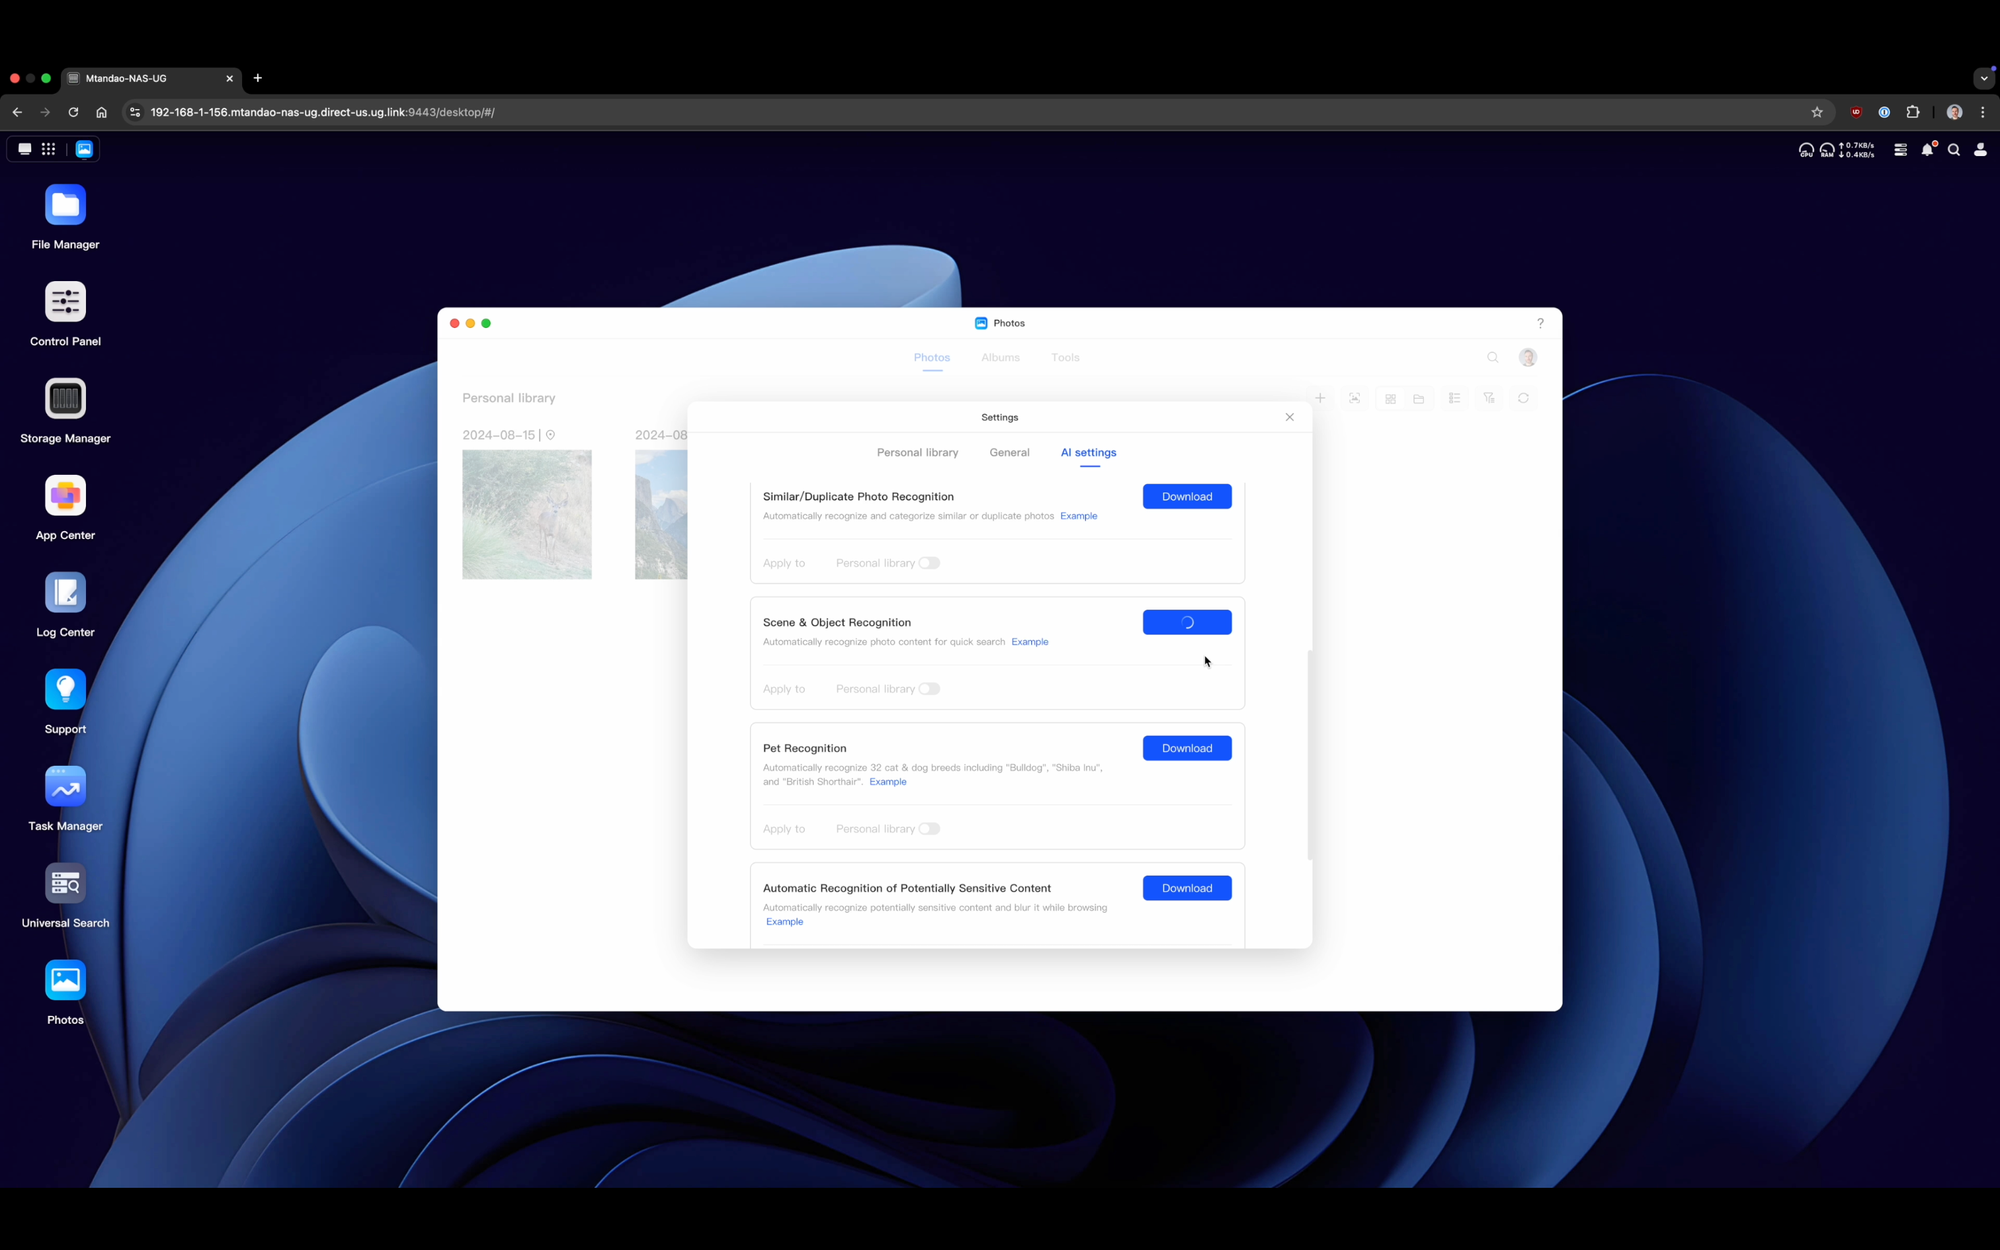
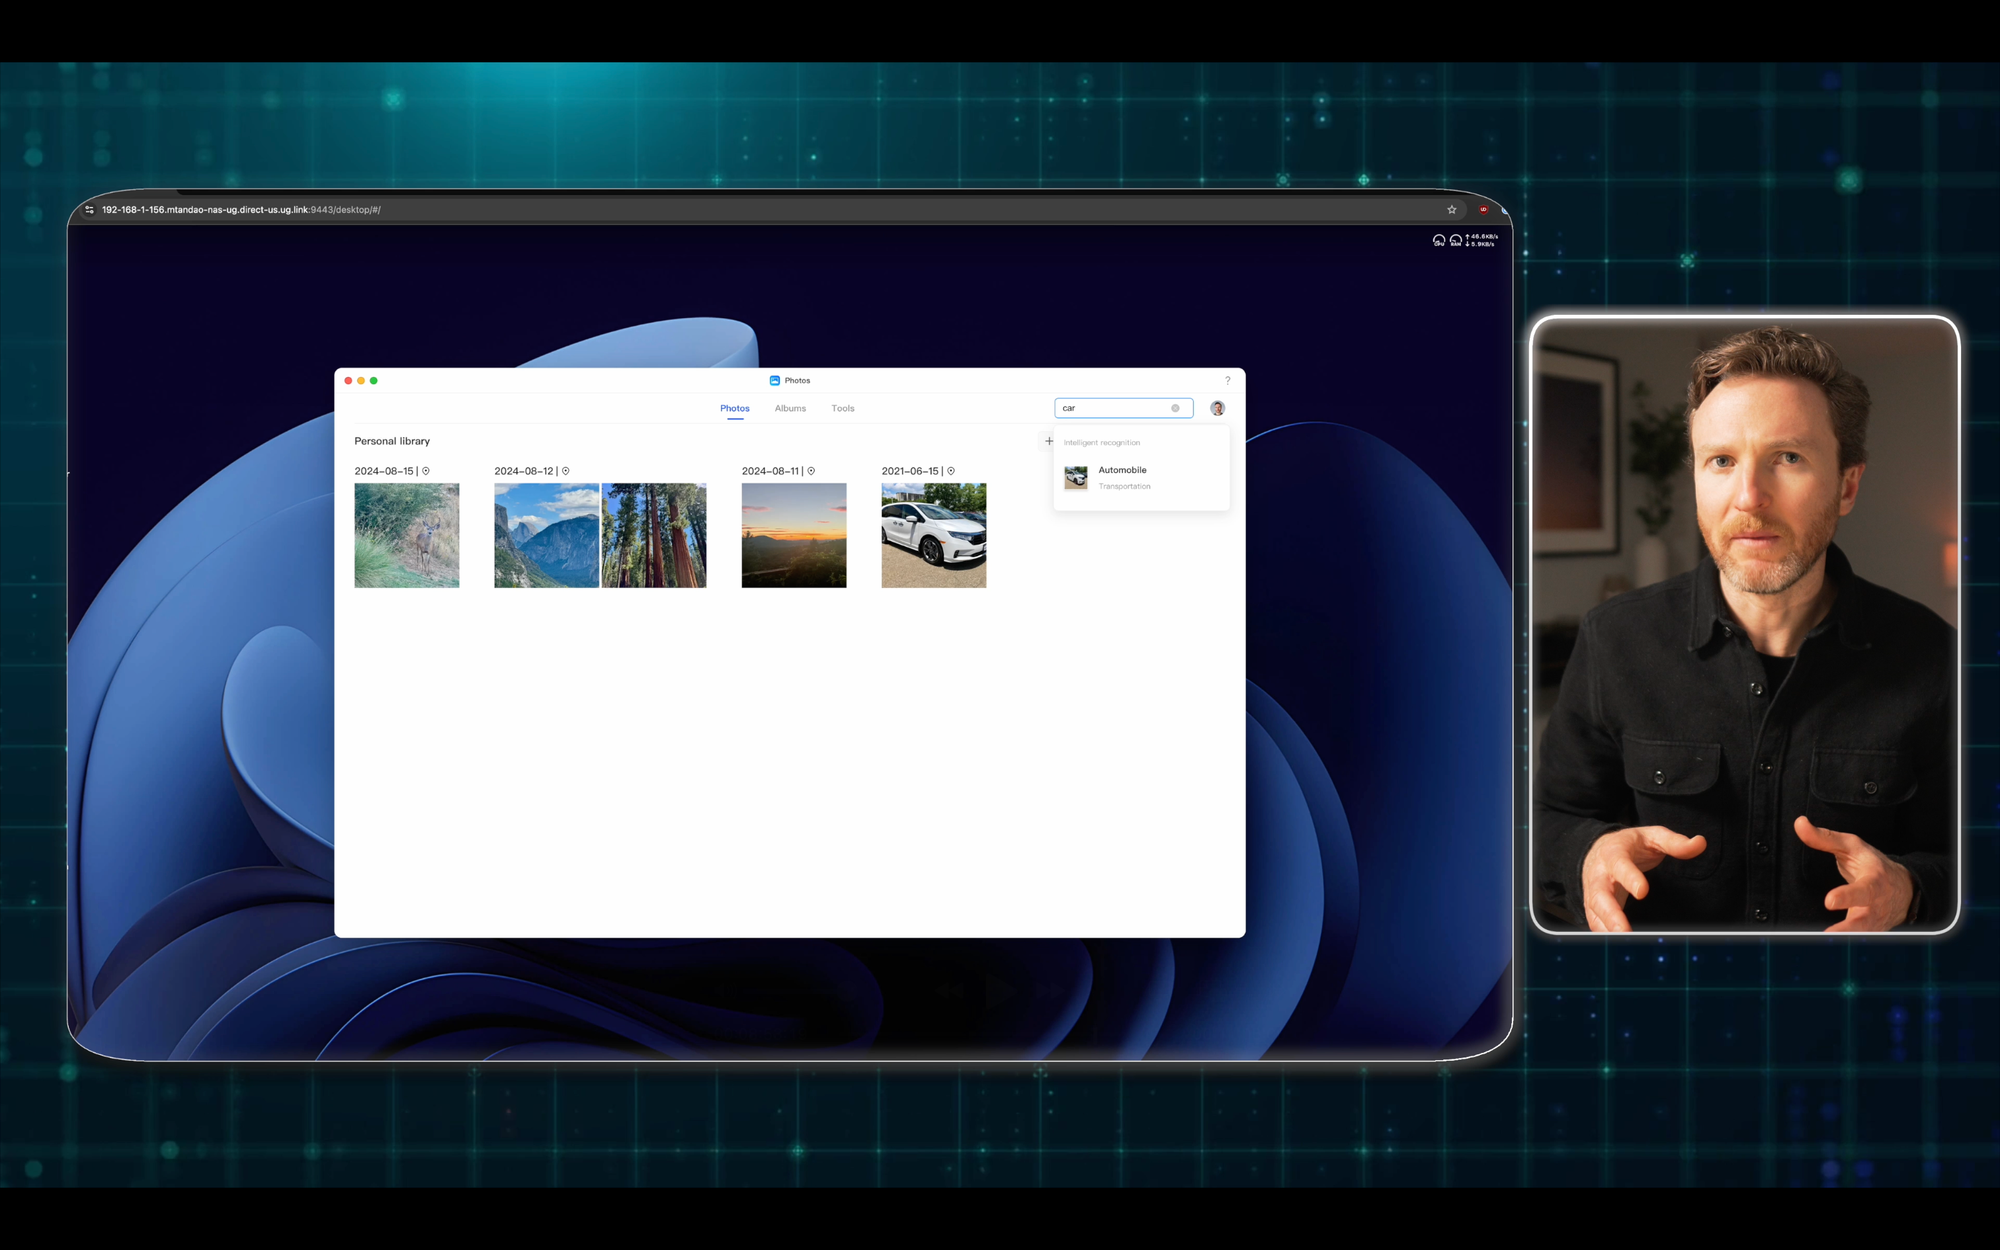
UGREEN NASync DXP4800 Plus Network Attached Storage: Managing photos with AI
Exploring Apps
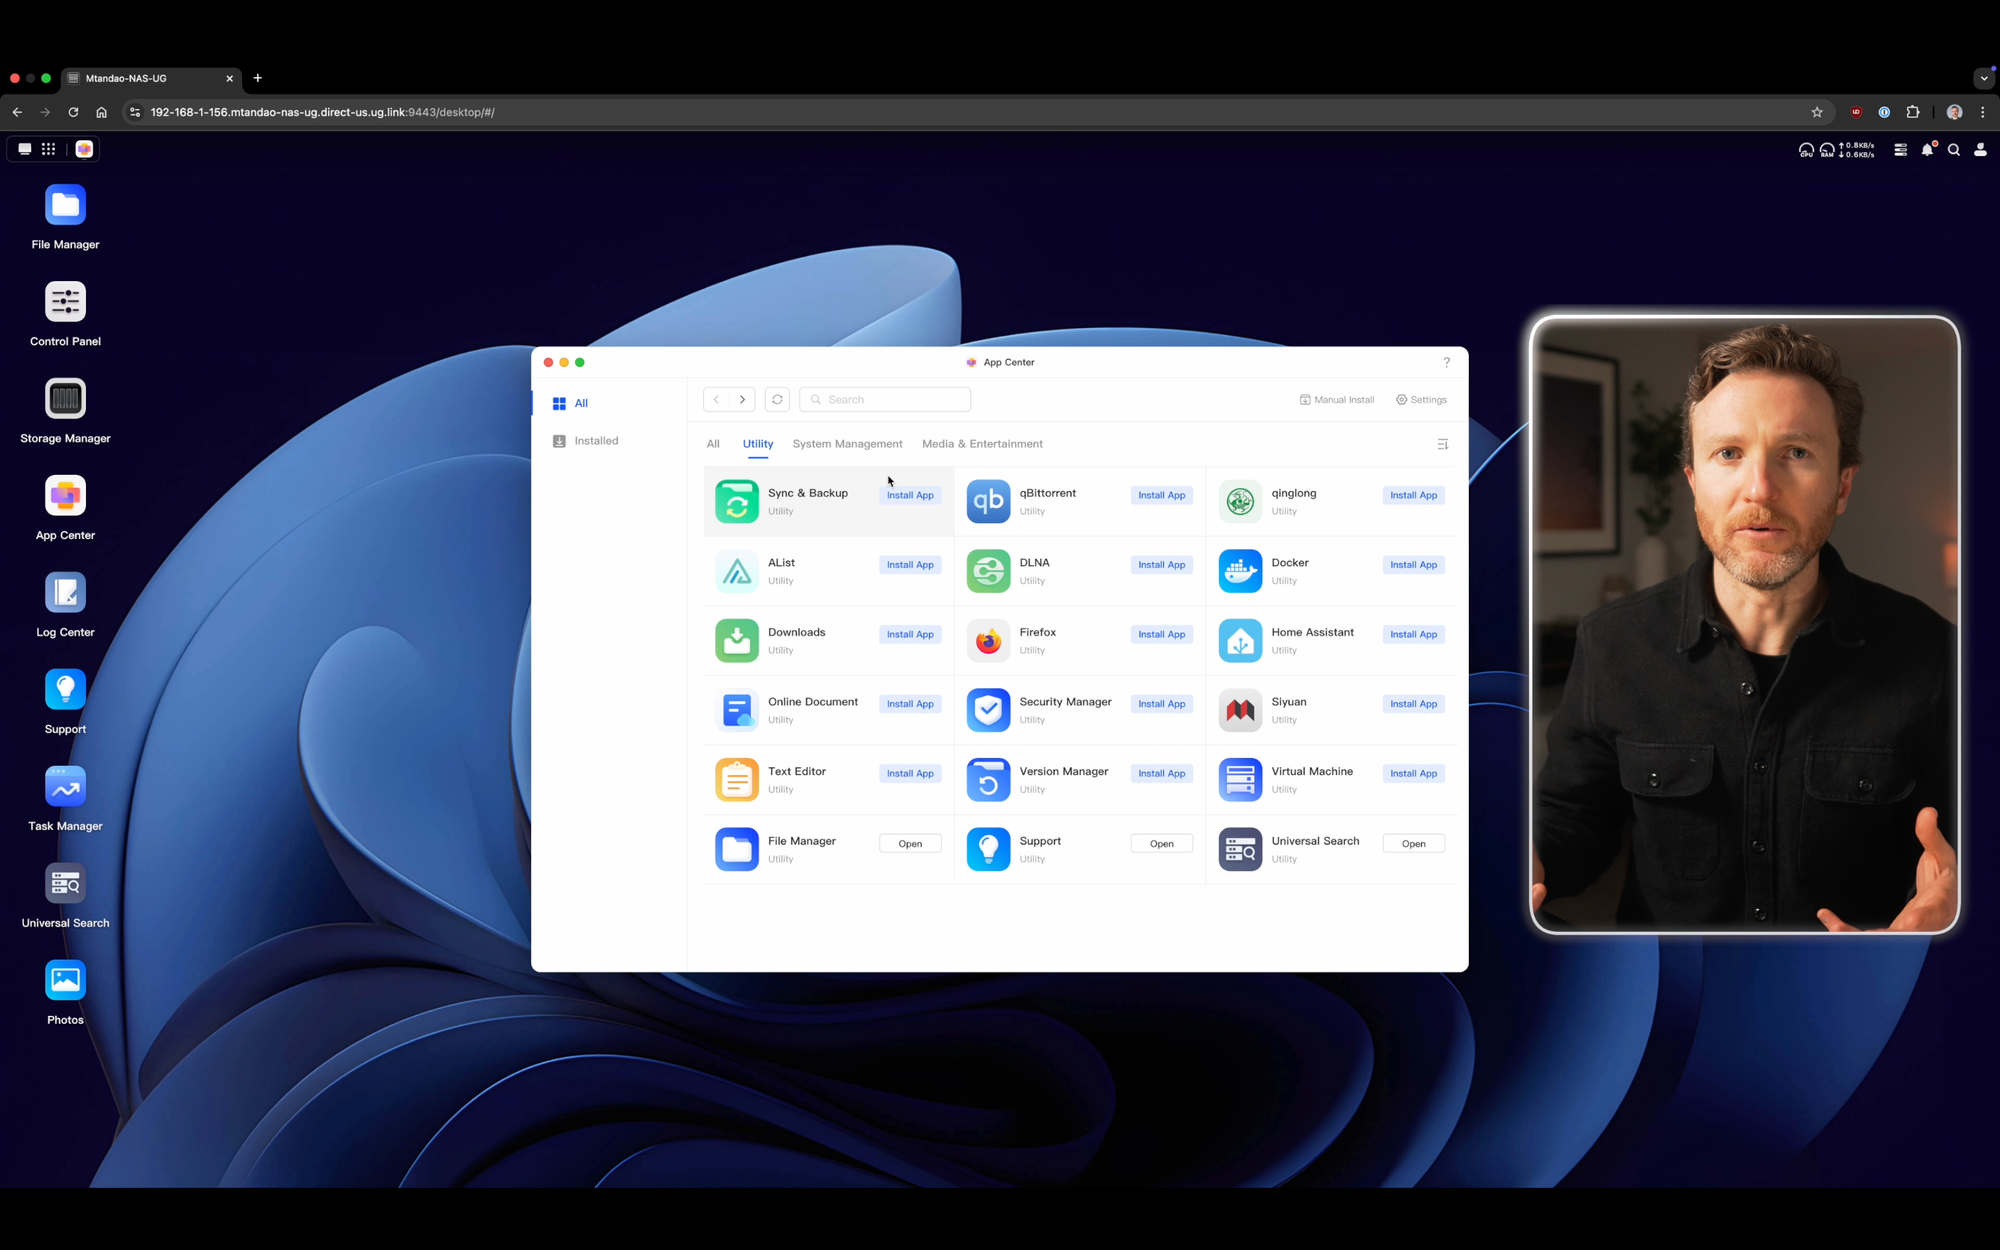
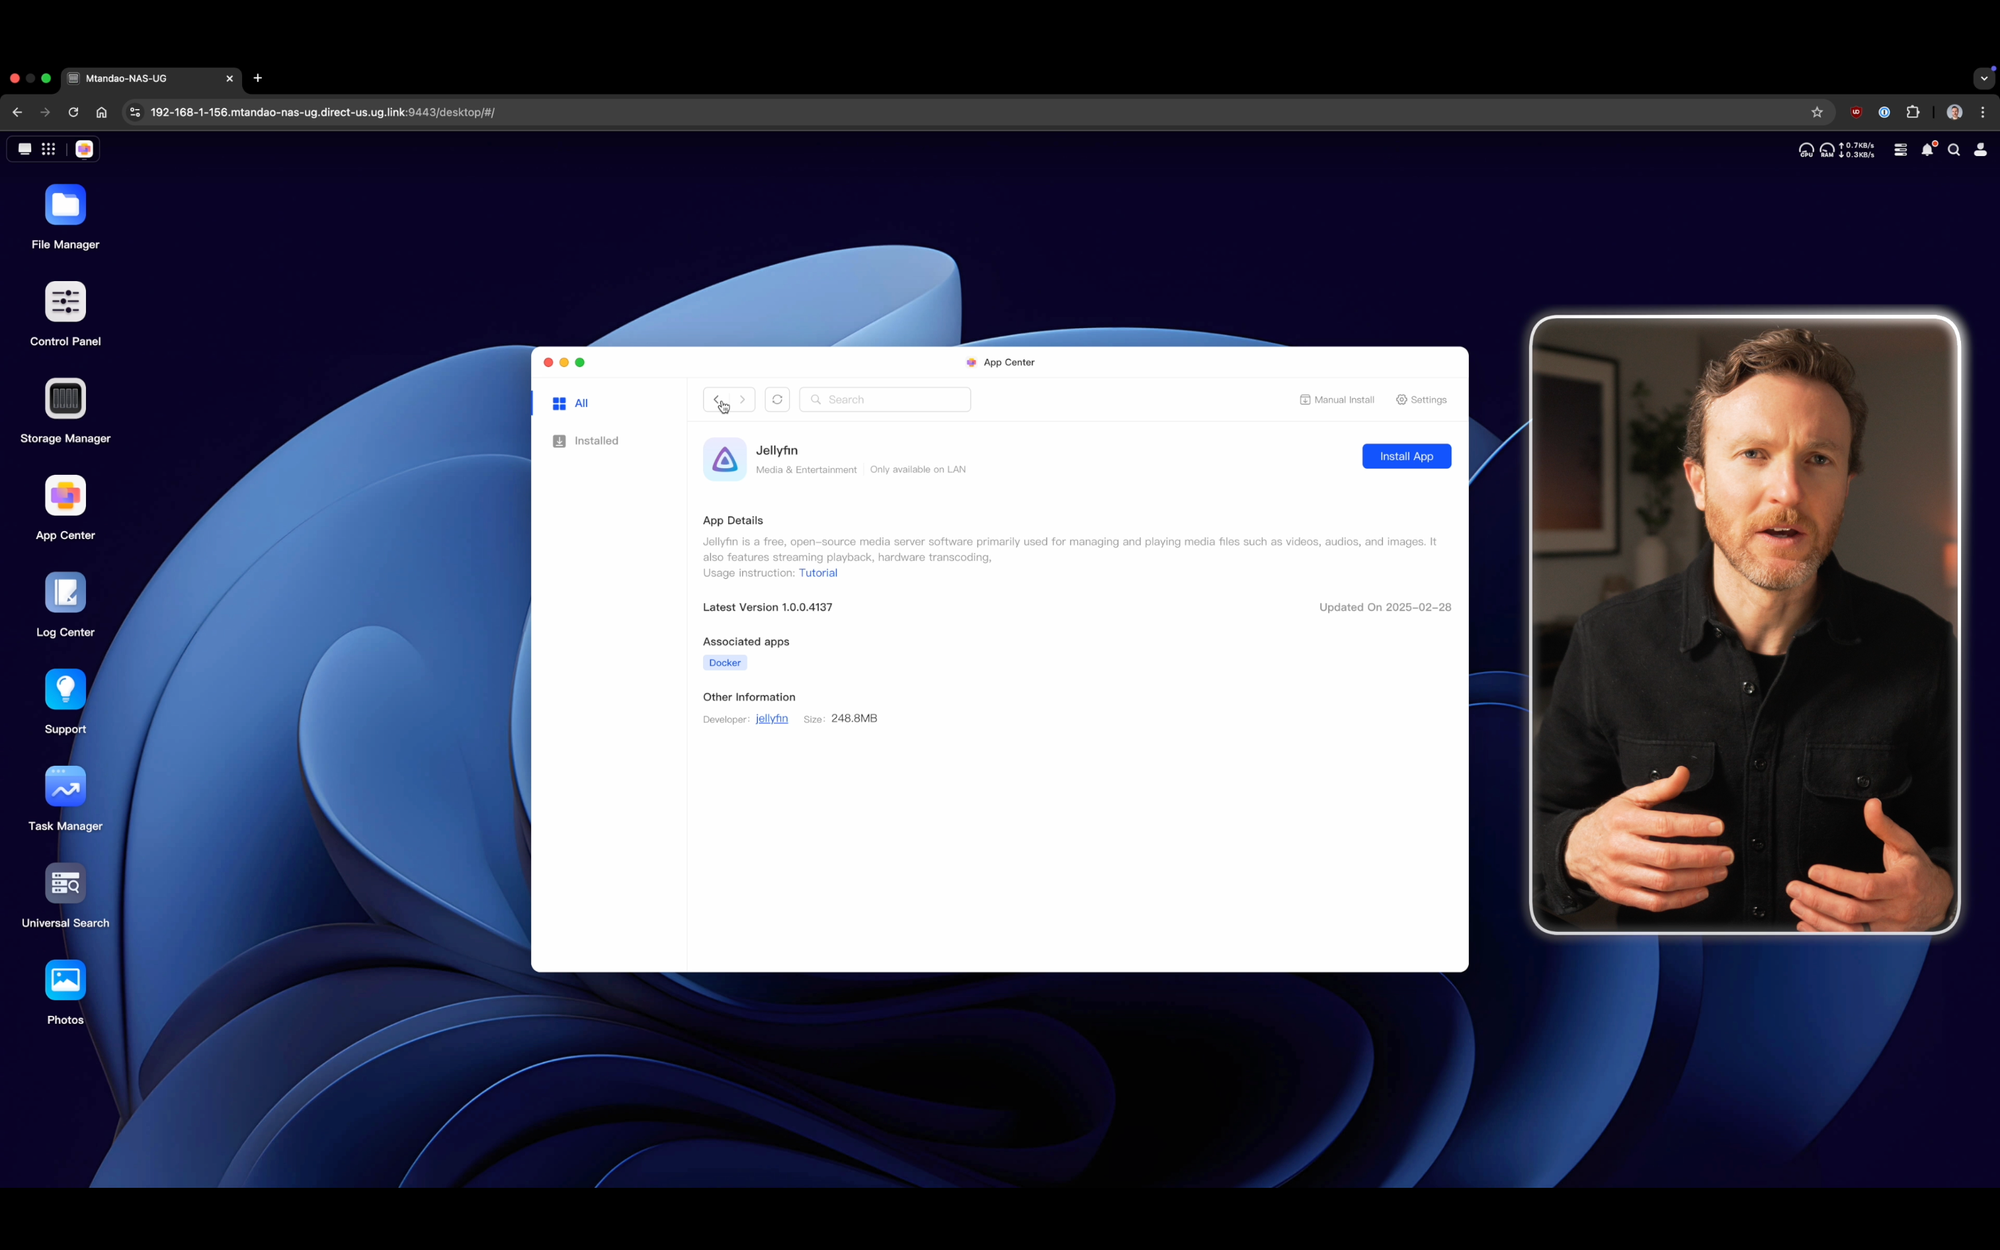
To get even more of your NAS, you can install apps for productivity, entertainment, security, and more. For example, I use apps like Jellfyin to organize all of our music, movies, and TV shows with rich metadata, like cover art, cast info, and more. I can then stream this media across any of my devices, like TVs, mobile phones, tablets, and web browsers.
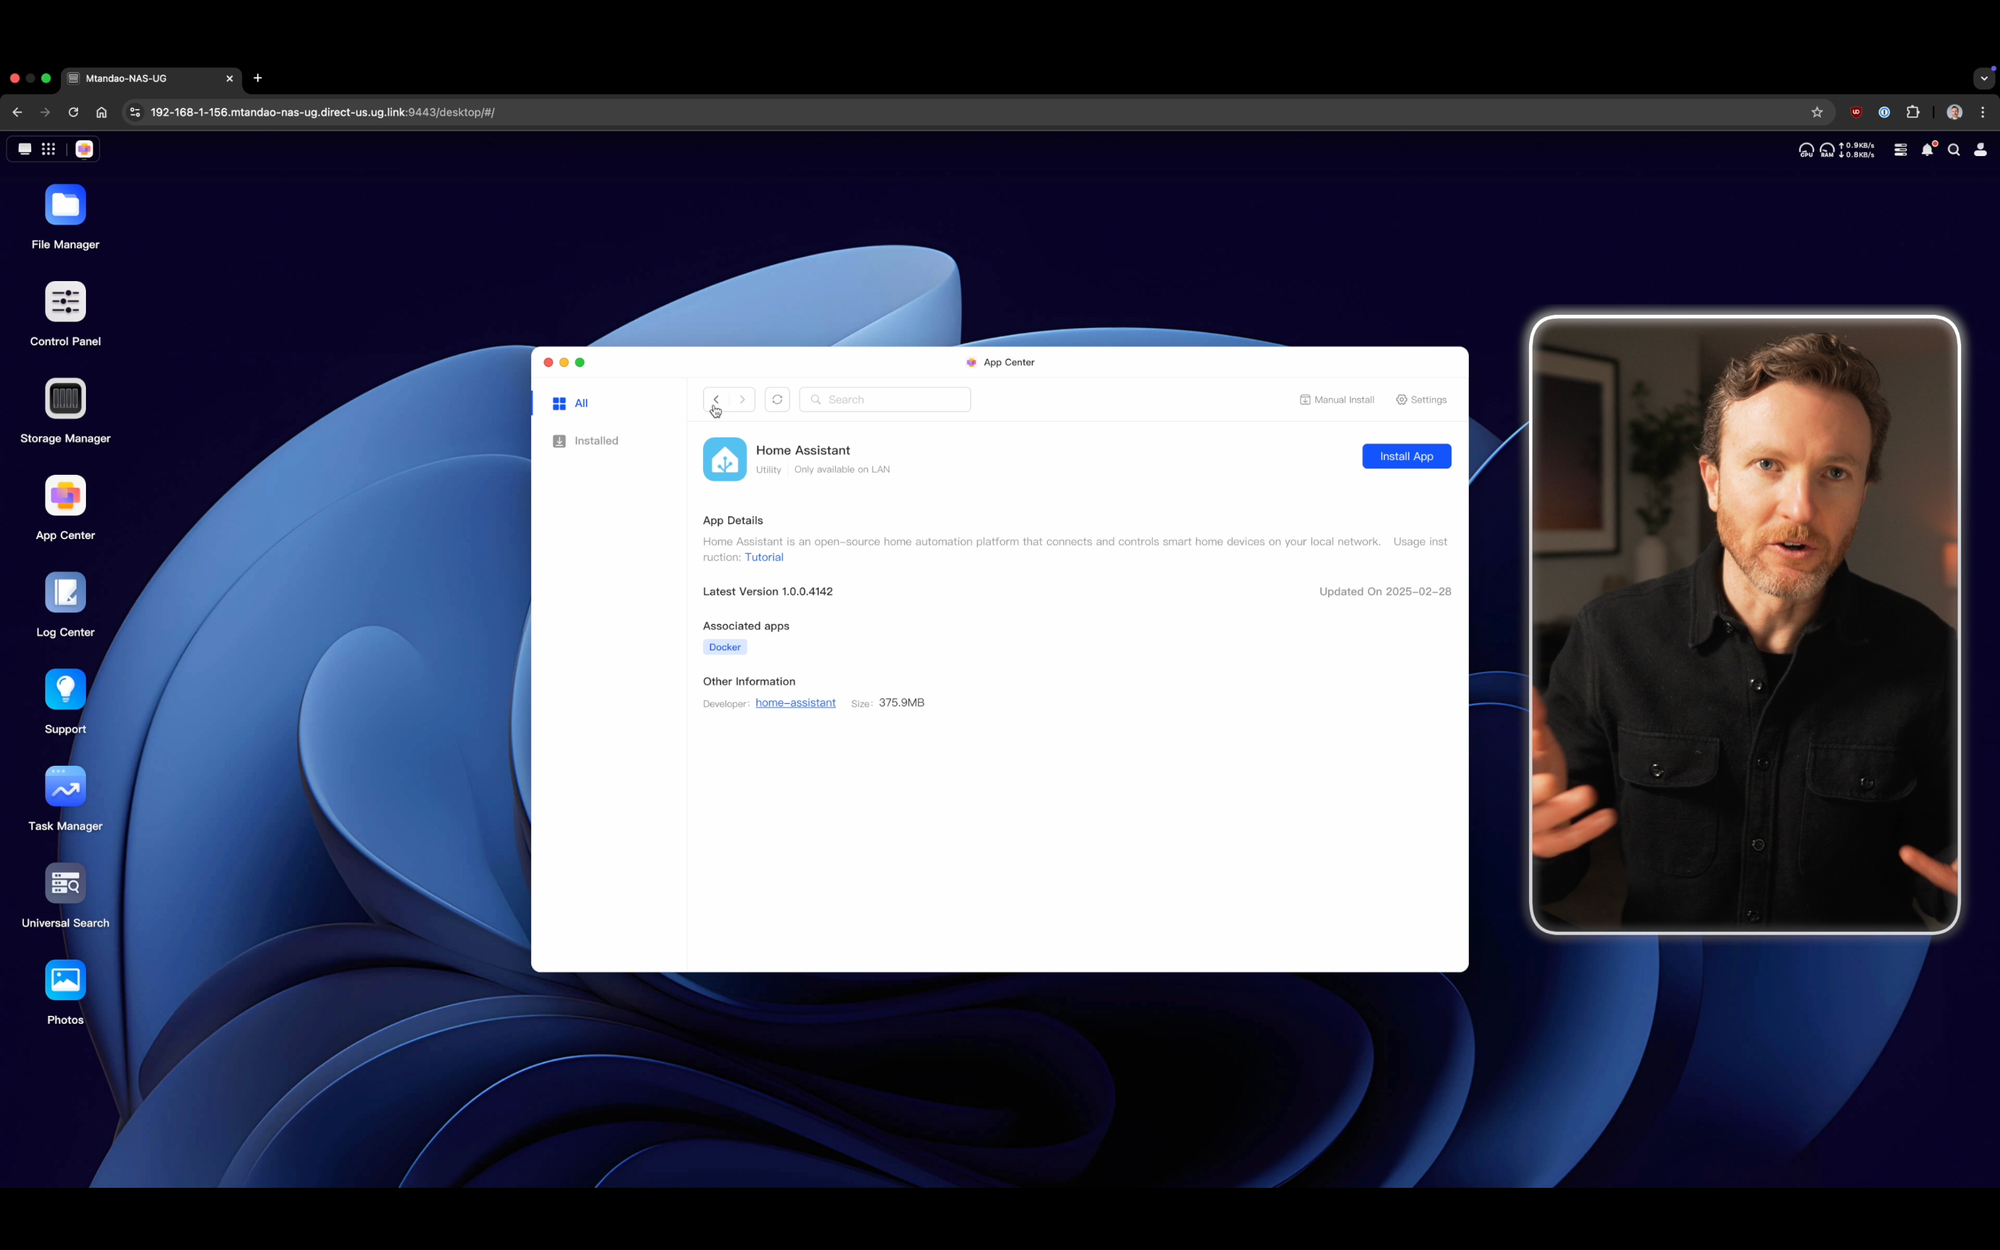
There are also apps for advanced users. You can use Docker for virtualization and container deployment, and you can even run Home Assistant this way for your home automation platform.
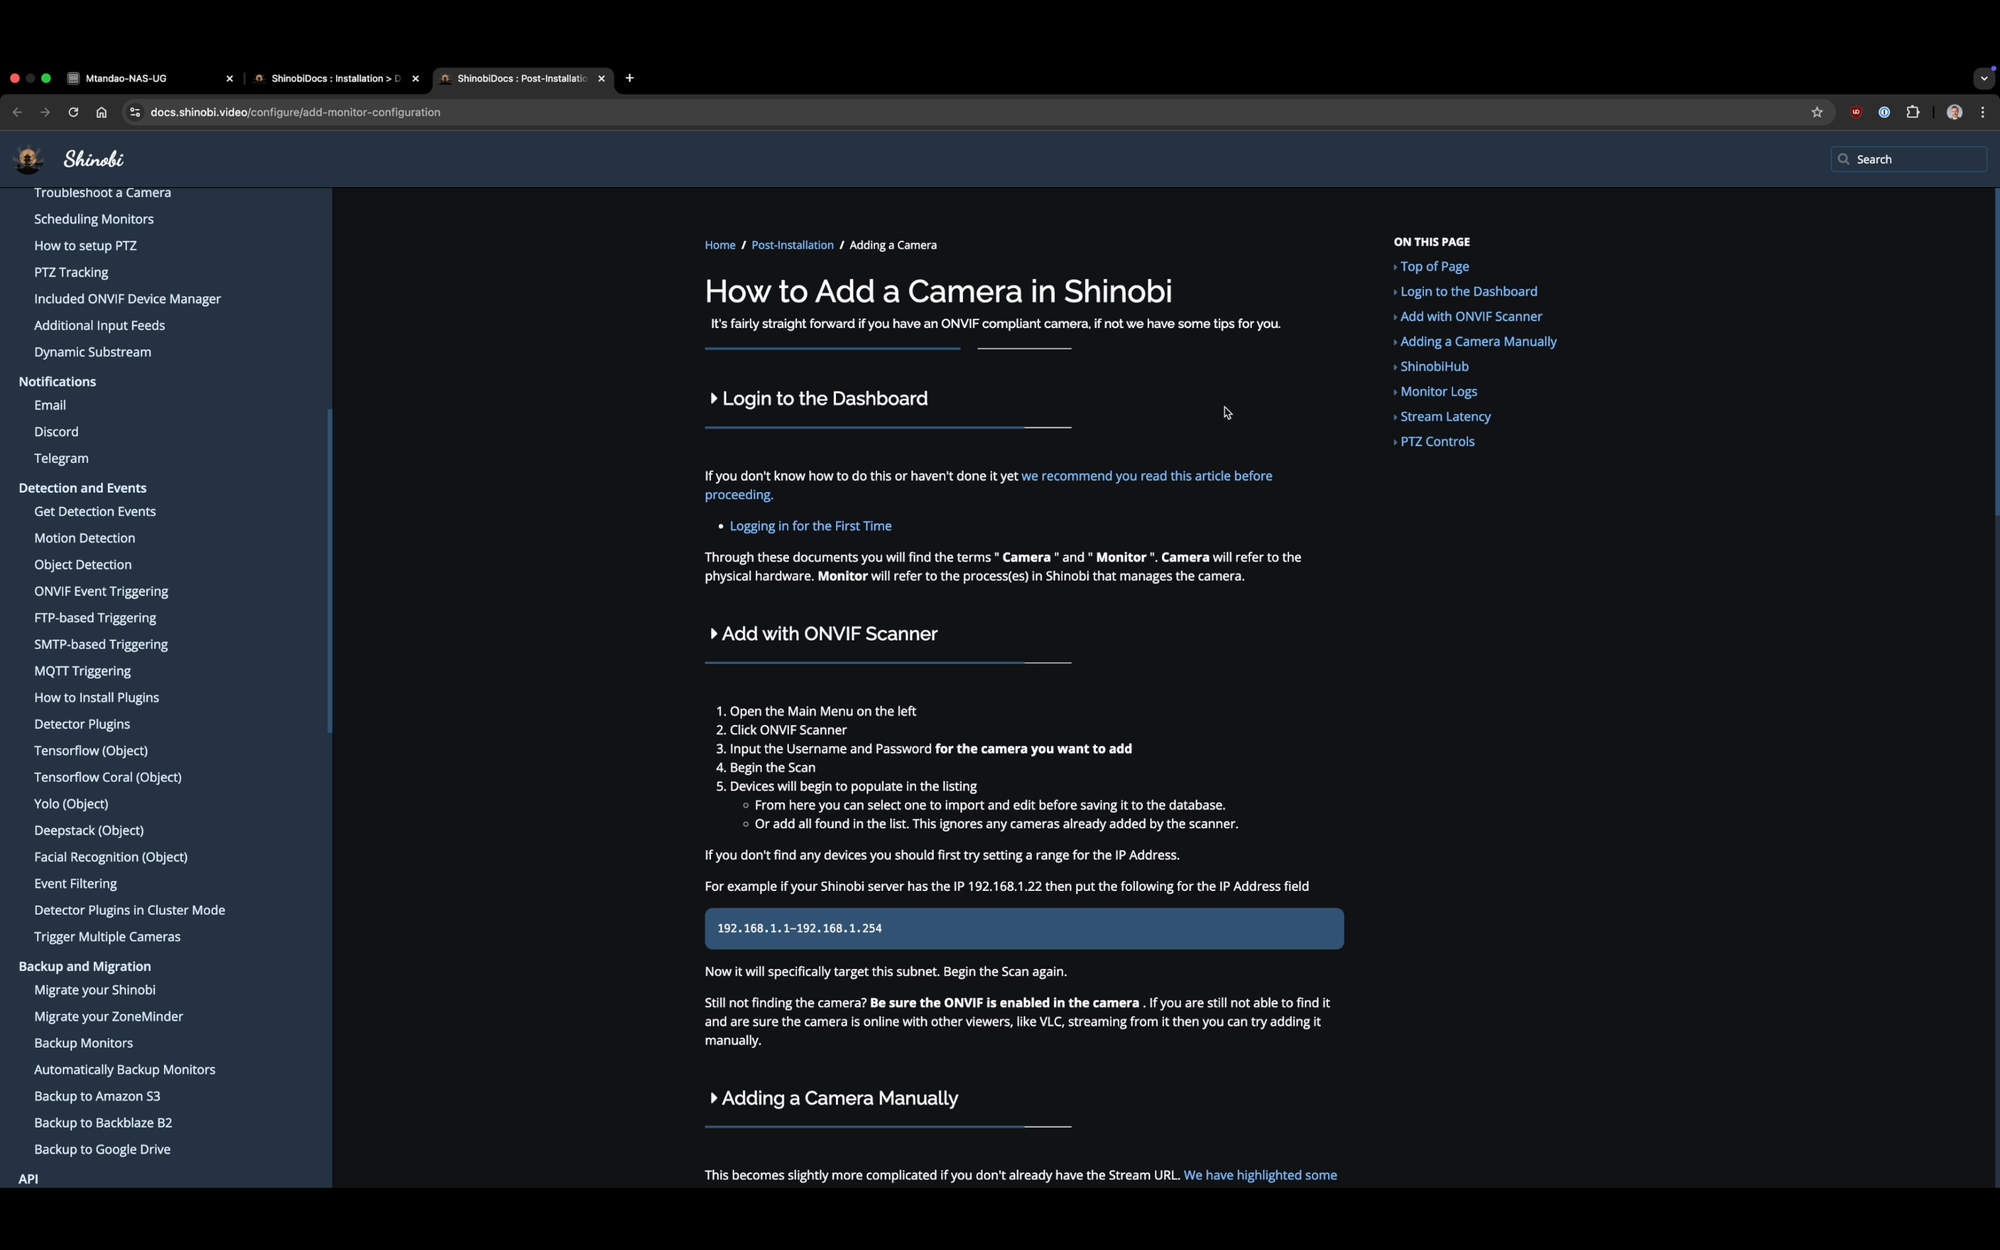
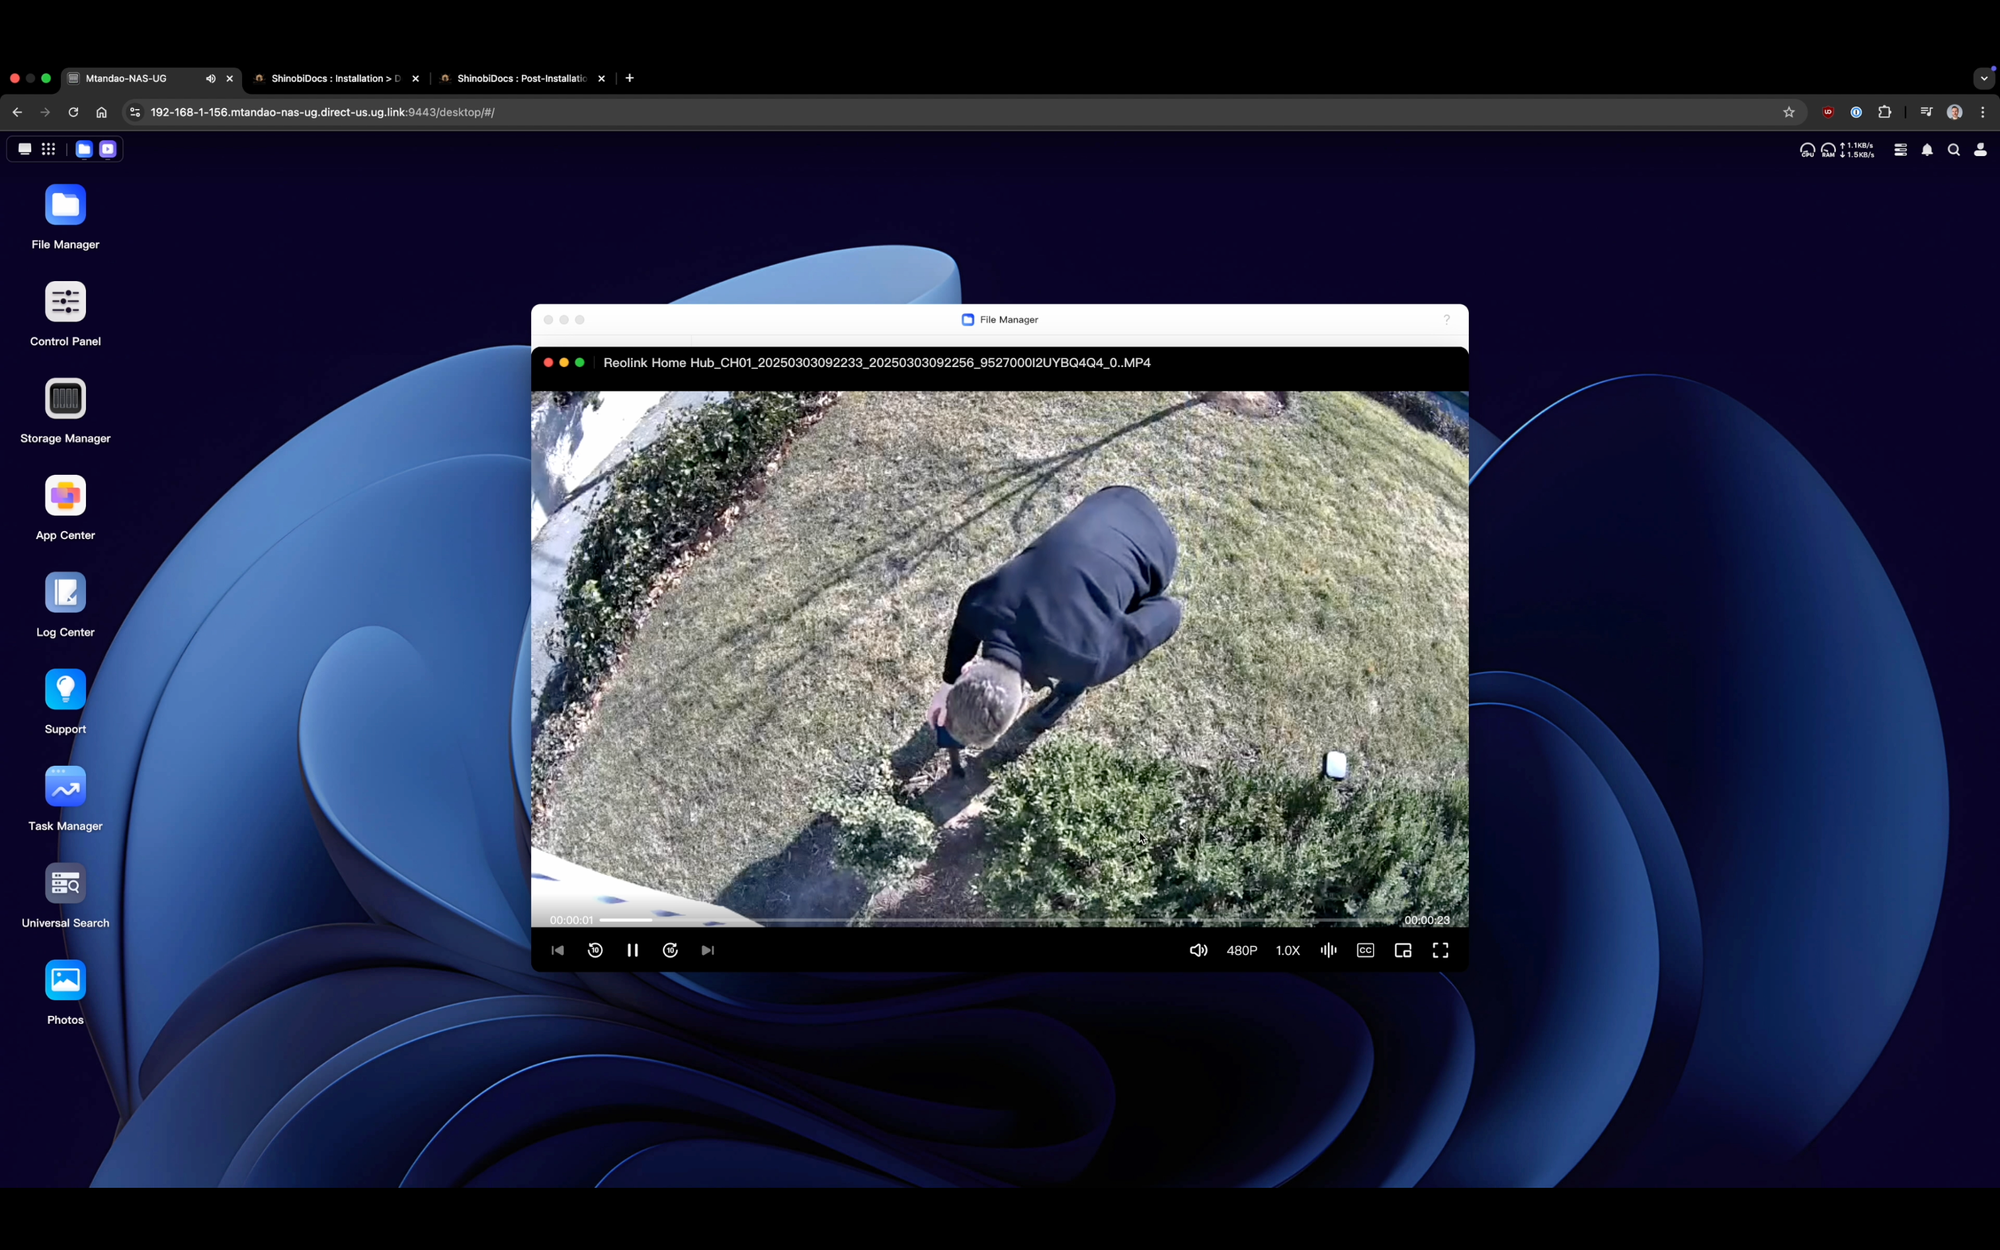
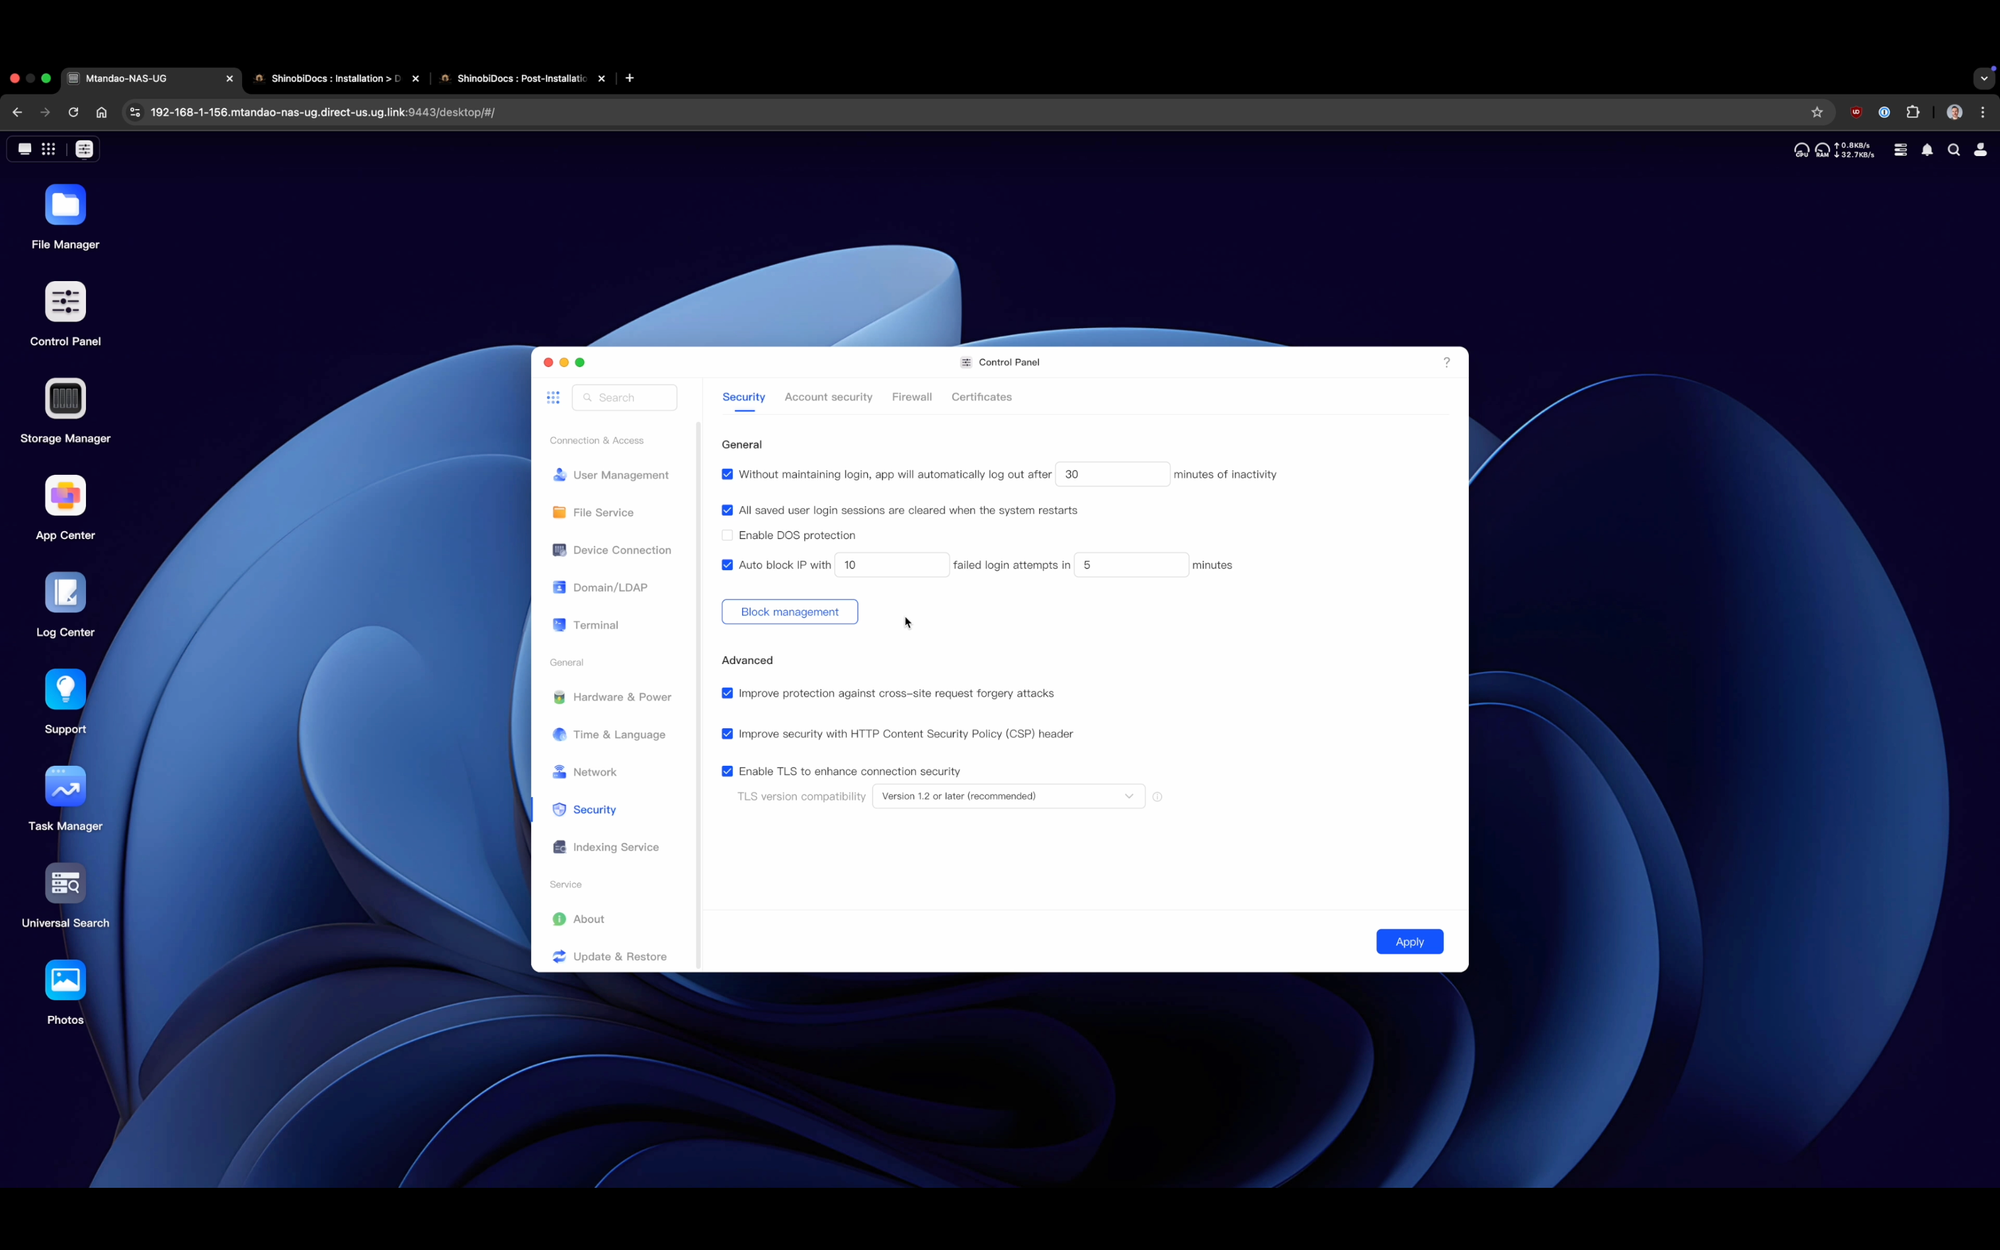
You can also use Docker on NAS as a network video recorder, or NVR, for managing your security camera recordings. This means you can view surveillance images in real-time, and playback stored content from anywhere. To keep your data safe, you can use the built-in Security Manager to configure your account protection, including two-factor authentication and firewall.
UGREEN NASync DXP4800 Plus Network Attached Storage: Exploring apps
Final Thoughts
There is a lot you can do with a 4-bay NAS, from computer backups, to home entertainment, to virtualization. The UGREEN NASync DXP4800 Plus is one of the easiest NAS devices to get started with as a beginner, without sacrificing storage or capabilities. It is normally $700, but you can get it for a limited 20% off.
What are you using for network storage? Let me know down in the comments.
Watch on YouTube
Featured Tech
To celebrate World Backup Day, you can save 20% on the UGREEN NASync DXP4800 Plus NAS from March 25-31, 2025!
UGREEN NAS DXP4800 Plus (USA, 20% OFF until 3/31): https://amzn.to/4ho2OSn
UGREEN NAS DXP4800 Plus (CA, 20% OFF until 3/31 ): https://bit.ly/4itJDYN
UGREEN NAS Series (20% OFF until 3/31): https://amzn.to/4izVzYs
World Backup Day discounts (up to $300 OFF): https://ugreen.pxf.io/kOMv4V