Solar Energy: REAL Cost, Process, and Performance at Home
My experience with home solar energy after six months, including the exact process, timeline, setup, cost, and impact on our electricity bill.
Introduction
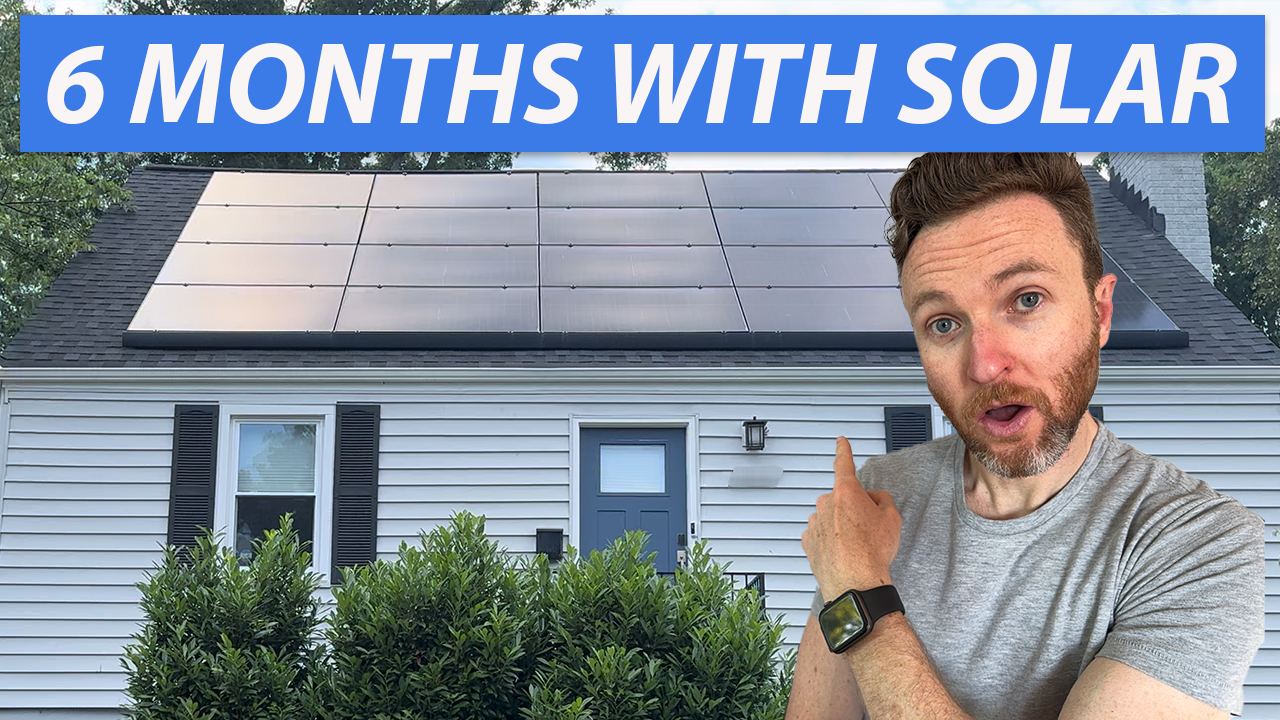
Toward the end of 2023, we installed solar panels on the roof of our home. With over six months of usage, I thought I’d share my experience setting up solar, the actual cost, and how it’s performed compared with expectations. I’ll describe the process and timeline, our exact setup, how much we paid, and how it’s impacted our electricity bill. I’ll also show how I’m monitoring both our solar production and consumption in my home using Home Assistant.
Main Points
Motivation
We switched to solar for three reasons: First, solar is a clean energy source that doesn’t produce greenhouse gas emissions. Second, solar can save money on energy bills over time. And third — though not a primary motivation — solar can increase a home’s value by 4% on average.
Process
There are at least three paths to going solar:
- You can design and install everything yourself, so the DIY approach.
- You can hire a local installer to design and install your system.
- You can join a solar co-op, like we did.
A solar co-op can take longer since it requires coordination among hundreds of participants, and you may not get to pick the installer or hardware. But, because it leverages the power of group buying, you can save a lot — up to 20% in our case. For that reason, and based on several recommendations from folks in our area, we went with a solar co-op.
Here’s a rundown of the steps in the process, and our exact timeline to give you some context.
The solar journey formally began for us on May 18, 2023 when we registered for our local co-op. This was completely free, with no obligation to continue — we could drop out at any point prior to signing a contract with an installer. Solar co-ops tend to run on cycles, meaning there may not always be one available to join, and they may not be available everywhere.
About six weeks later, the co-op organizer selected the installer after reviewing numerous proposals. Our installer was Solar Energy World, and they are one of the larger solar installers in our area.
About a month later, we received our personal offer, which estimated the size and cost of our solar system based on information that I previously provided. Within a few days, Ashley and I accepted that offer. We were still not obligated to pay for the system at this point.
Ten days later, I met in-person with the individual assigned to be our solar advisor. During that meeting, we reviewed a more detailed proposal based on their offsite analysis and inputs that I provided, including a copy of our most recent electricity bill. The next day, we signed a contract.
At the end of August, the installer came out to do a site assessment to validate the technical feasibility, and to take photos of our roof and property using a drone. These photos helped engineers build the final plans for our solar array.
Two weeks later, I received updated designs based on this site assessment, and one month after that they crew came out to perform the actual installation.
The install took two days. As I recall, we had about four people at the house on the first day, and two the second day. On the first day, they put up at least half the solar panels on the roof, and fully completed the installation of the inverter outside our home, including wiring to the main electrical panel in our basement, and grounding the system. The remaining panels were put up and completed on the second day, October 13.
On November 3, a county official inspected and certified our solar system. But…we still could not turn on the solar. To do this, we needed our utility company to upgrade our electrical meter to support net metering.
Net metering is a policy in which the surplus power generated by our solar system that is then transferred onto the grid offsets the cost of any electricity that we draw from the utility.
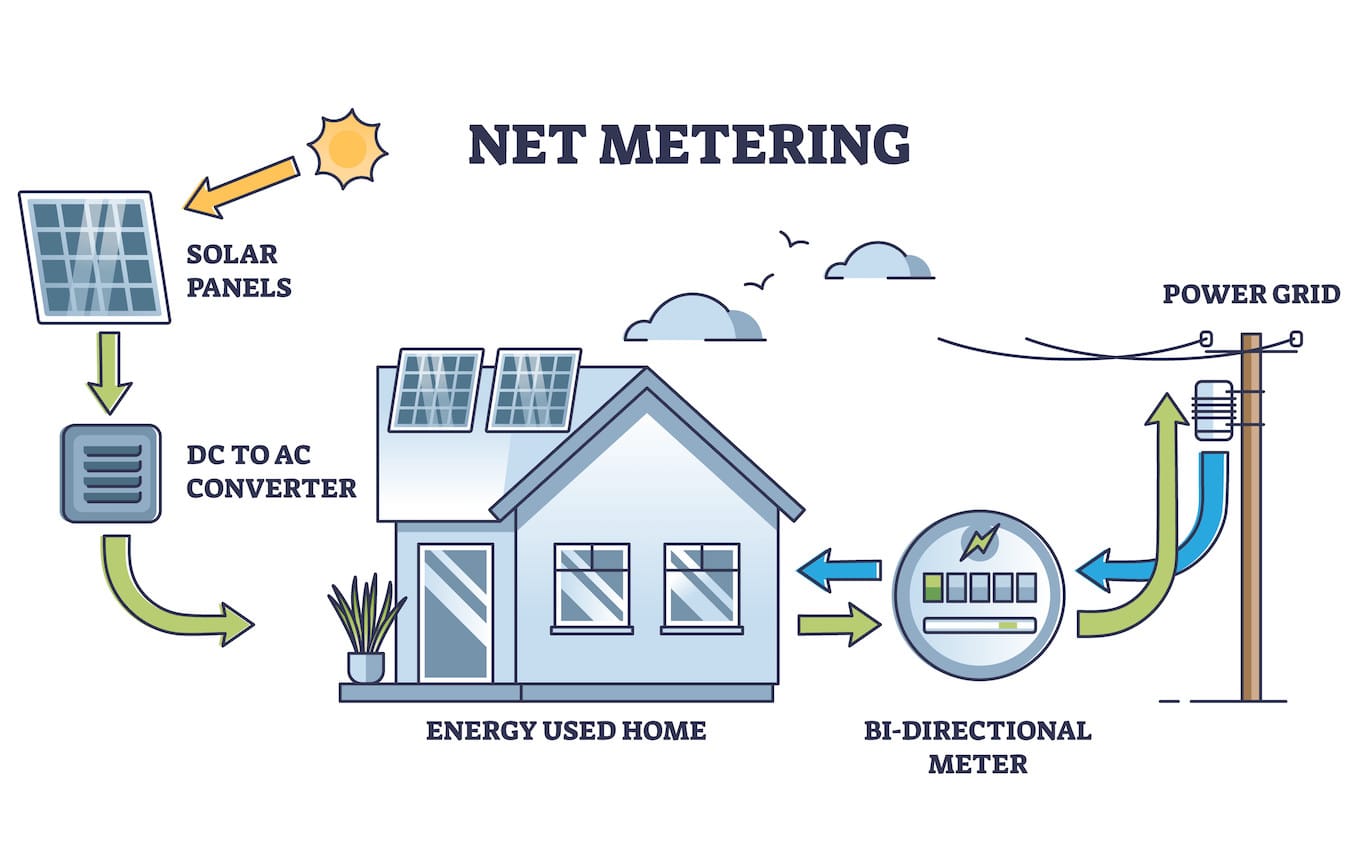
For example, let’s say our home uses 500 kWh of electricity in one month, but in that same timeframe our solar produced 750 kWh. Since we don’t have battery storage, the surplus of 250 kWh is transferred onto the grid. If one month our electricity consumption exceeds our solar production — which is more likely in the winter months — then that excess electricity usage is offset by any surplus energy generated by our solar. This is how you can eliminate your electricity bill even without battery storage. However, net metering policy can vary by location, so find out how it works where you live.
Now, our utility is required to perform the net metering upgrade within 30 days…but over six weeks passed before it was completed and we finally received permission to operate. However, I am confident it would have taken much longer had I not intervened. Since the utility company did not meet the 30-day window, I contacted them, but they basically told me there was nothing they could do to expedite. So, I then contacted the state commission and my local representatives asking for their support. Coincidentally — or not — the next day I received word that the utility would perform the upgrade.
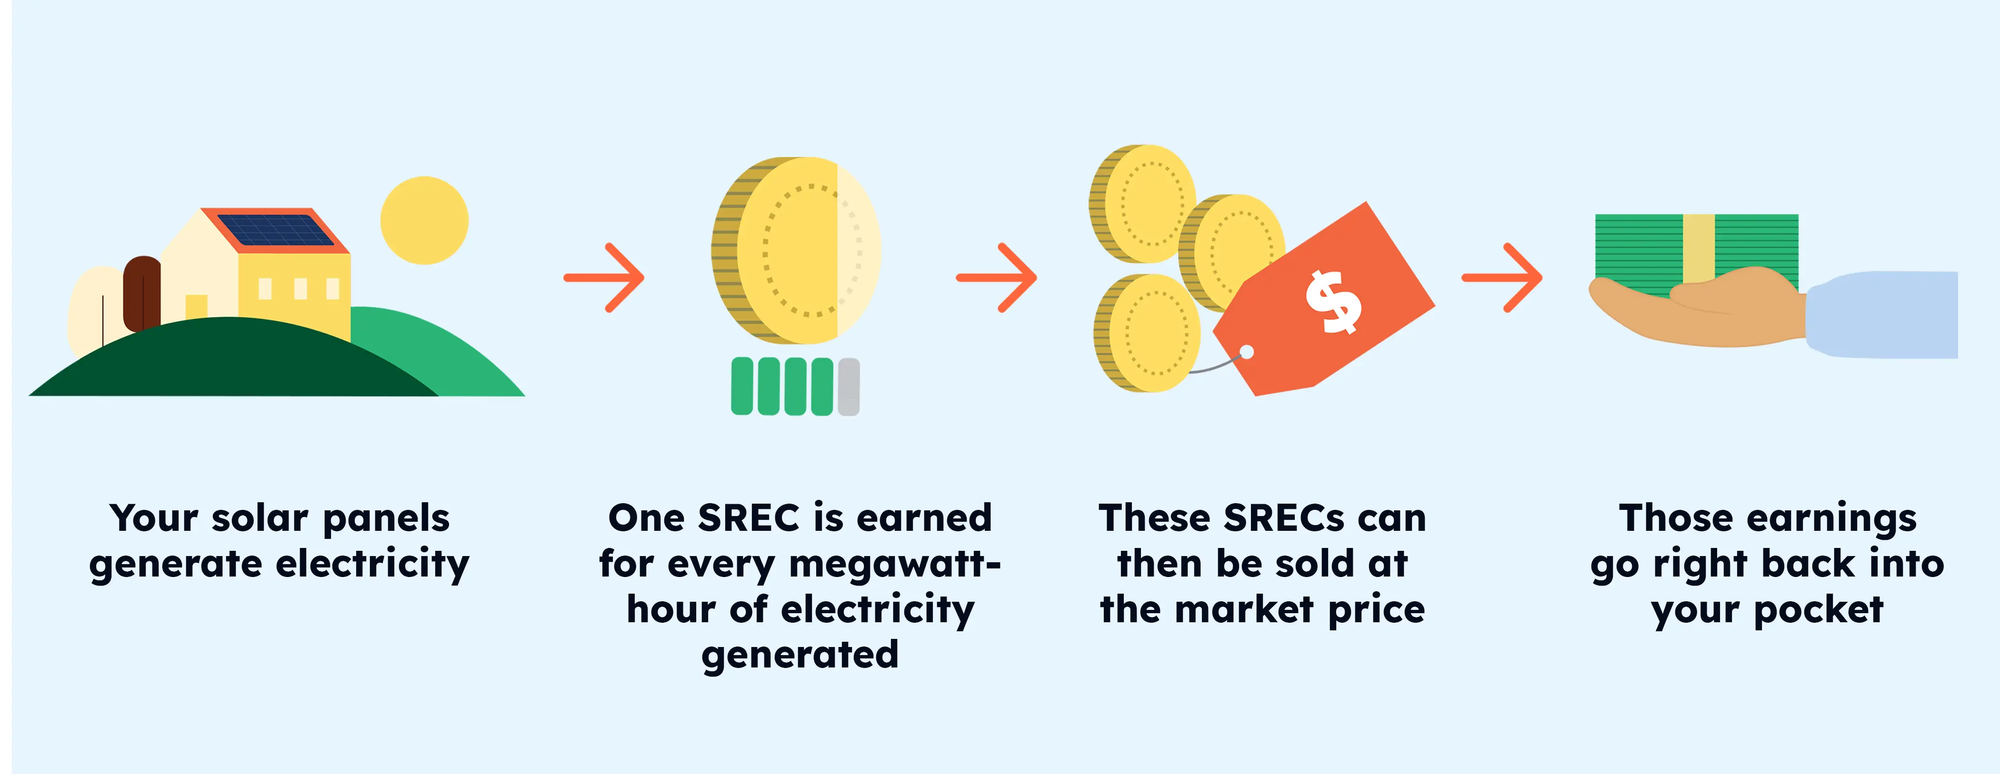
With that step behind us, we had our first day of solar production on December 20, 2023, seven months after we registered for the solar co-op. In early February of 2024, we signed a Solar Renewable Energy Credit, or SREC, contract. We earn one SREC for every 1,000 kWh of electricity produced by our system.
These SRECs are then sold, generally to utility companies, who must meet certain sustainability requirements. Since SRECs are bought and sold on the open market, their price fluctuates. Each state also has different renewable portfolio standards that impact the price. For context, we received our first SREC payment of $33 at the end of May, and our SREC payments are sent to us 2 months after the period when the SREC was earned.
| Date | Milestone |
|---|---|
| 5/18/23 | Registered for solar co-op |
| 6/26/23 | Co-op selected the installer |
| 7/25/23 | Received personal offer |
| 7/30/23 | Accepted personal offer |
| 8/10/23 | Met with solar advisor |
| 8/11/23 | Signed contract |
| 8/30/23 | Site assessment conducted |
| 9/15/23 | Received updated design |
| 10/12/23 | Began solar installation |
| 10/13/23 | Completed solar installation |
| 11/3/23 | Passed solar inspection |
| 12/19/23 | Received permission to operate |
| 12/20/23 | 1st day of solar production |
| 2/8/24 | Signed SREC contract |
| 5/31/24 | 1st SREC payment |
Cost
Alright, so how big is our solar system, and how much did it cost?
Our system is comprised of 20, 390-watt panels with SolarEdge power optimizers arranged in a rectangle on our front roof facing east. This 7.8 kW system is projected to generate 7,082 kWh annually, which is enough to offset all the electricity that our home consumes in a typical year. We decided against adding more solar panels to the rear, west-facing roof since their production would have been reduced significantly by the shade from large trees.
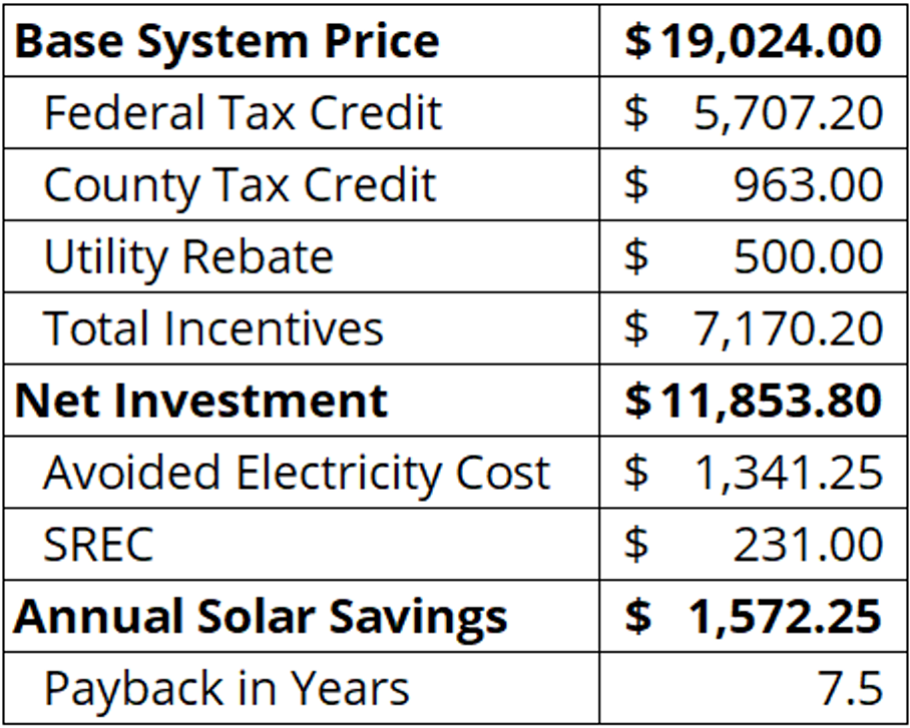
Let’s breakdown the cost of our system, including incentives.
The base price for our system size was $19,024, after a $4,500 solar co-op discount was applied. We benefitted from incentives that reduced this cost by over $7,000, bringing our net investment to $11,853.80. By going solar, we’ll save an average of $1,341.25 annually, and also benefit from ongoing SREC sales. Combined, these annual savings suggest our system will pay for itself in 7.5 years.
Performance
But, is our system actually on track to achieve this?
Yes, in fact, we are on track to do even better. This plot looks at how much solar we actually produce monthly — represented by the blue line — compared with how much it was expected to produce — represented by the orange line. Aside from January, our system has produced more energy than expected each month. Through June, we are exceeding forecasted production by +22.7%.
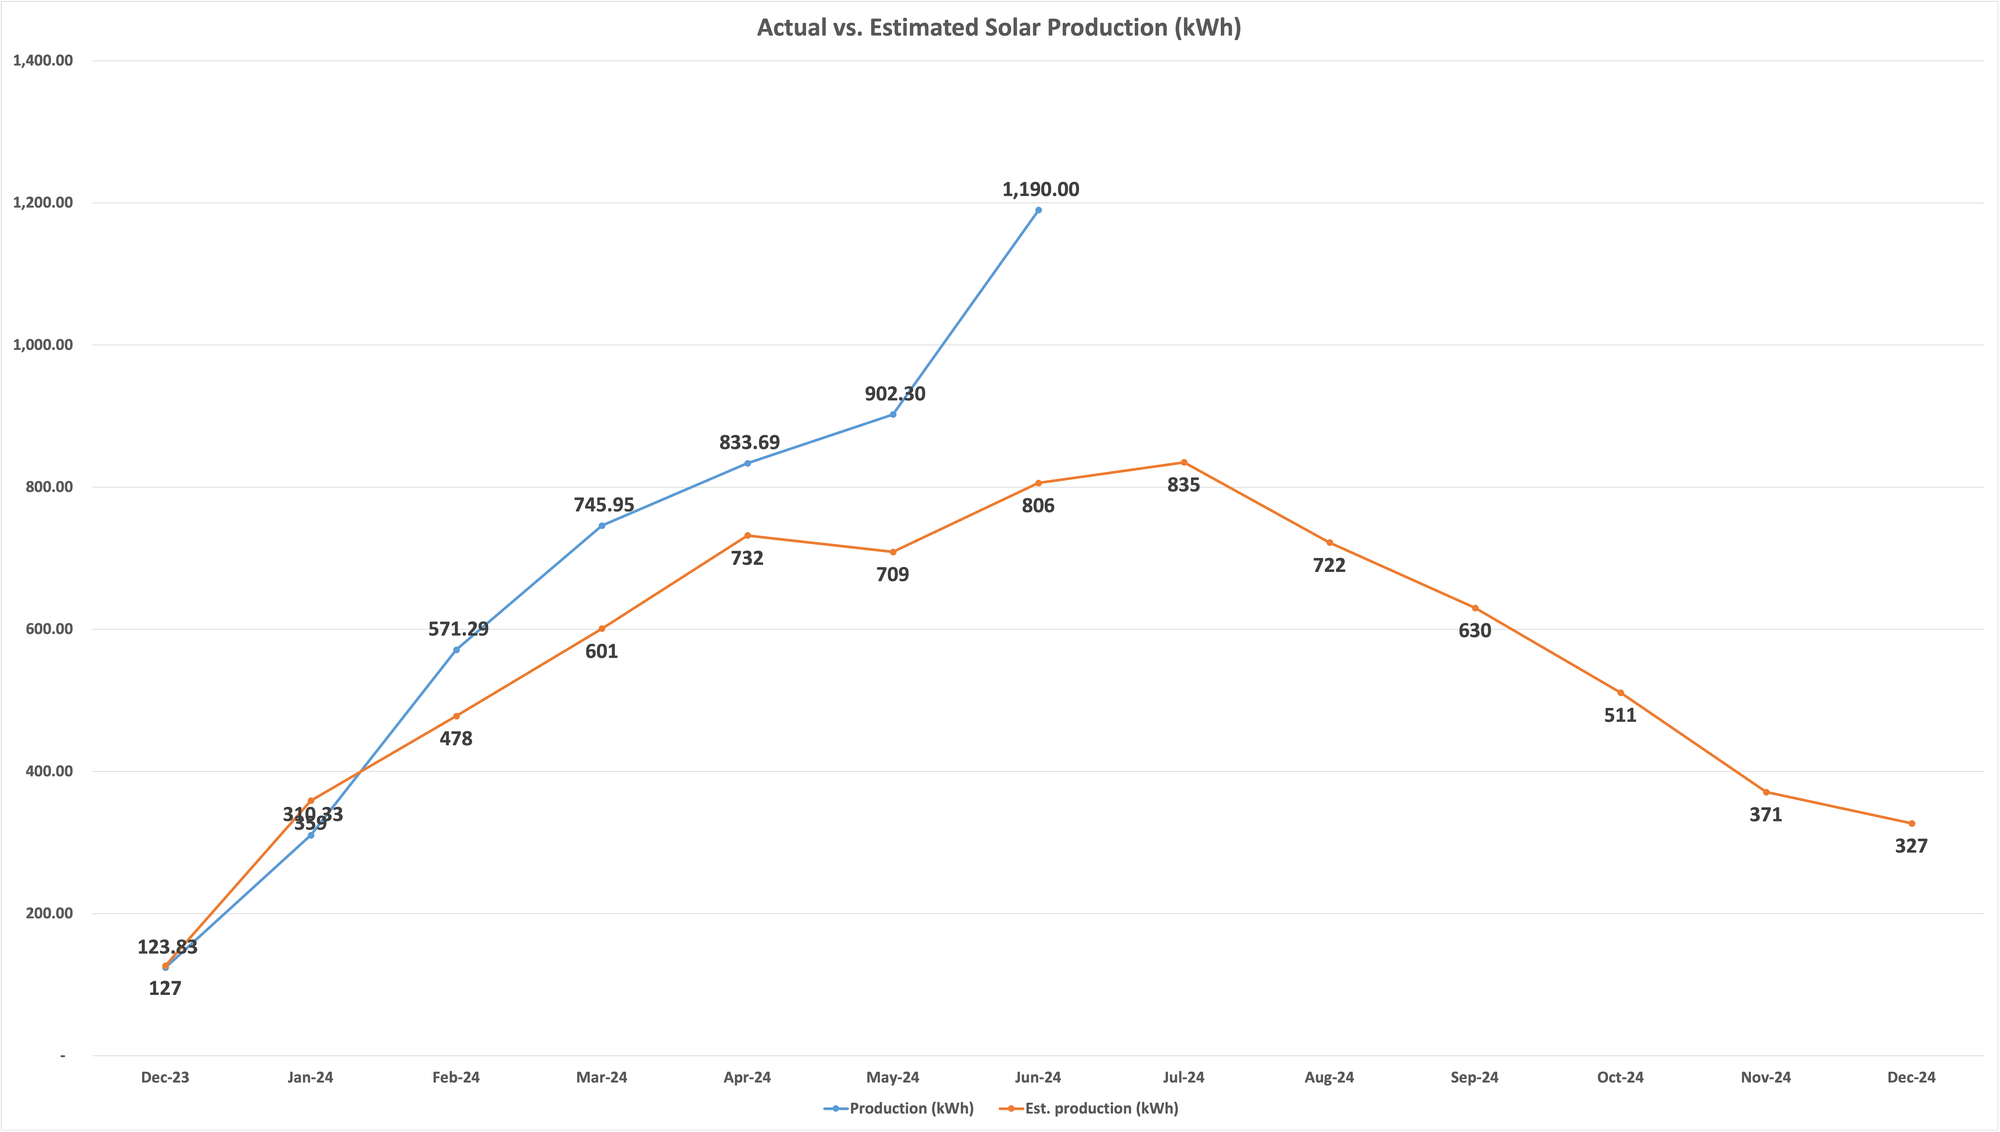
We have had $0 electricity bills with this system up and running, with surplus production offsetting anything we pull from the grid through net metering. Since we don’t have battery storage, our house still pulls electricity from the grid since solar is not producing energy 24 hours per day. Our solar array faces east, so our solar system produces the most energy in the morning, though it still generates energy even until sunset.
One note though about that $0 electricity bill. Technically, our monthly bills are now $7.58, because that’s the monthly fee that the utility charges no matter what.
Smart Home Integration
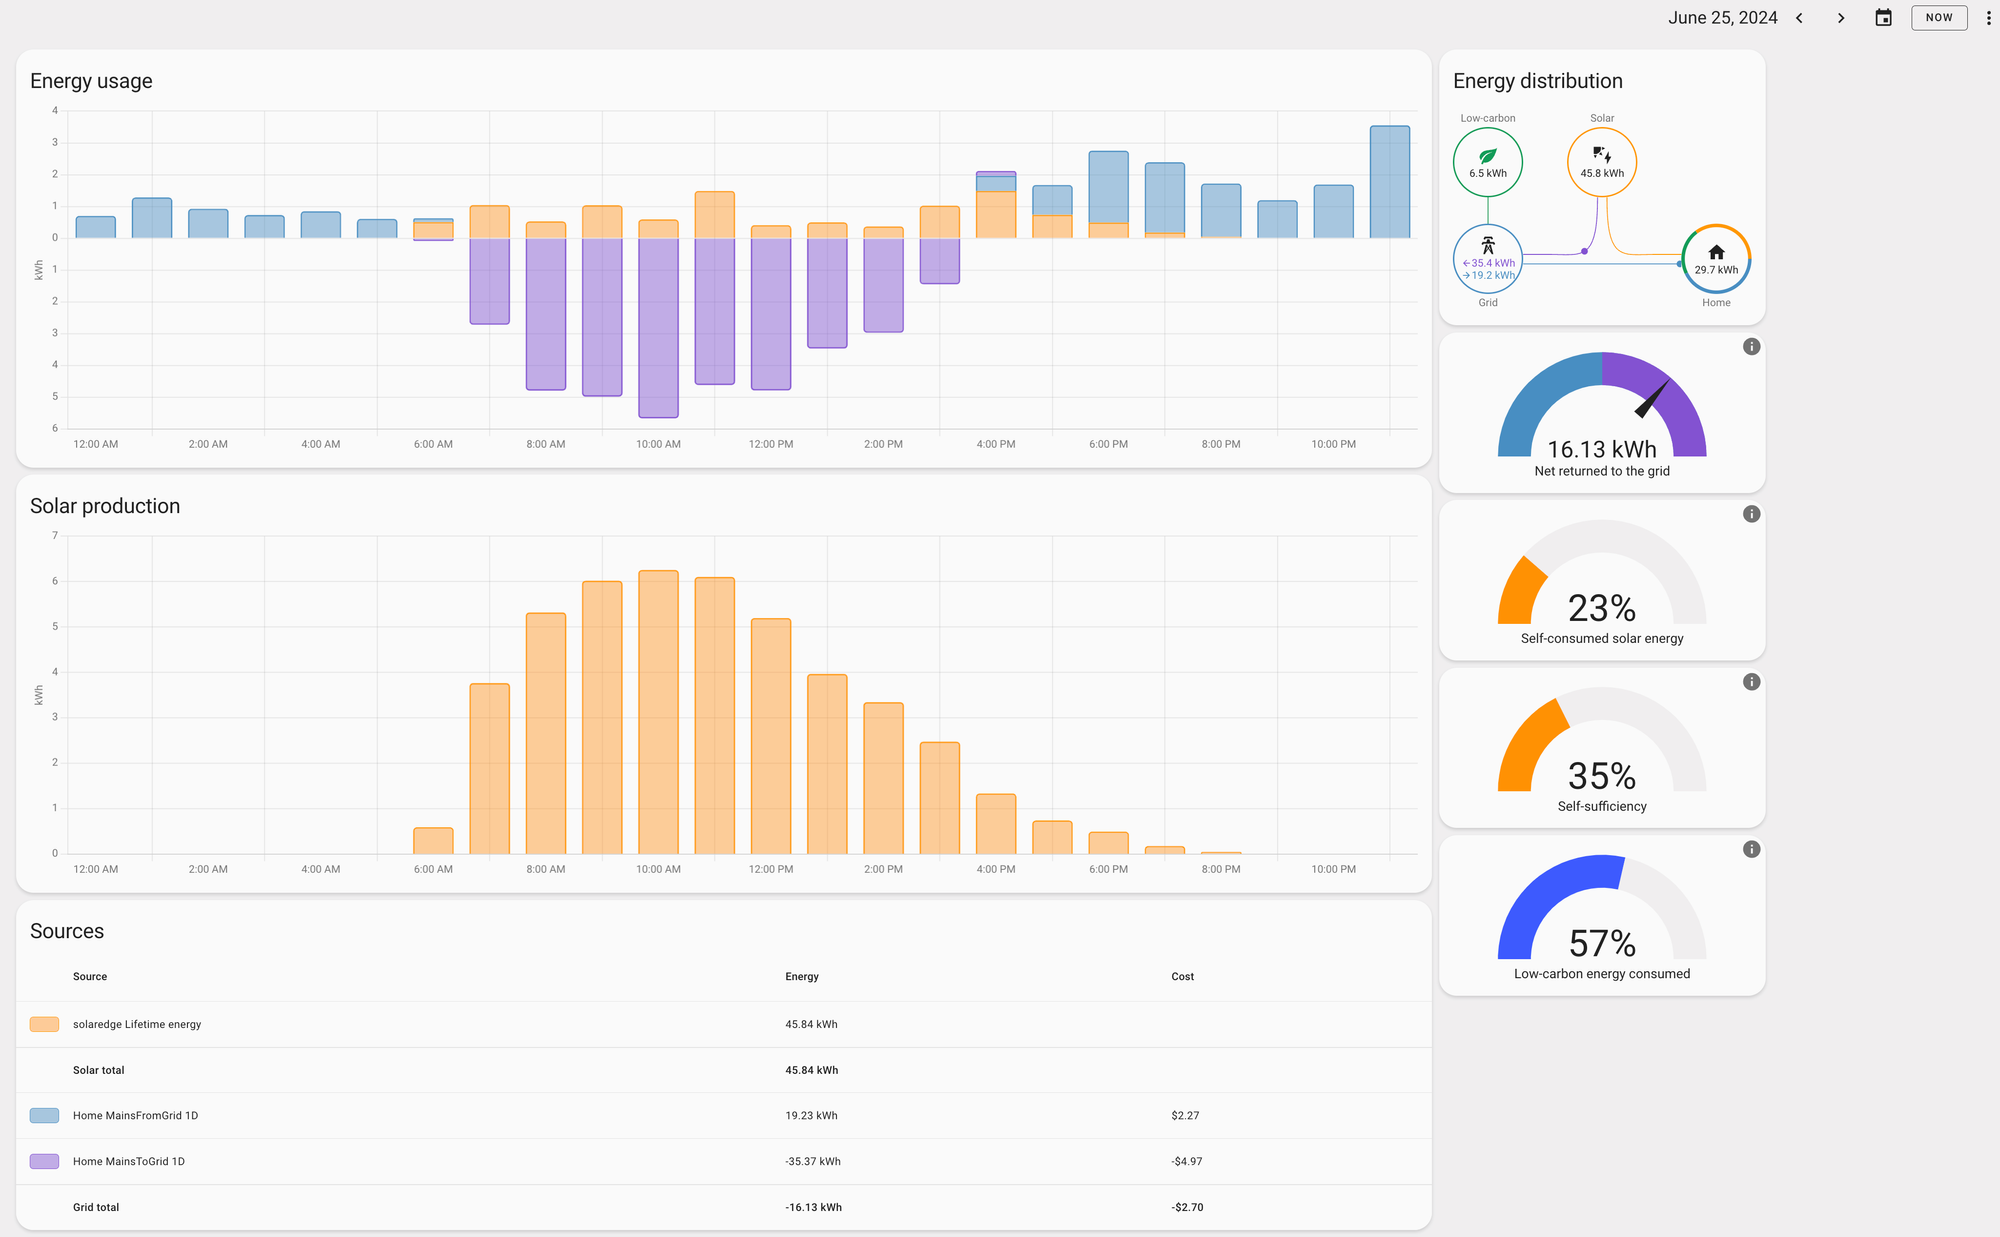
Using data from the SolarEdge inverter coupled with an Emporia Vue energy monitoring system that I installed on our electrical panel, I’m able to measure both the production and consumption of energy in our home.
I have this data visualized in my home automation system, Home Assistant. I can select any time period, and see the inflows and outflows of electricity, track solar production by hour, and understand device level consumption. The visuals help me understand quickly how much of our solar production we’ve consumed, and how much is going back to the grid.
Final Thoughts
After over six months of usage, I’m really happy with our decision to go solar, and with the actual performance that we’re seeing. We saved 20% by going with a solar co-op, and are on track to produce even more solar energy than expected, effectively eliminating our electricity bill. And the SolarEdge integration with Home Assistant makes it easy to track and visualize our real-time solar production.
Watch on YouTube
Featured Tech
Emporia Vue Gen 3 Smart Home Energy Monitoring: https://amzn.to/44csnAC