PRECISE Presence Detection: Apollo MTR-1 Multi-Target Radar
Review of the MTR-1 Multi-Target Radar for Home Assistant, including the features, accessories, setup, and recommendations.
Introduction
I’ve talked a lot about presence detection on this channel, calling it the biggest game changer in my smart home. I’ve shown how mmWave sensors can accurately detect if a person is in a room, even if they are sitting still. I’ve also described why this matters: By knowing confidently if anyone is in a room or the house, you can reliably automate routine tasks like turning off lights, changing the thermostat, arming or disarming the alarm system, and much more.
But…what if you could not only know if someone was in a room, but their exact location? You could know if someone was sitting on the couch for turning on a reading light, or at the counter for turning on the overhead lights. I’m going to show how that’s possible using the MTR-1 Multi-Target Radar from Apollo Automation.
Main Points
Features
Let’s take a closer look at the MTR-1, what it is, and what it does.
The MTR-1 is a smart home sensor built for home automations using Home Assistant. Its standout feature is a multi-target, mmWave radar. This can track up to three targets simultaneously across three zones, at a distance up to 6 meters, or 19.6 feet. This ability to track multiple targets in multiple zones is what separates the MTR-1 from a similar sensor by Apollo Automation, the MSR-2 mmWave Multipurpose sensor.
Like the MSR-2, the MTR-1 also has a LUX and UV sensor for measuring the ambient brightness, plus a temperature and pressure sensor. However, unlike the MSR-2, the MTR-1 does not include a humidity sensor. You can also get an optional CO2 sensor though.
In addition, the device includes an RGB pixel and a buzzer. These can be used in home automations as both visual and audible notifications. For example, reminding you to move the laundry from the wash to the dryer by displaying a blue light and playing a beeping sound.
If you live with others and want to know which person is in the room using the Bluetooth on their phone or smart watch, you can use the MTR-1’s onboard Bluetooth tracker.
The MTR-1 must be plugged in to function, and uses a USB-C connector.
Accessories
One of the cool things about Apollo Automation sensors is the available accessories that give you more choice in how you mount and place them.
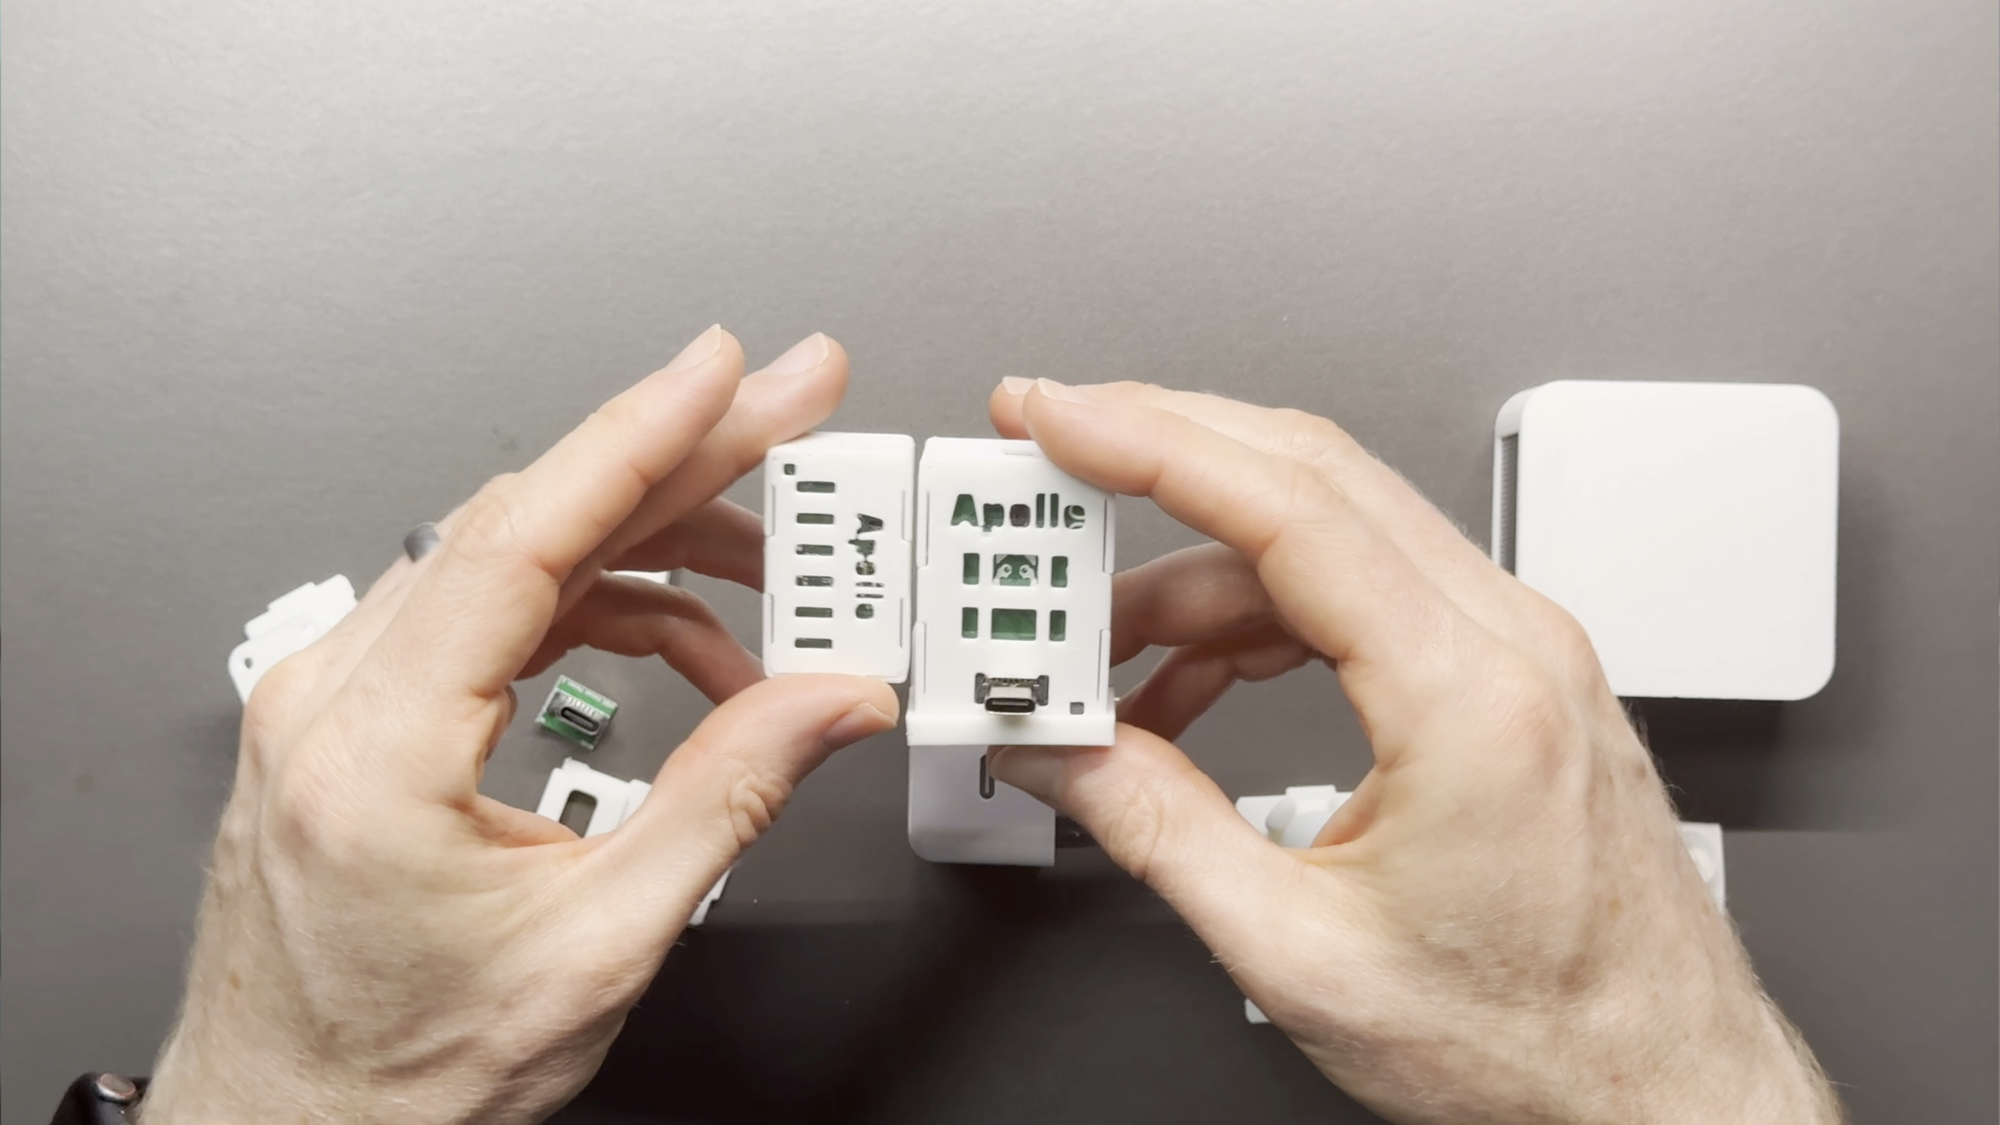
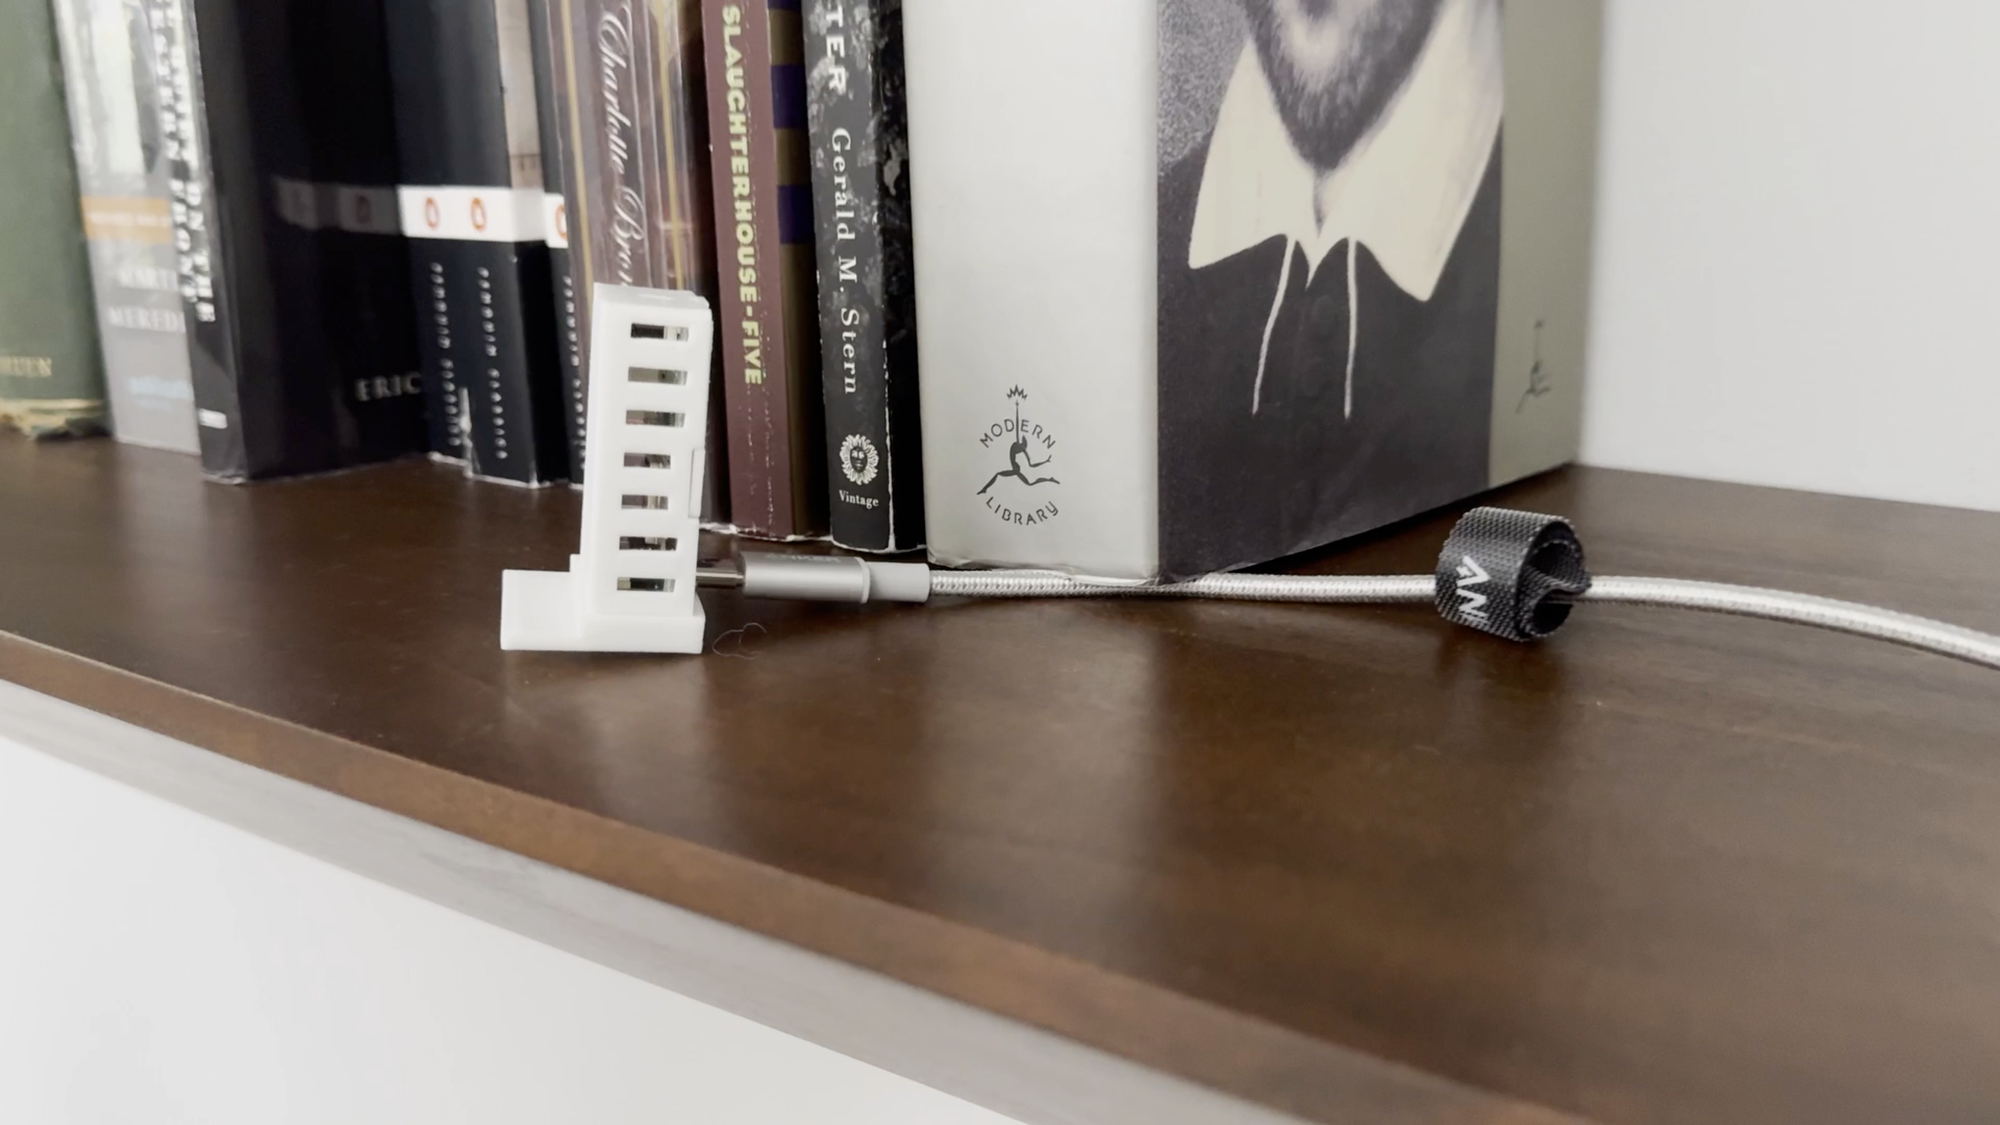
The MTR-1 comes in this 3D printed case, and a little floor stand on the bottom for placing on a flat surface, like a shelf or table. However, you could pick-up a sensor stand, which you can mount to any surface at an angle using the included tape or screw holes. Or, you could get an outlet mount, for plugging directly into a wall outlet. Since mmWave sensors are super sensitive to even subtle movements, placement location is key, so these accessories can help you get the setup right.

Apollo Automation MTR-1 Multi-Target Radar
Setup
Speaking of setup, adding the MTR-1 to Home Assistant follows the same steps as the other sensors from Apollo Automation. And that’s a good thing because they are among the fastest, easiest devices I’ve added to Home Assistant.
Plug the sensor into a power brick. Connect to the device’s WiFi network from your phone or computer. A pop-up screen allows you to select your home’s WiFi network for the sensor to connect with. After entering your WiFi password, open up Home Assistant and go to the Devices & Services page. The sensor is auto-discovered by ESPHome in Home Assistant. Click configure and submit, and the device is added to the ESPHome integration, and ready for use in your home automations. All of this can be done in about a minute.
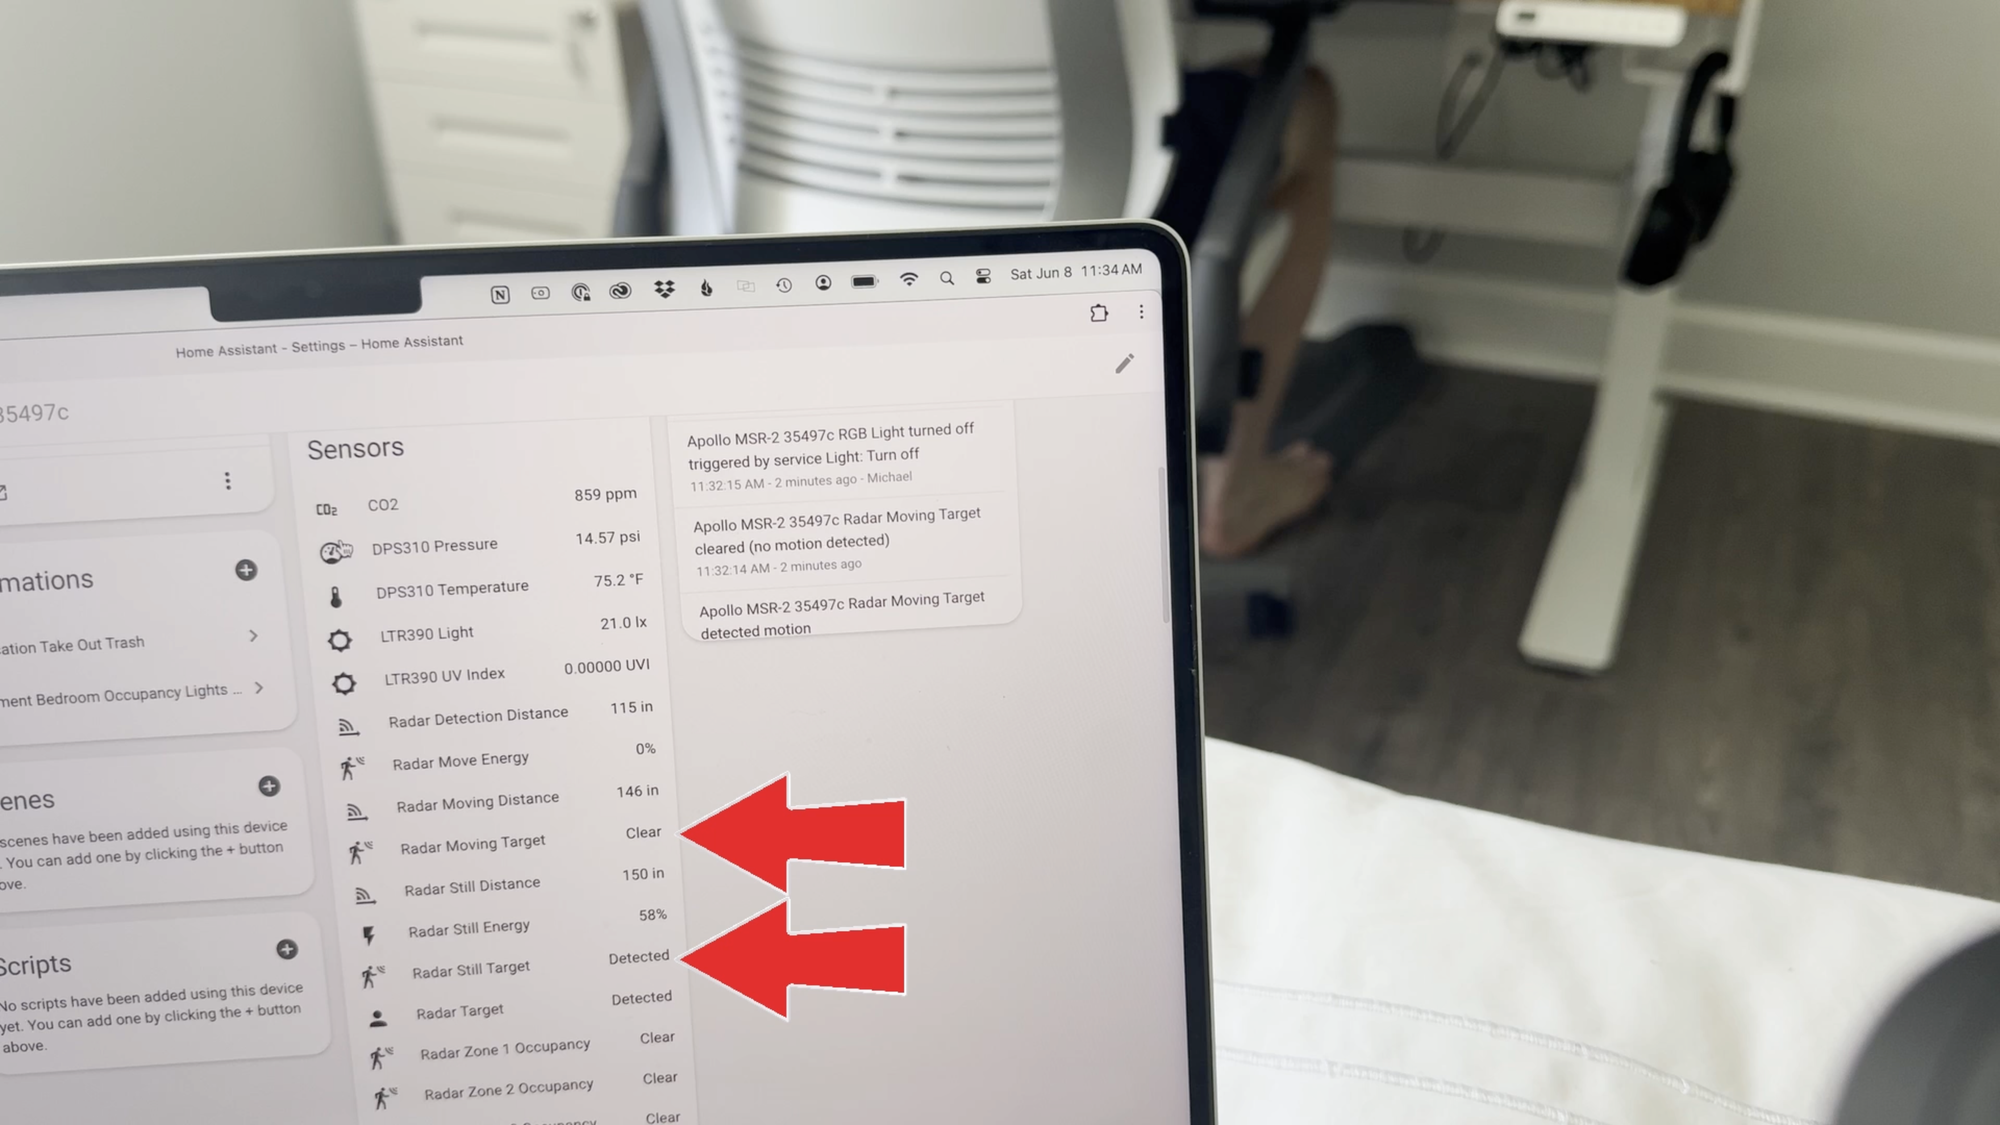
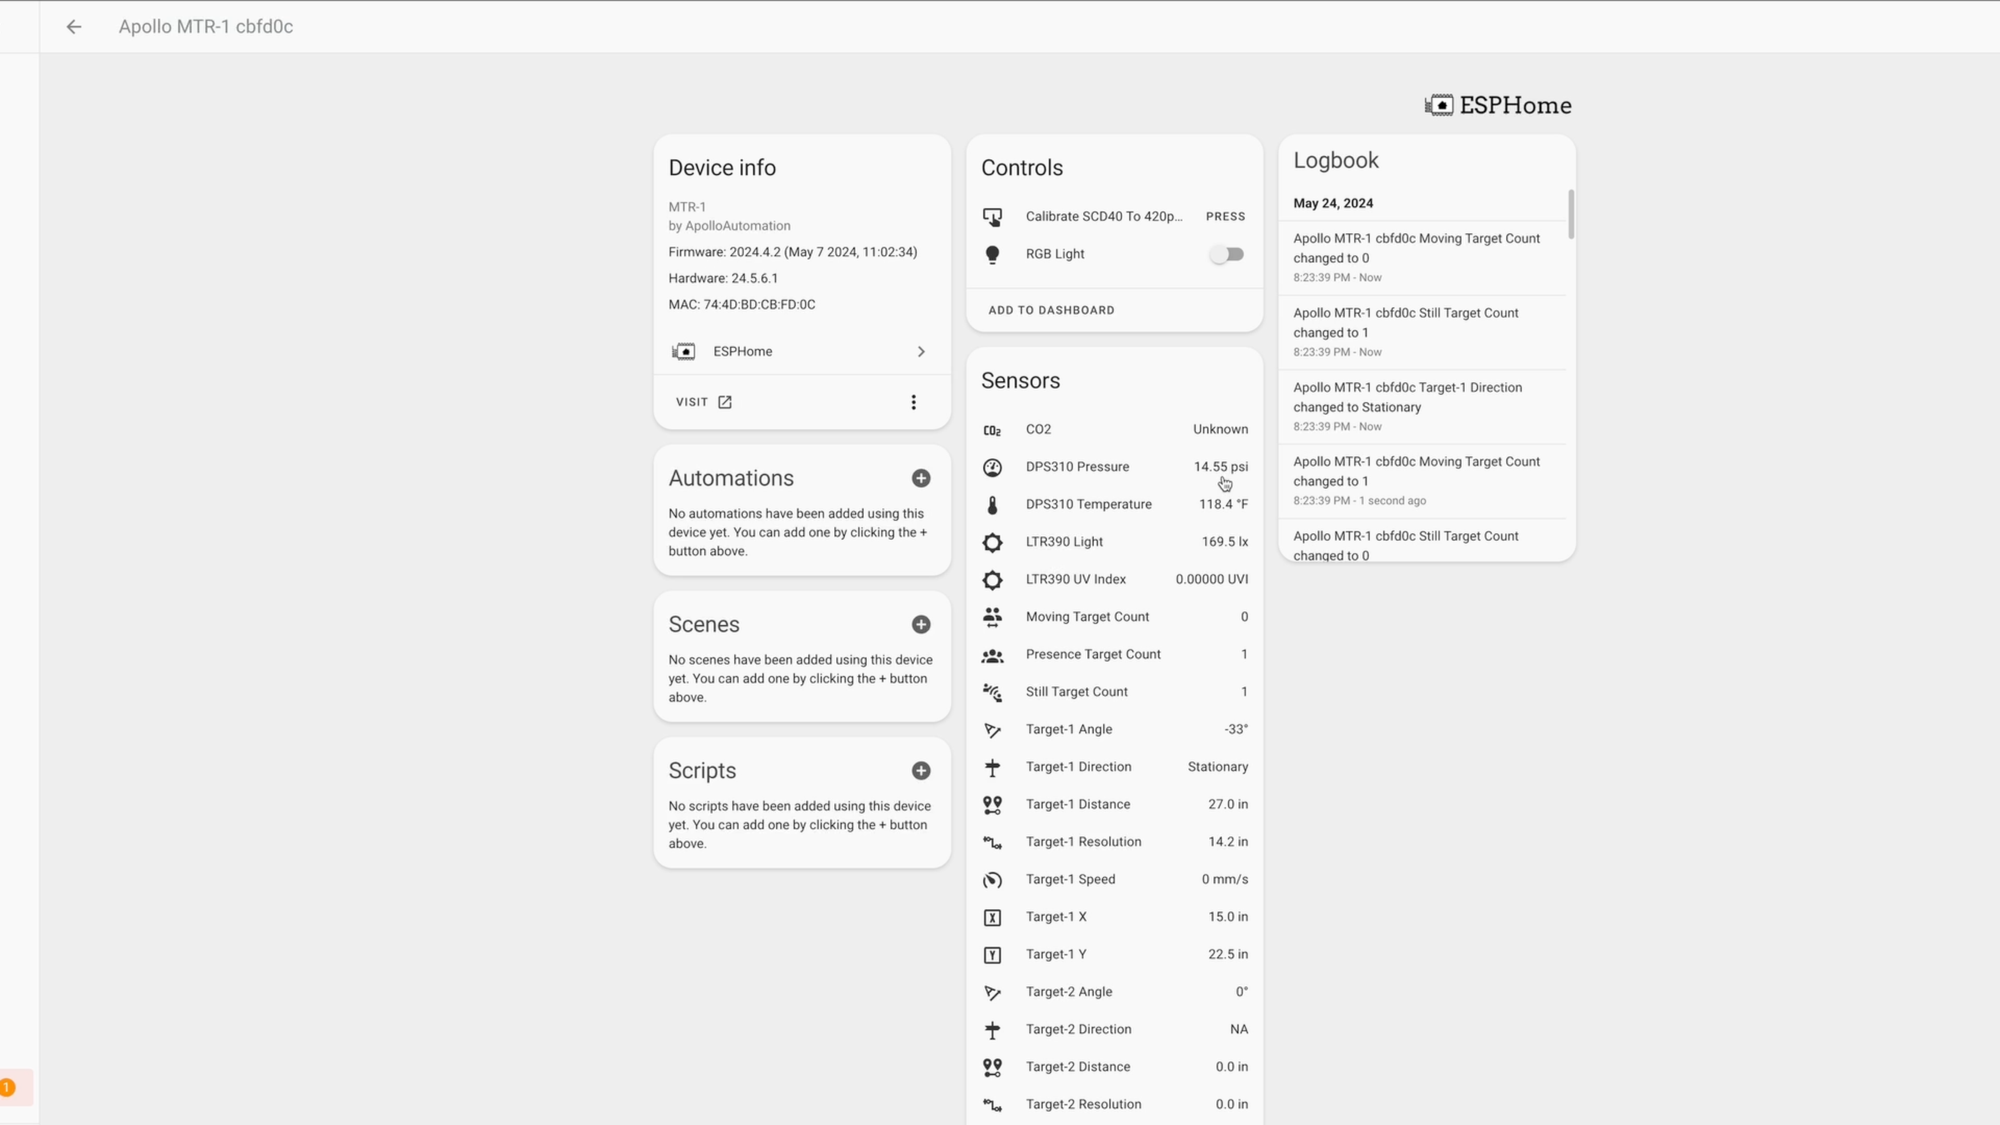
Once setup, you’ll see just how many entities are exposed in Home Assistant. The list is especially long because of the unique, real-time data and configuration possibilities for the multi-zone radar.
By default, the MTR-1 Zone Type was set to Disabled in Home Assistant. This means it is setup to track general presence detection in a room. If you don’t want zone tracking and just want general detection, then you can leave it as is. But, if you want to track presence across multiple zones within that room, you’ll need to configure the zones, and there are two ways to do this.
First, you can enter distance values on the device page in Home Assistant. This requires you to measure how far a desired zone is from the sensor, separate that from other zones, and enter the values manually.
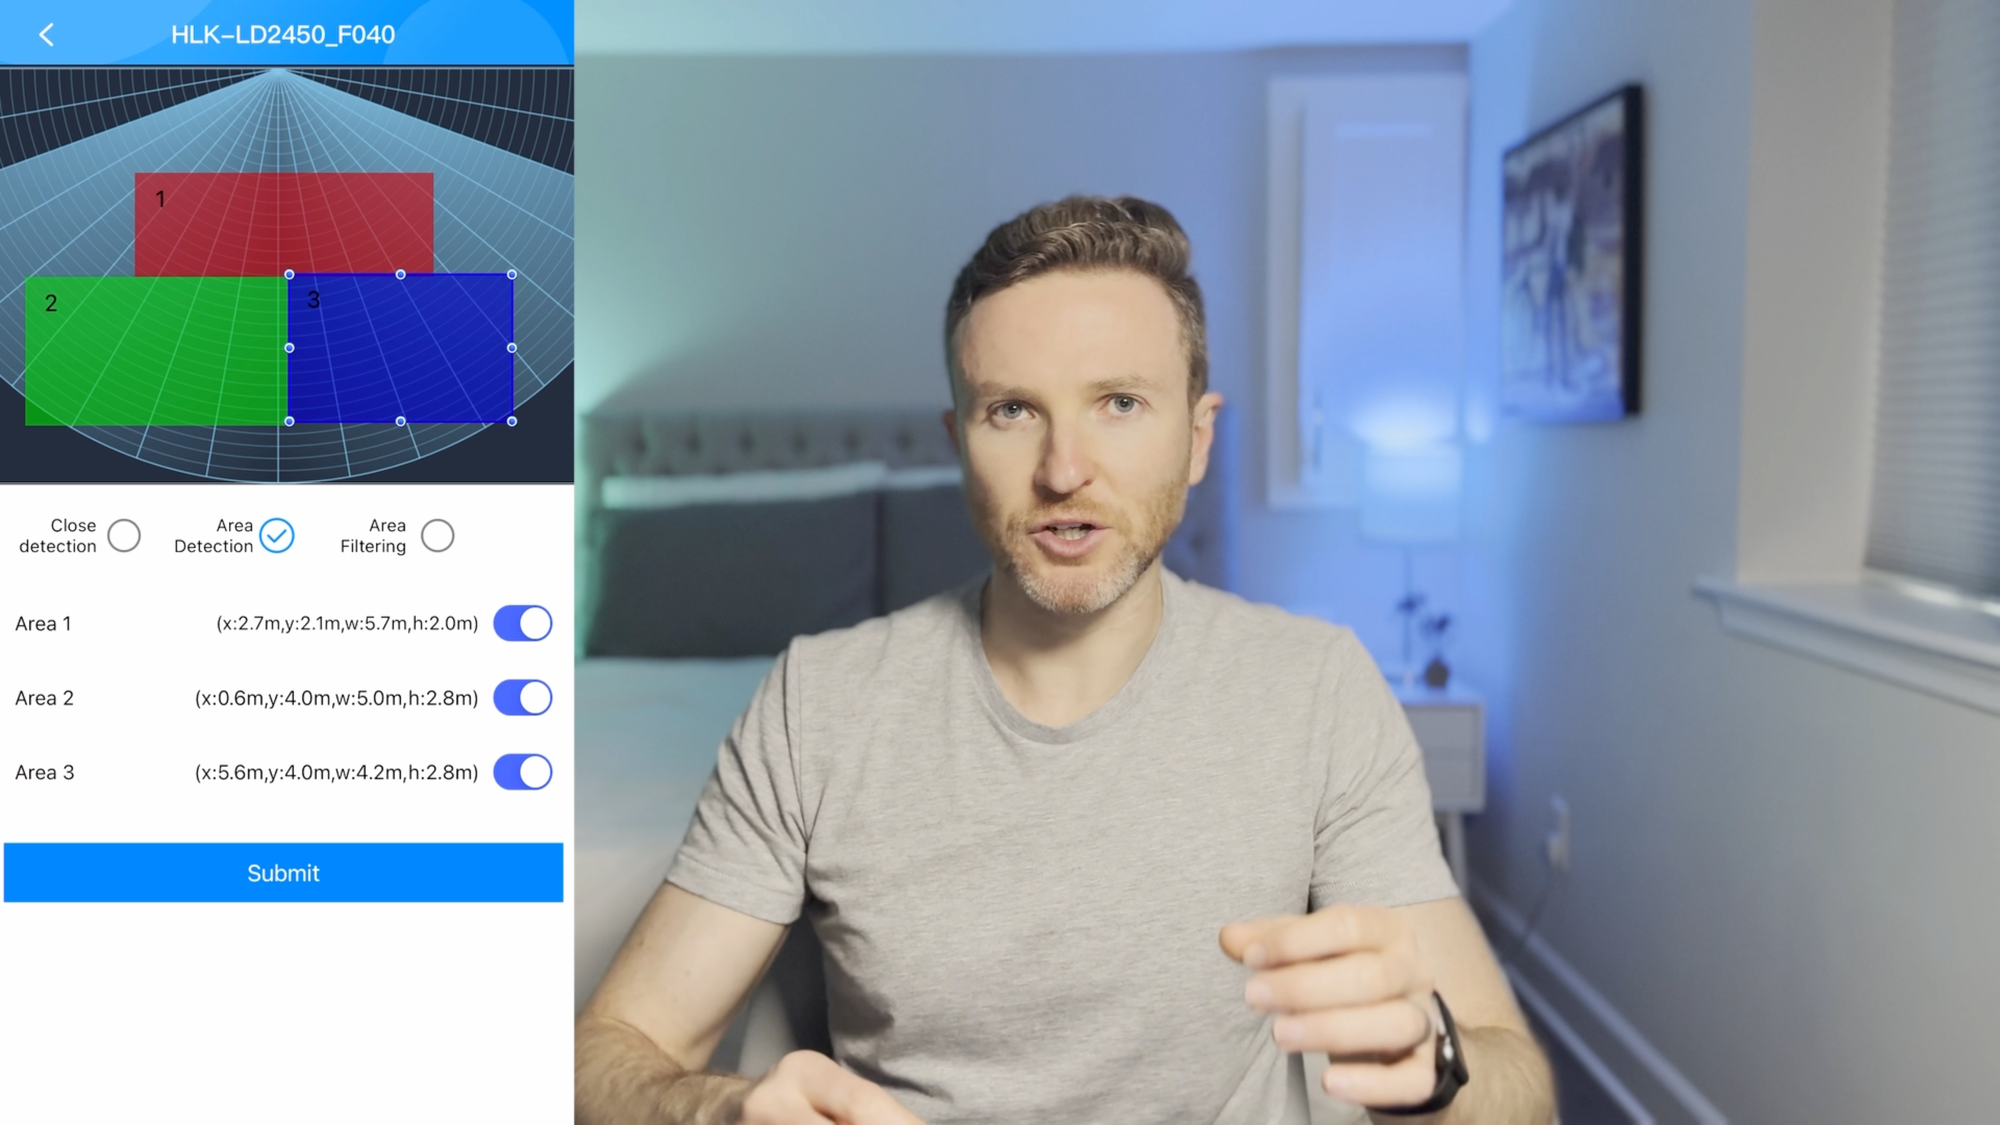
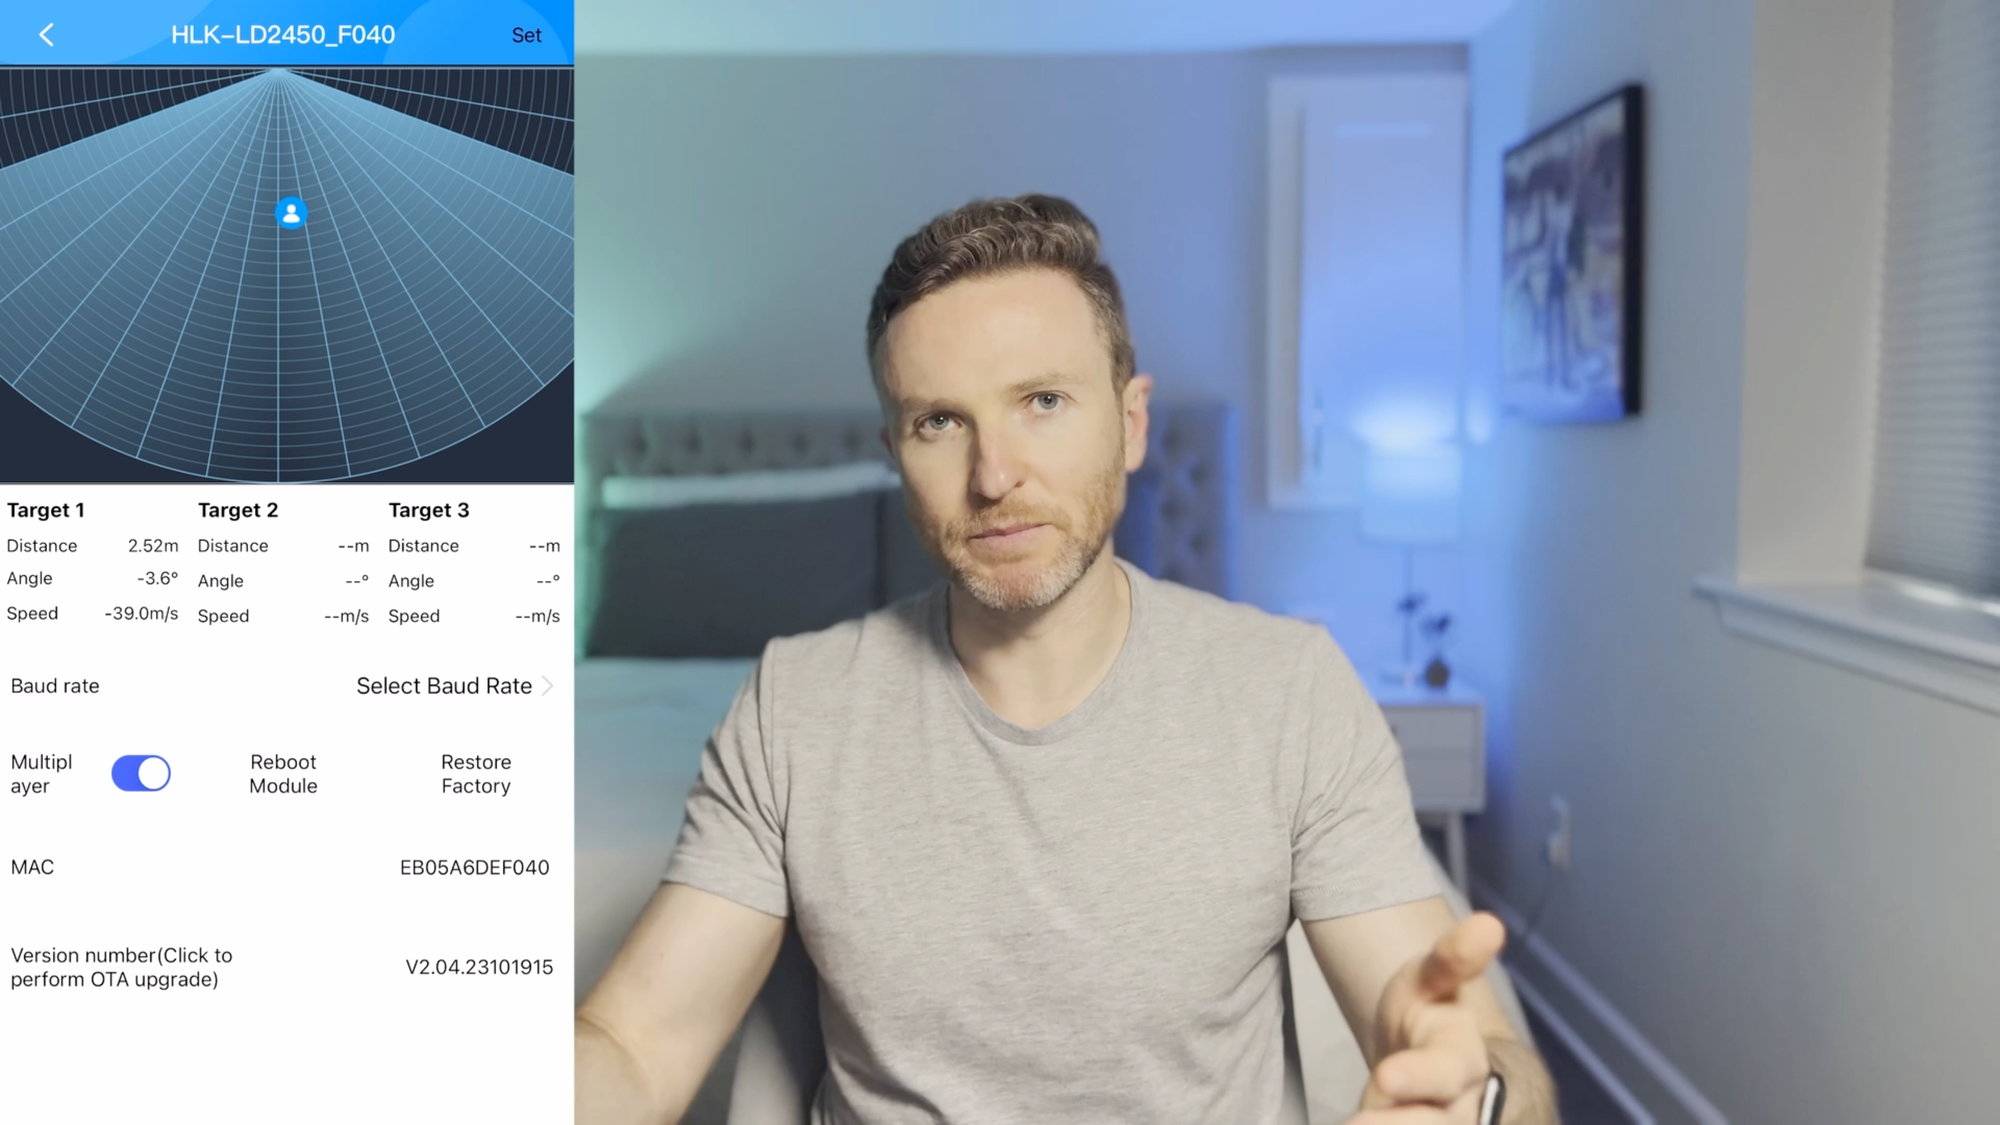
The second and faster method is to use a separate app, called the HLK Radar Tool. I didn’t love the idea of needing another app for zone configuration. However, it simplifies and expedites zone configuration. Just enable Bluetooth mode on the MTR-1 from the device page, and then the HLK tool quickly detects it. From the HLK app, you can drag and re-size virtual boxes with your finger to layout your desired zones, one, two, and three. You’ll want to do this when you are in the same room as the MTR-1, both for the Bluetooth connection and for positioning the zones. Since it shows a graphical interface of targets in that room, it makes it much easier to know where each zone is in space based on where you are sitting or standing. After saving, this auto-fills the data into Home Assistant, and your zones are ready to go.
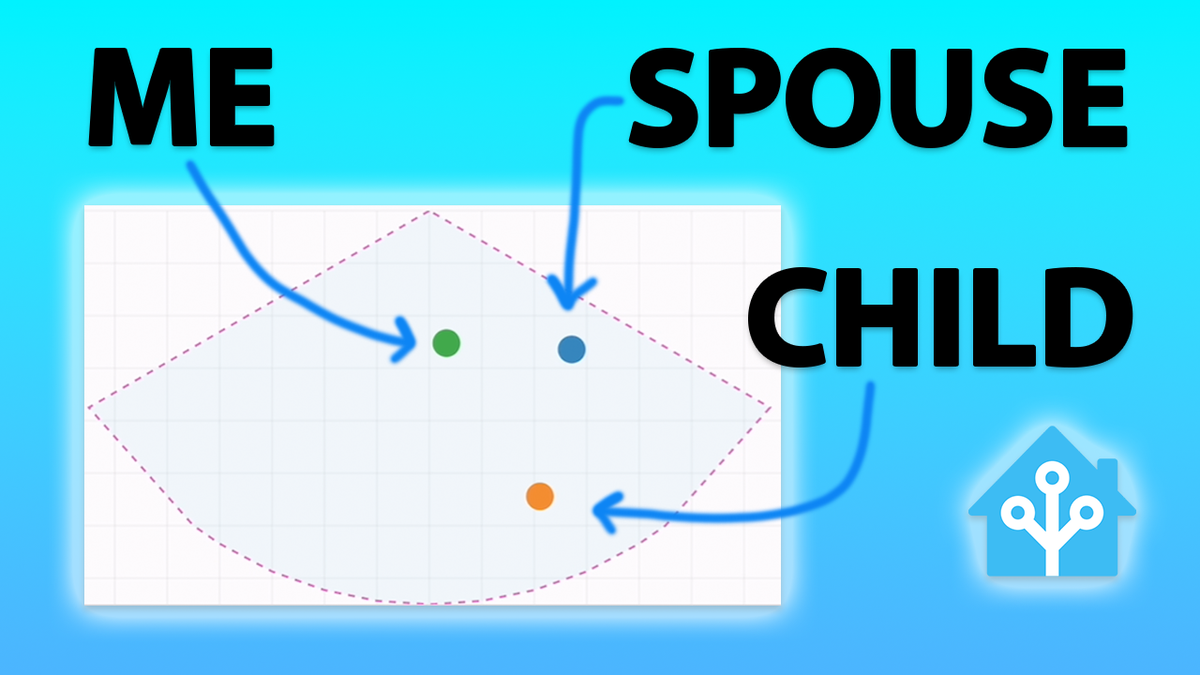
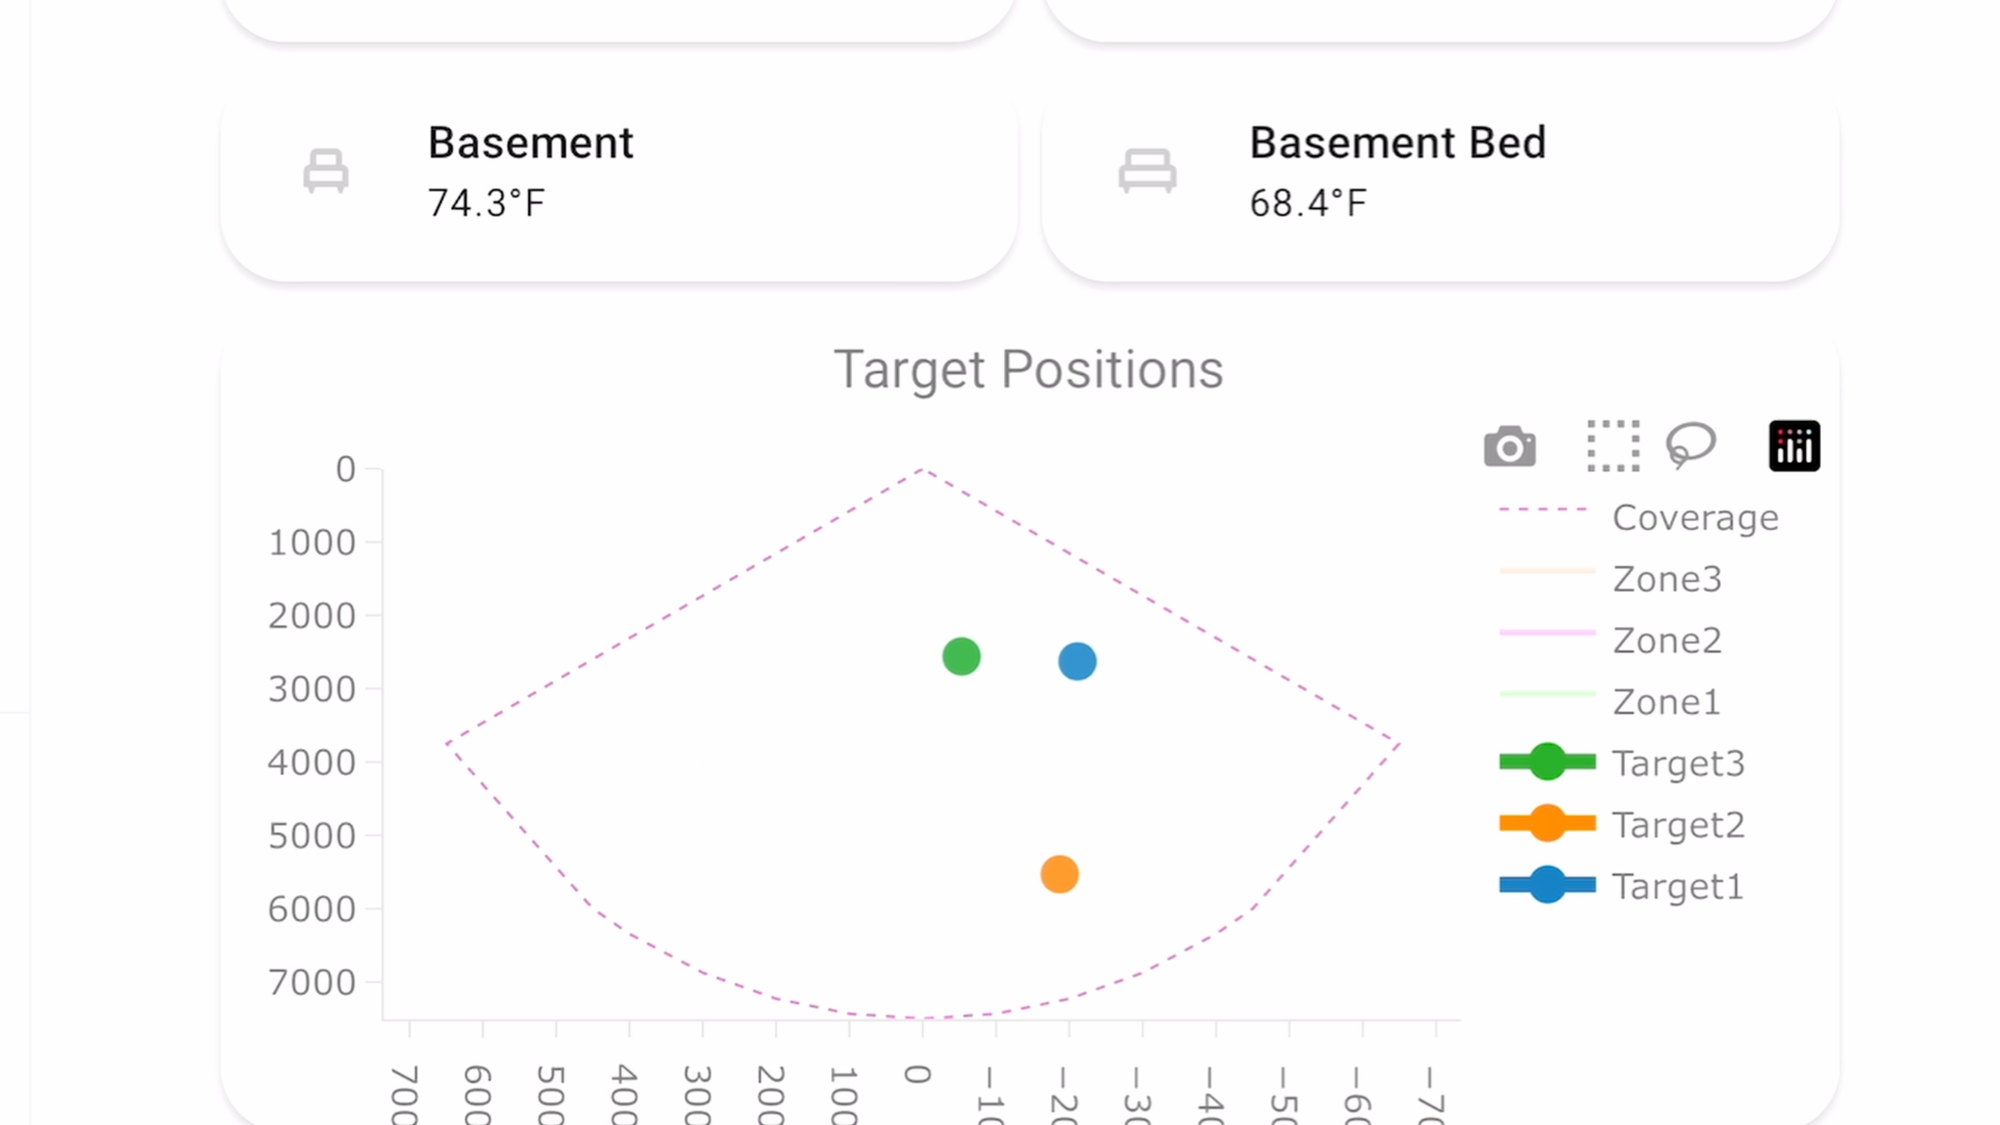
As you move about the room, the entities for zones 1, 2, and 3 display a real-time count of the number of targets being tracked. You’ll be able to track if any target is still or moving within those zones. I even added a visual layout of these movements to my Home Assistant dashboard using the Plotly Graph Card, so I can see it anytime without needing to use the HLK Radar Tool app. You can find an example of the code I'm using for the Plotly Graph Card here.

Separately, and as I mentioned in my review of the MSR-2, you’ll want to calibrate the CO2 sensor for the most accurate readings. To do that, just take it outside, plug it in for 3-5 minutes, and then press the Calibrate SCD40 button at the top of the entities on the device page in Home Assistant. After that, it’s ready to use inside.
Use Cases
Alright, so what are some ways that I’m using this sensor, and how might you want to use it?
In our house, we have an open kitchen and living room as one larger room. The multi-target mmWave allows me to know if someone is sitting at the kitchen counter, standing in front of the refrigerator, or relaxing on the living room couch. So, I can create an automation to turn on the kitchen lights when someone is at the counter, or turn on the living room lamp when someone is on the couch.
You could also do things like turn on the TV or play music based on a defined zone. Or, set your home into a night mode — like turning off all lights and arming the alarm — based on a zone around your bed with a time condition. You could also use zone detection to tell Home Assistant not to run a certain automation if someone was in that zone.
Similar to the MSR-2, I use the LUX sensor to only turn on the lights when the room’s brightness level is too low. I can also automate turning on a ceiling fan when the temperature sensor or CO2 readings cross a certain threshold.
The RGB pixel can turn red if it’s nighttime and the garage door has been left open.
When you have a device with so many sensors and features, you will most likely only be limited by your imagination.
What I Like
There’s a lot to like about the Apollo MTR-2 Multi-Target Radar sensor.
It packs a ton of useful sensors into a single, compact, discrete device. Multi-target mmWave opens up new presence detection possibilities, going beyond knowing if someone is in a room, to where they physically are in that room. The RGB pixel is a nice bonus — indicator lights can be really useful in home automations, so I wish more sensors had this. And adding the device to Home Assistant was a breeze.
If you were to get stuck, the Apollo Automation team is super responsive on their Discord channel, and their wiki has lots of helpful documentation.
What to Improve
That’s not to say the MTR-1 is perfect.
I’d love for an easier way to configure zones in Home Assistant, similar to the HLK Radar Tool, but without requiring a separate app.
The device has a ton of great sensors already, but I wasn’t sure why humidity was left off — other than perhaps cost reduction — since humidity readings are included in the MSR-2.
And just like the MSR-2, I’d be interested in a version with a PIR motion sensor, which I think is the better sensor for turning lights on and avoiding unwanted detections.
Because this sensor is so small and lightweight, I found it difficult — if not impossible — to position it flat on a surface using the included table-top stand. The USB-C cord — even a flexible, braided one — just yanks the device around.
Finally, I’d like to see improved still detection. The MSR-2 is better than the MTR-1 at knowing if someone is sitting still at a desk or on the couch.
This is a key aspect for me in presence detection, and I don’t want to necessarily combine two mmWave sensors in the same room to get both still and multi-target detection.
Final Thoughts
The Apollo MTR-1 Multi-Target Radar is $40, or $5 more than the MSR-2. The extra $5 adds multi-target, multi-zone presence detection, but gives up a humidity sensor and extra reliable still detection. For an extra $20, you can get the MTR-1 with a CO2 sensor, just like the MSR-2. And for an extra $5 to $13, you can get one of the optional accessories for mounting the device.
But at $40 for the base price, you get a really compelling smart home sensor.
Watch on YouTube
Featured Tech
Apollo Automation MTR-1 Multi-Target Radar: https://go.michaelsleen.com/mtr-1