Don’t Be Fooled By Its Size: Apollo MSR-2 mmWave Multisensor
Review of the MSR-2 mmWave Multisensor for Home Assistant, including the features, accessories, setup, and recommendations.

Introduction
I’m taking a look at this super small smart home multi-sensor from Apollo Automations. his little device can track a person moving around a room, and provide brightness, temperature, humidity, pressure, and CO2 readings. It can also light up and make noise.
What is this thing, and what’s it for? We’re about to find out.
Main Points
Features
This little gadget is called the MSR-2 mmWave Multisensor. It’s made specifically for smart home automations using Home Assistant.
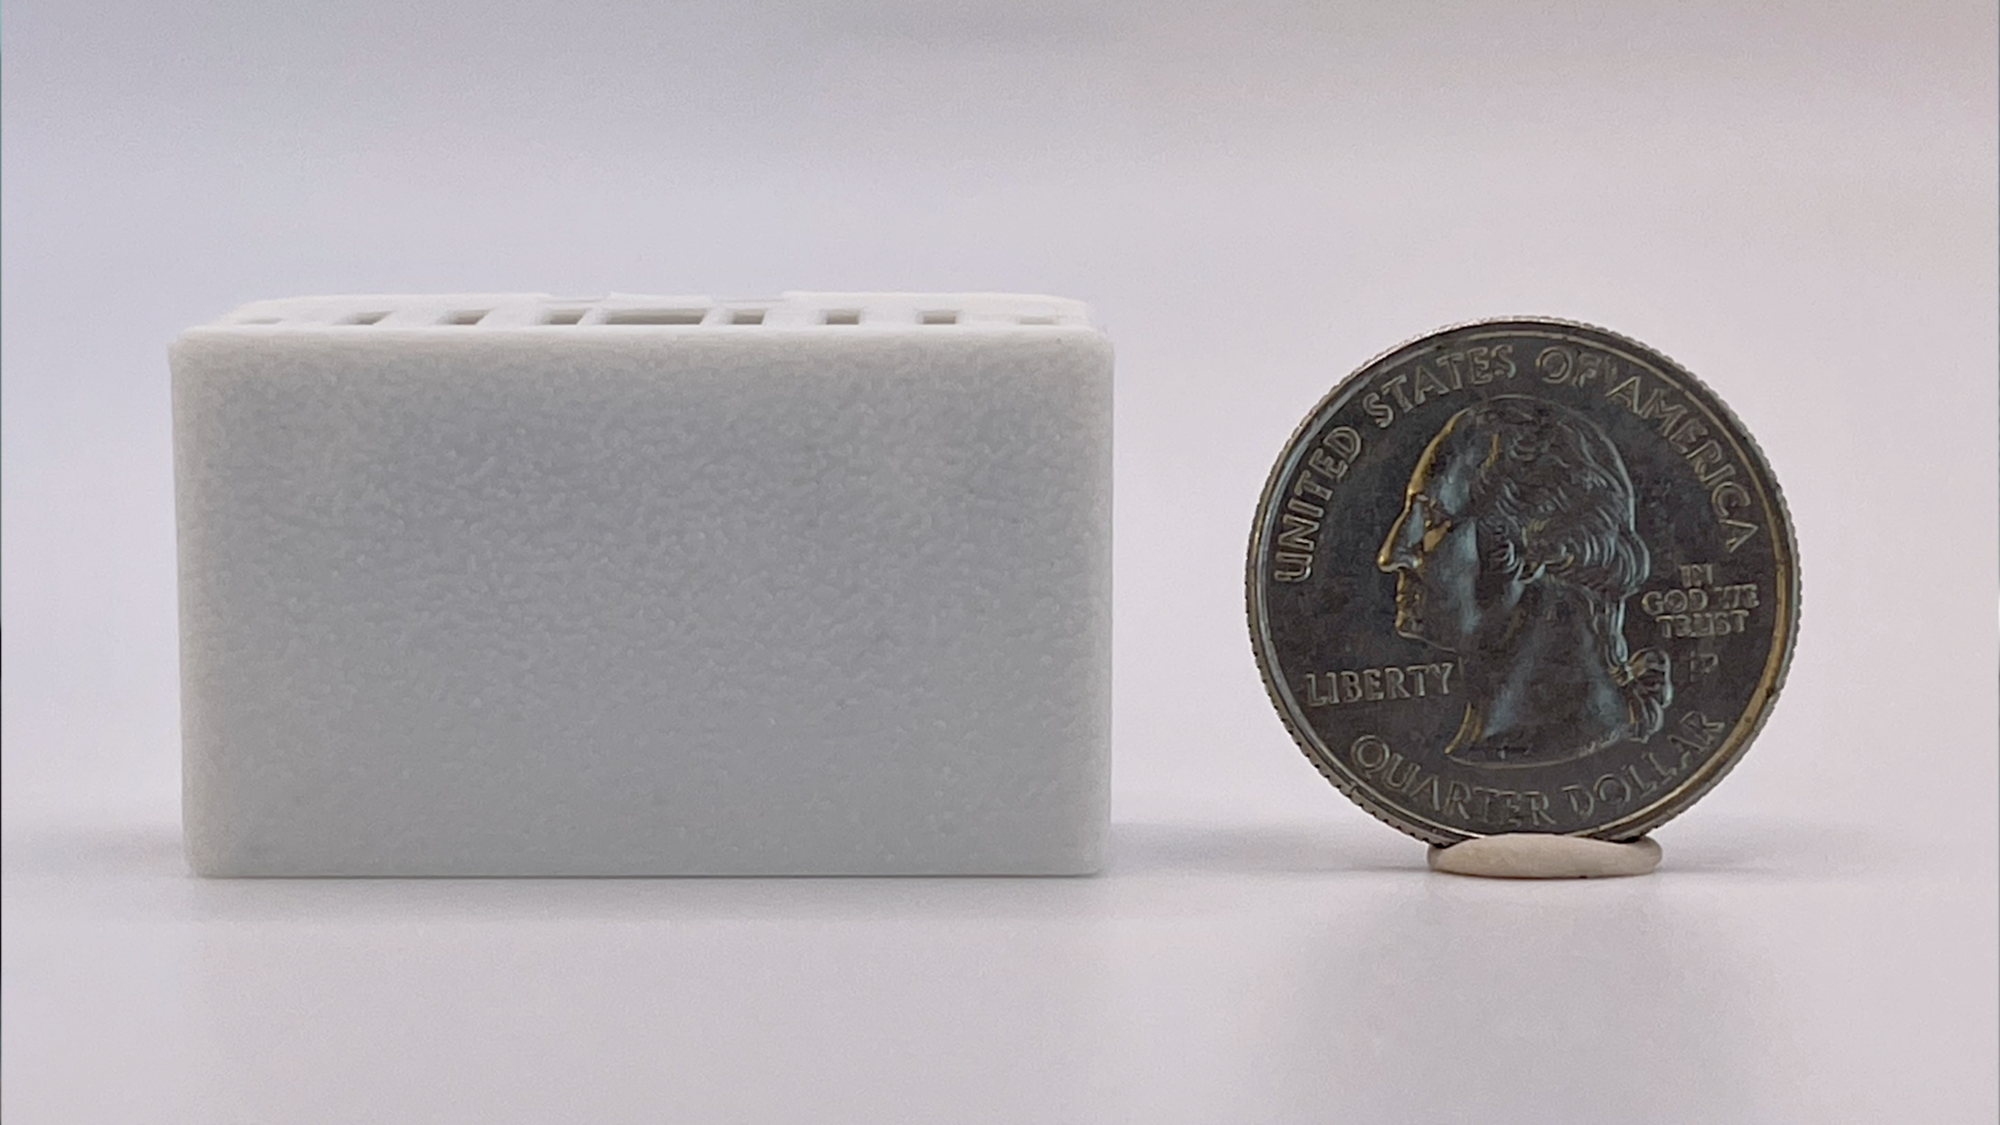
The MSR-2 measures just 1 9/16” wide, 15/16” tall, and 9/16” deep. It’s about the height of a US quarter dollar coin. The power brick I’m using with it is much larger. Despite its small size, the MSR-2 packs a punch.
Its primary sensor is mmWave radar. This can track a single person in a room, whether they are moving or still. It also has a LUX sensor measuring the ambient brightness and UV. Additionally, it has a sensor for providing temperature, humidity, and pressure.
Due to the heat generated by the onboard ESP32, you will need to provide offsets to land on the correct indoor temperature and humidity. This can easily be done on the device page in Home Assistant: no coding required.
You can also get an optional CO2 sensor. And, it can act as a Bluetooth device tracker, to know who specifically just walked into a room based on their connected Bluetooth device. Or, it could track a pet if it has a Bluetooth beacon on its collar. One reason you may want to do that is to exclude the pet’s movement from triggering an automation.
But that’s not all.
The MSR-2 also has a built-in RGB pixel, which you can use to set different colors related to your home automations. For example, the light could turn red if it’s nighttime and the garage door was left open. The built-in buzzer is perhaps the most curious. It can beep when a door or window opens, or even play a song.
The device must be plugged in to operate, and is powered by USB-C.
Accessories
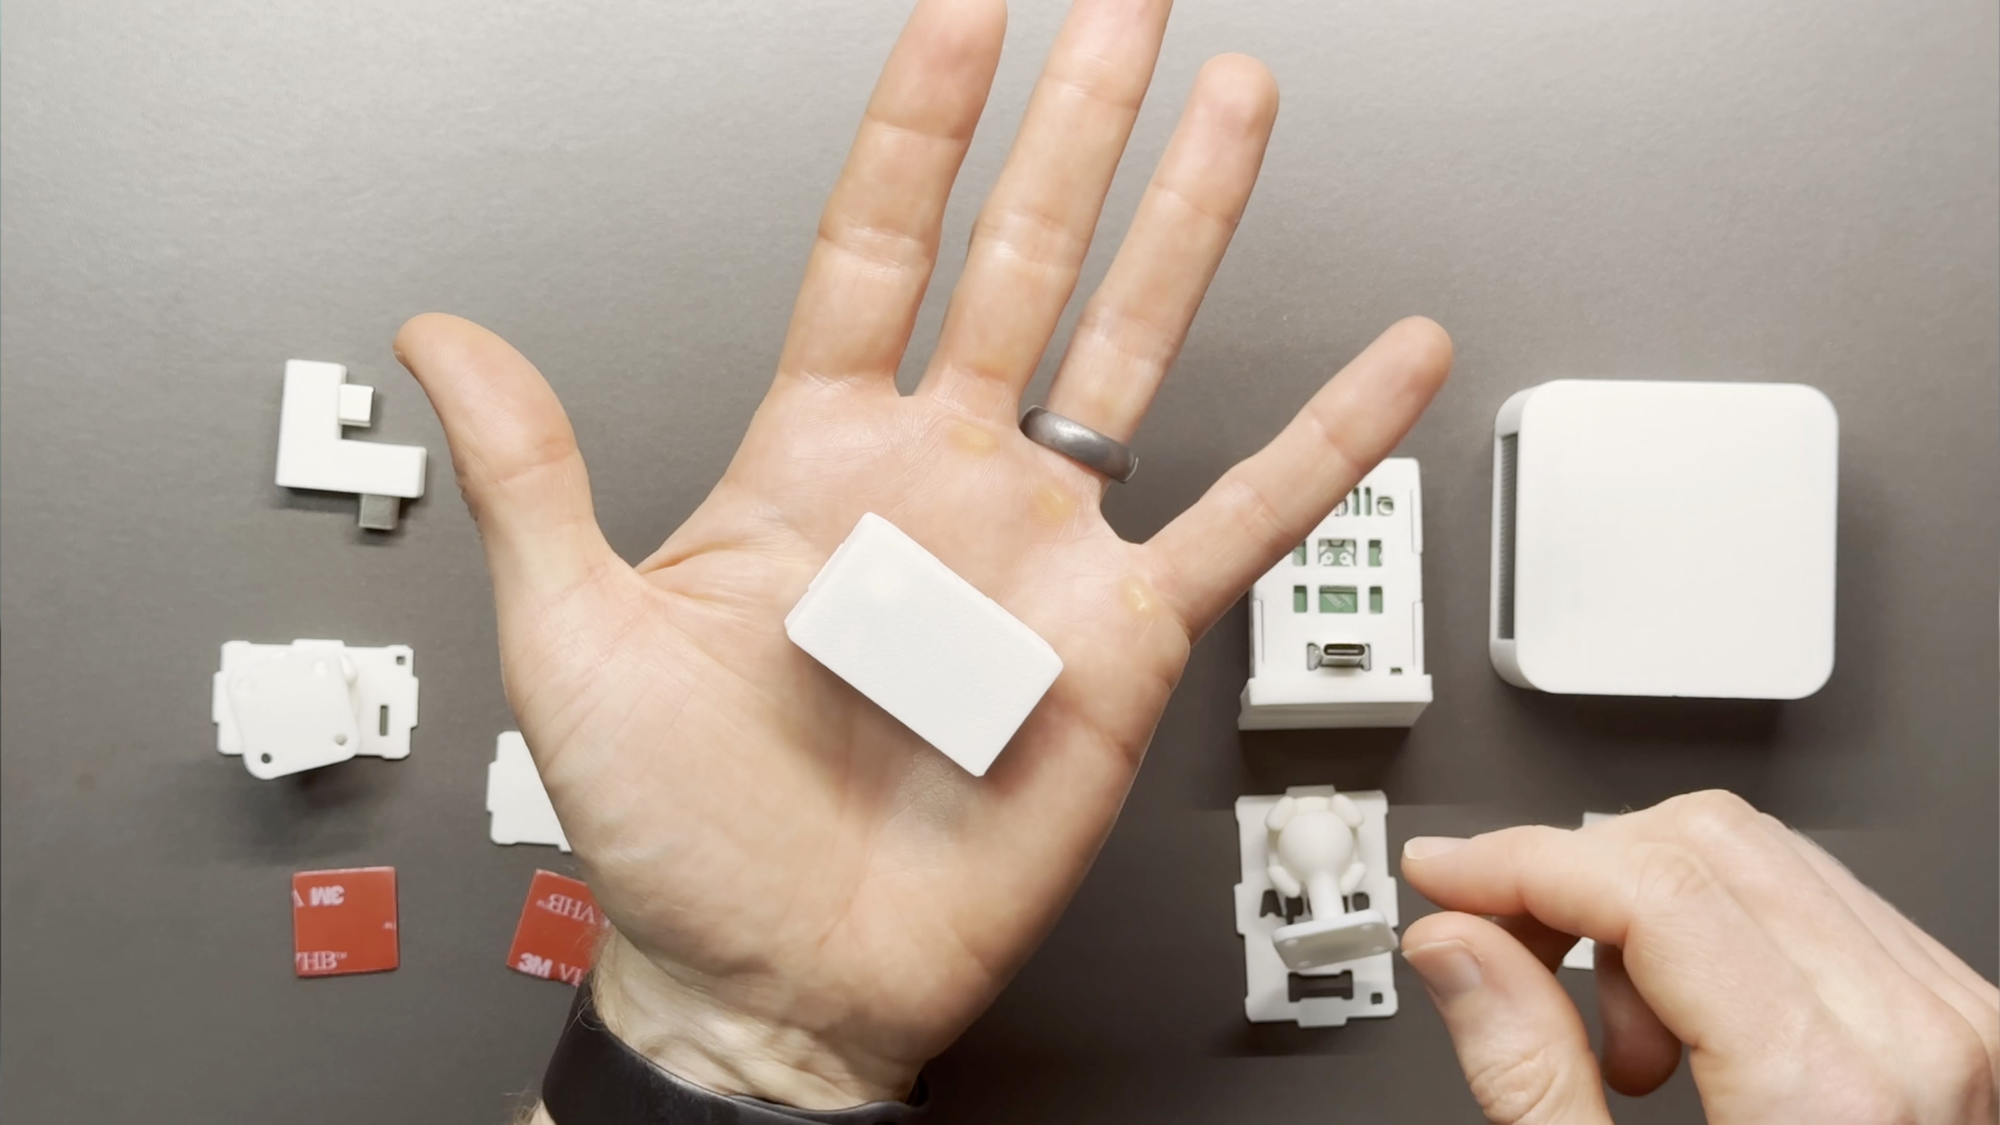
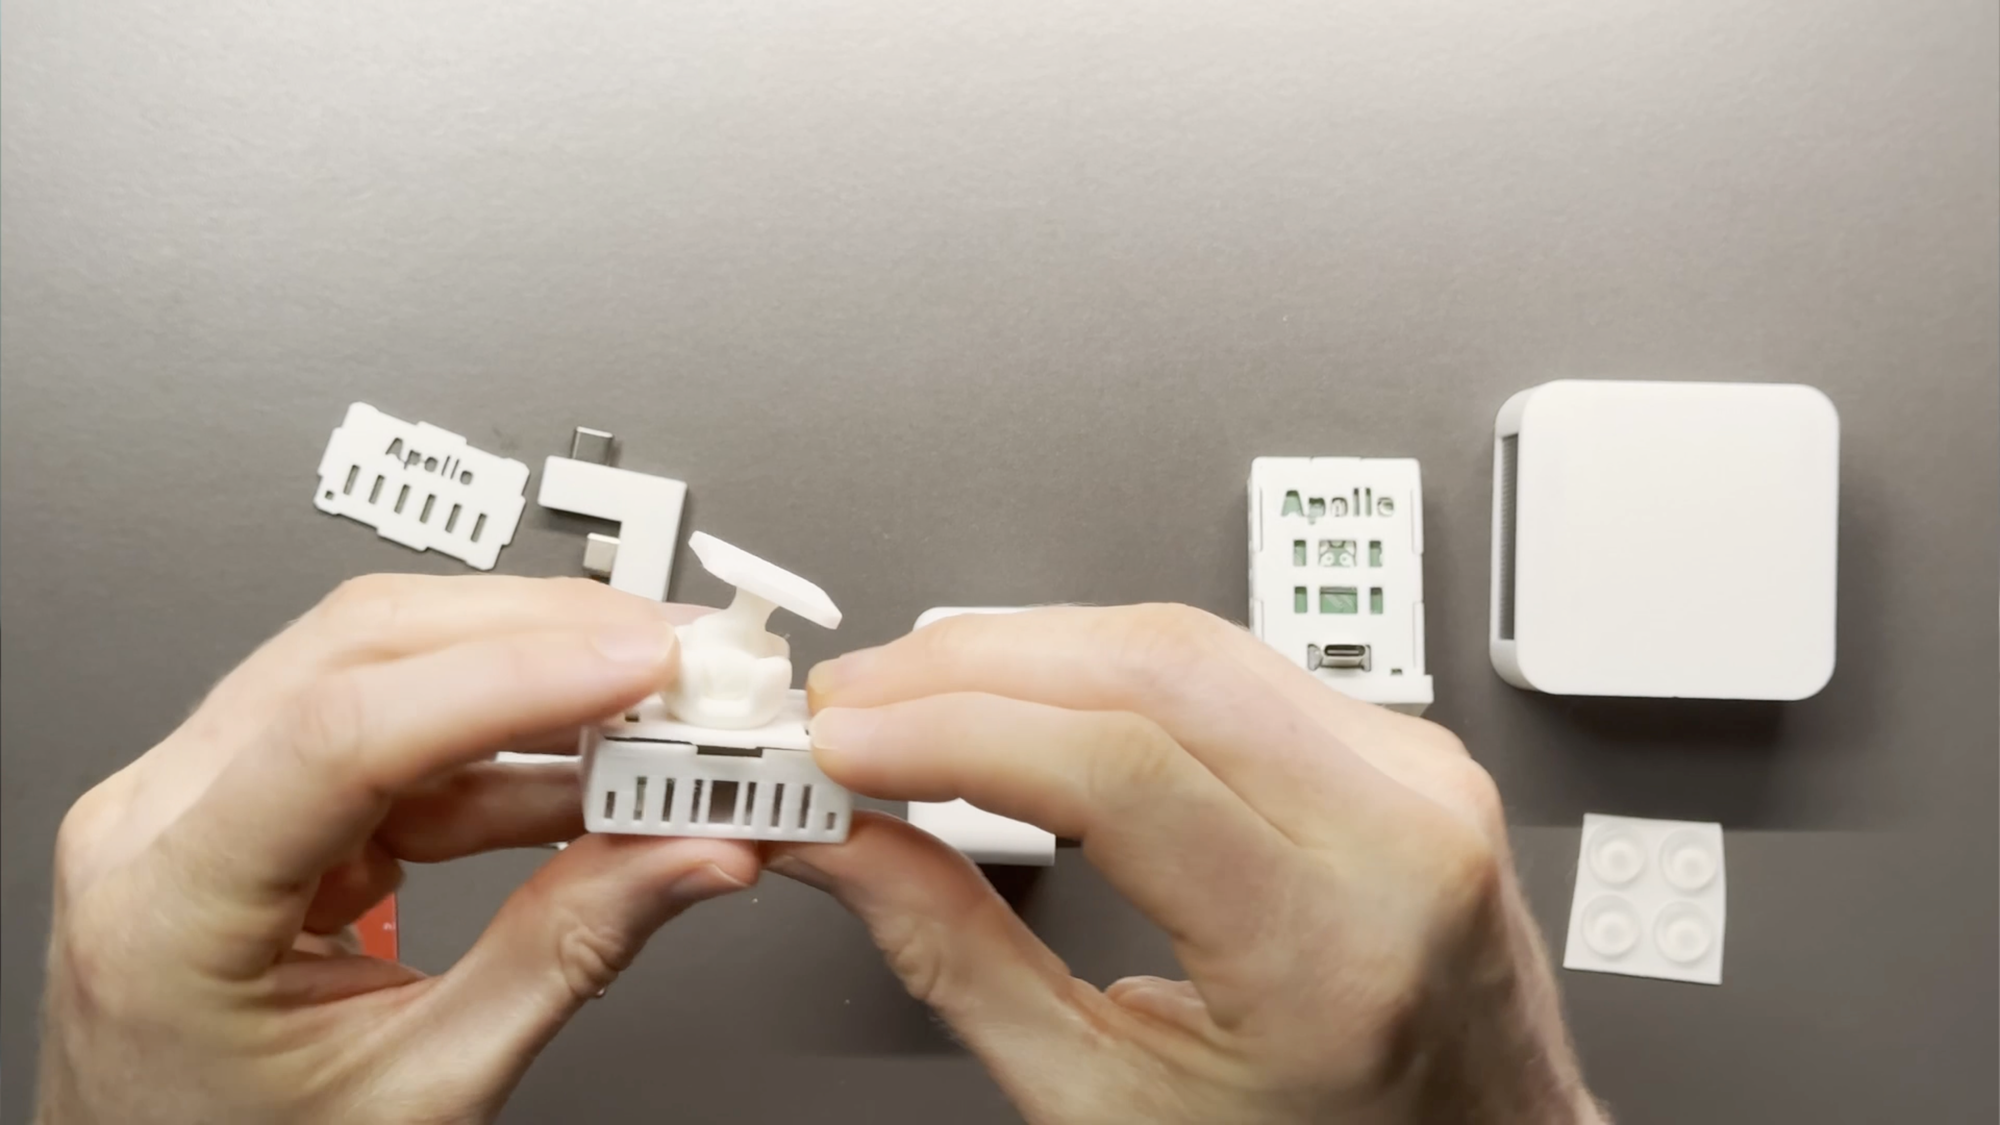
If you just purchase the MSR-2, you get the fully assembled board inside a 3D-printed case. However, Apollo offers several accessories depending on how you’d like to place it in your home.
You can swap out the back of the case for an alternate, back-facing USB-C port. The default case has USB-C coming out one side, so this accessory let’s you run a cable to it from the back. Or, you could get a sensor stand, which you can mount to any surface at an angle of your choosing using the included tape or screw holes.
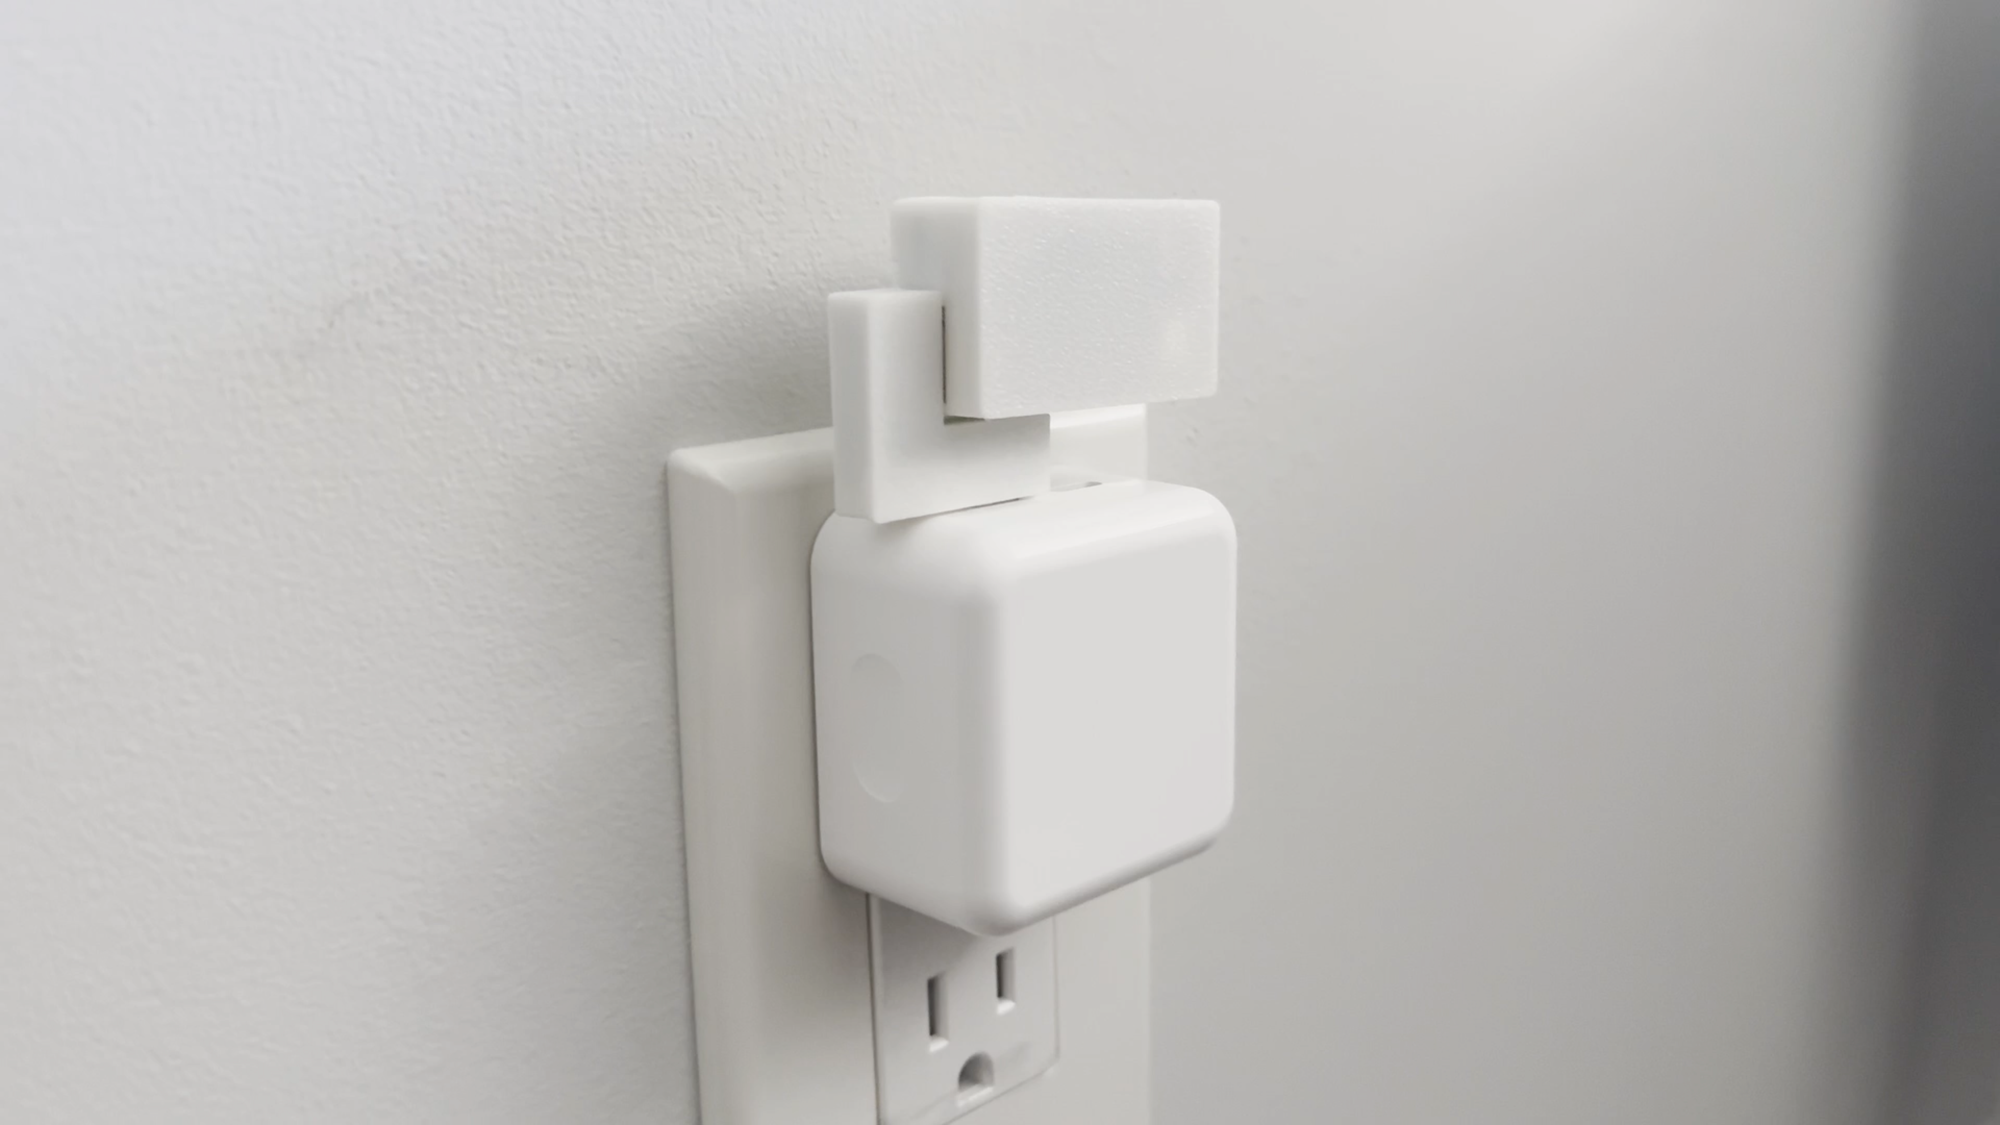
But there’s more. For my favorite, you can get an outlet mount, which is an L-shaped USB-C to USB-C connector that plugs into a wall power brick. I prefer this not only for the wire-free look, but also the ease of setup and sensor stability. With mmWave radar, it’s important that it’s very still since it can detect subtle movements.
Apollo Automation MSR-2 mmWave Multisensor
Setup
Setting up the sensor and adding it to Home Assistant is super quick and easy.
Plug the sensor into a power brick. Connect to the device’s WiFi network from your phone or computer. A pop-up screen allows you to select your home’s WiFi network for the sensor to connect with. After entering your WiFi password, open up Home Assistant and go to the Devices & Services page. The sensor is auto-discovered by ESPHome in Home Assistant. Click configure and submit, and the device is added to the ESPHome integration, and ready for use in your home automations. All of this can be done in about a minute.
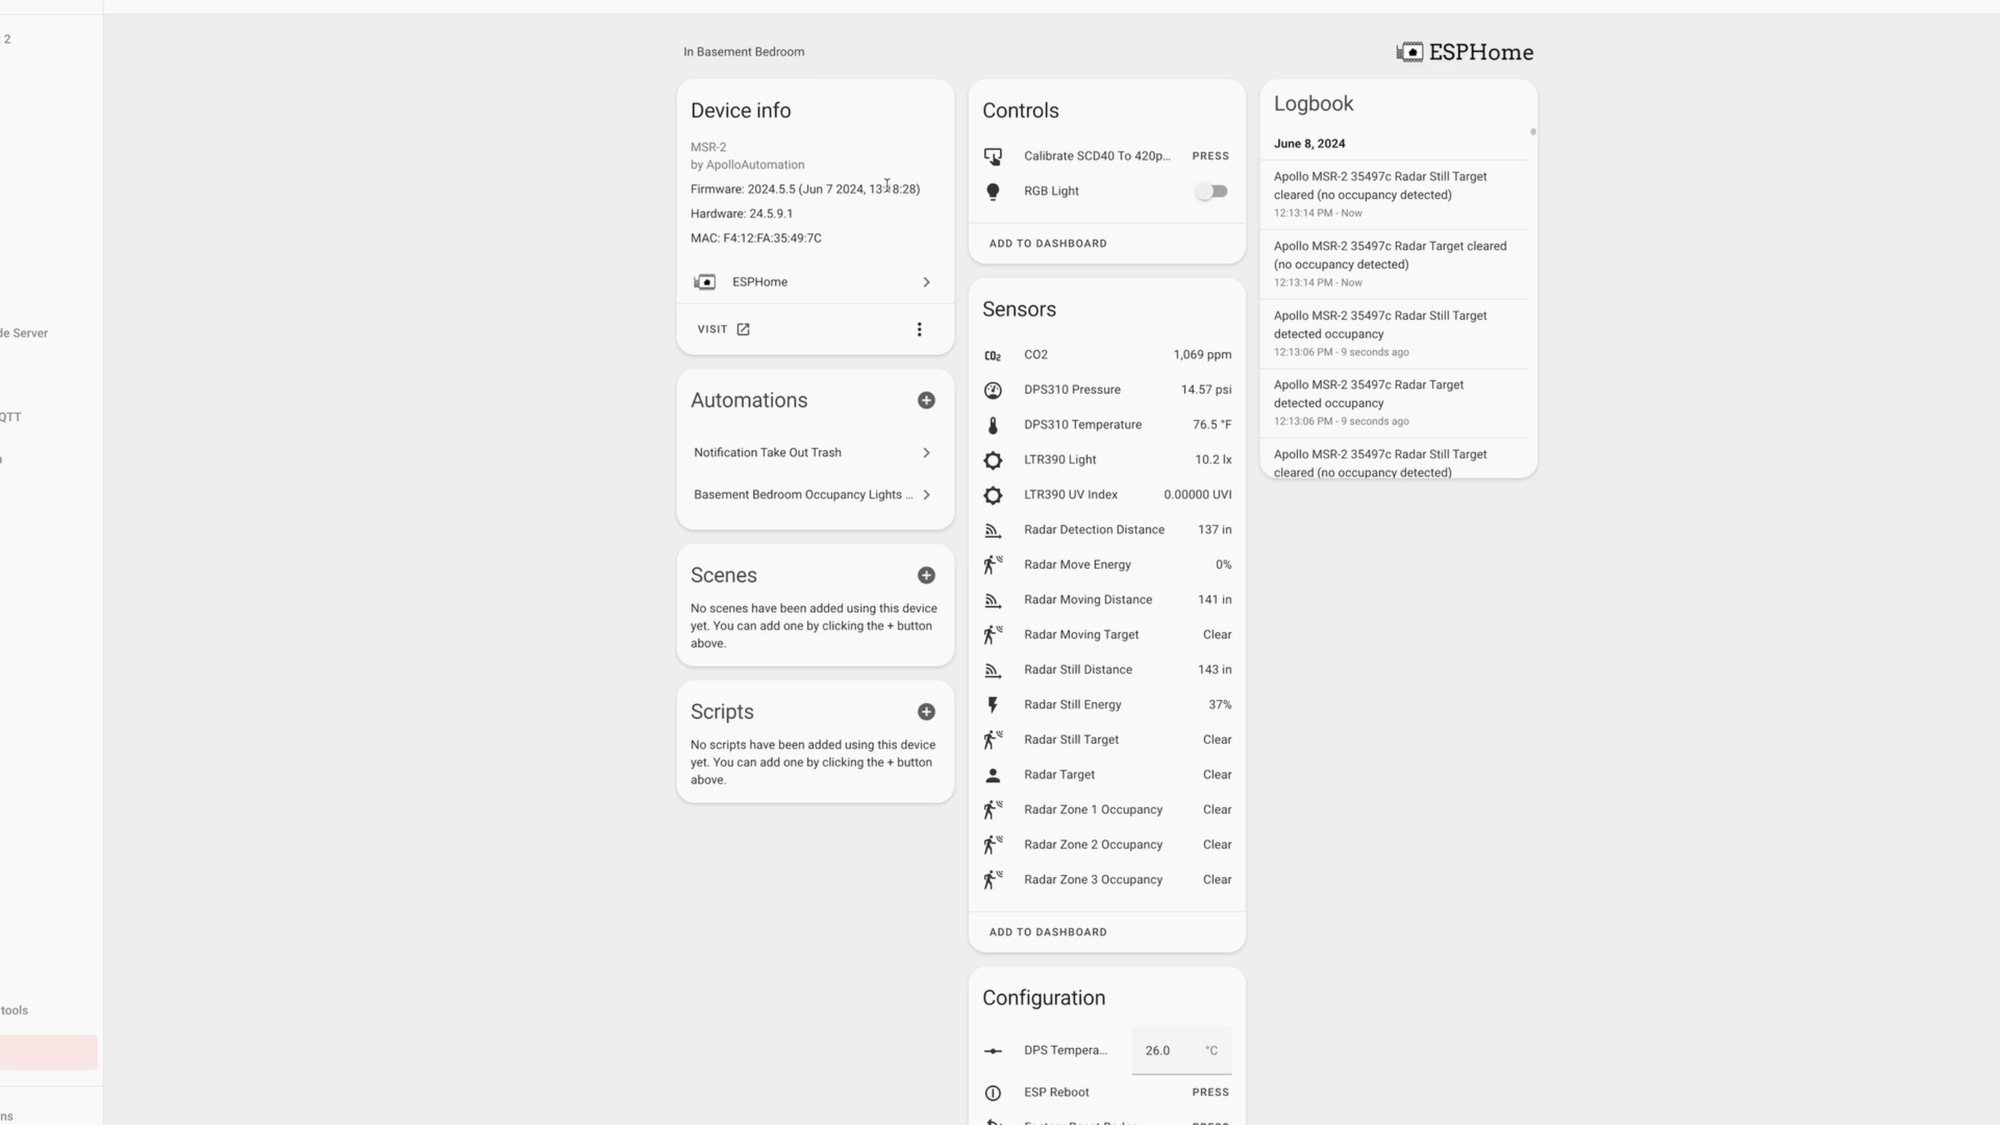
Taking a look at the device page, it has a crazy number of entities. The mmWave radar has entities for tracking the distance of the target, and even if the target is moving toward or away from the sensor. For the most accurate CO2 readings, you’ll want to calibrate its sensor first. To do that, just take it outside, plug it in for 3-5 minutes, and then press the Calibrate SCD40 button at the top of the entities on the device page in Home Assistant. Then, you can bring it back inside, and it’s ready to go.
Use Cases
Let’s talk about how I’m using this, or how you might want to use it. I think mmWave is the killer feature of any smart home, because presence detection unlocks so many possibilities.
I’m using the mmWave capability to automatically turn off the lights in my office when no one is in the room. Turning on the lights can use a condition to only do so when the LUX sensor detects a low level of brightness.
You can turn on a ceiling fan when the temperature sensor or CO2 readings cross a certain threshold, or turn on nan exhaust fan based on the level of humidity in a bathroom.
I take the trash out every Thursday night, so I have the built-in RGB pixel turn green as a reminder on trash nights.
There are nearly endless possibilities when you have all these sensors to play with.
What I Like
Alright, so, how does this sensor stack up? Well, pretty big, in fact.
It’s the fastest and easiest smart home device I’ve ever setup. The case is included with the purchase and it’s strong, and you can choose from a range of mounting accessories to get just the right placement.
Indicator lights can be really useful in home automations, so I wish more smart home sensors included a built-in RGB pixel like this does.
The mmWave radar has been dead on reliable for me so far, and I haven’t had to do much tweaking to the default configuration.
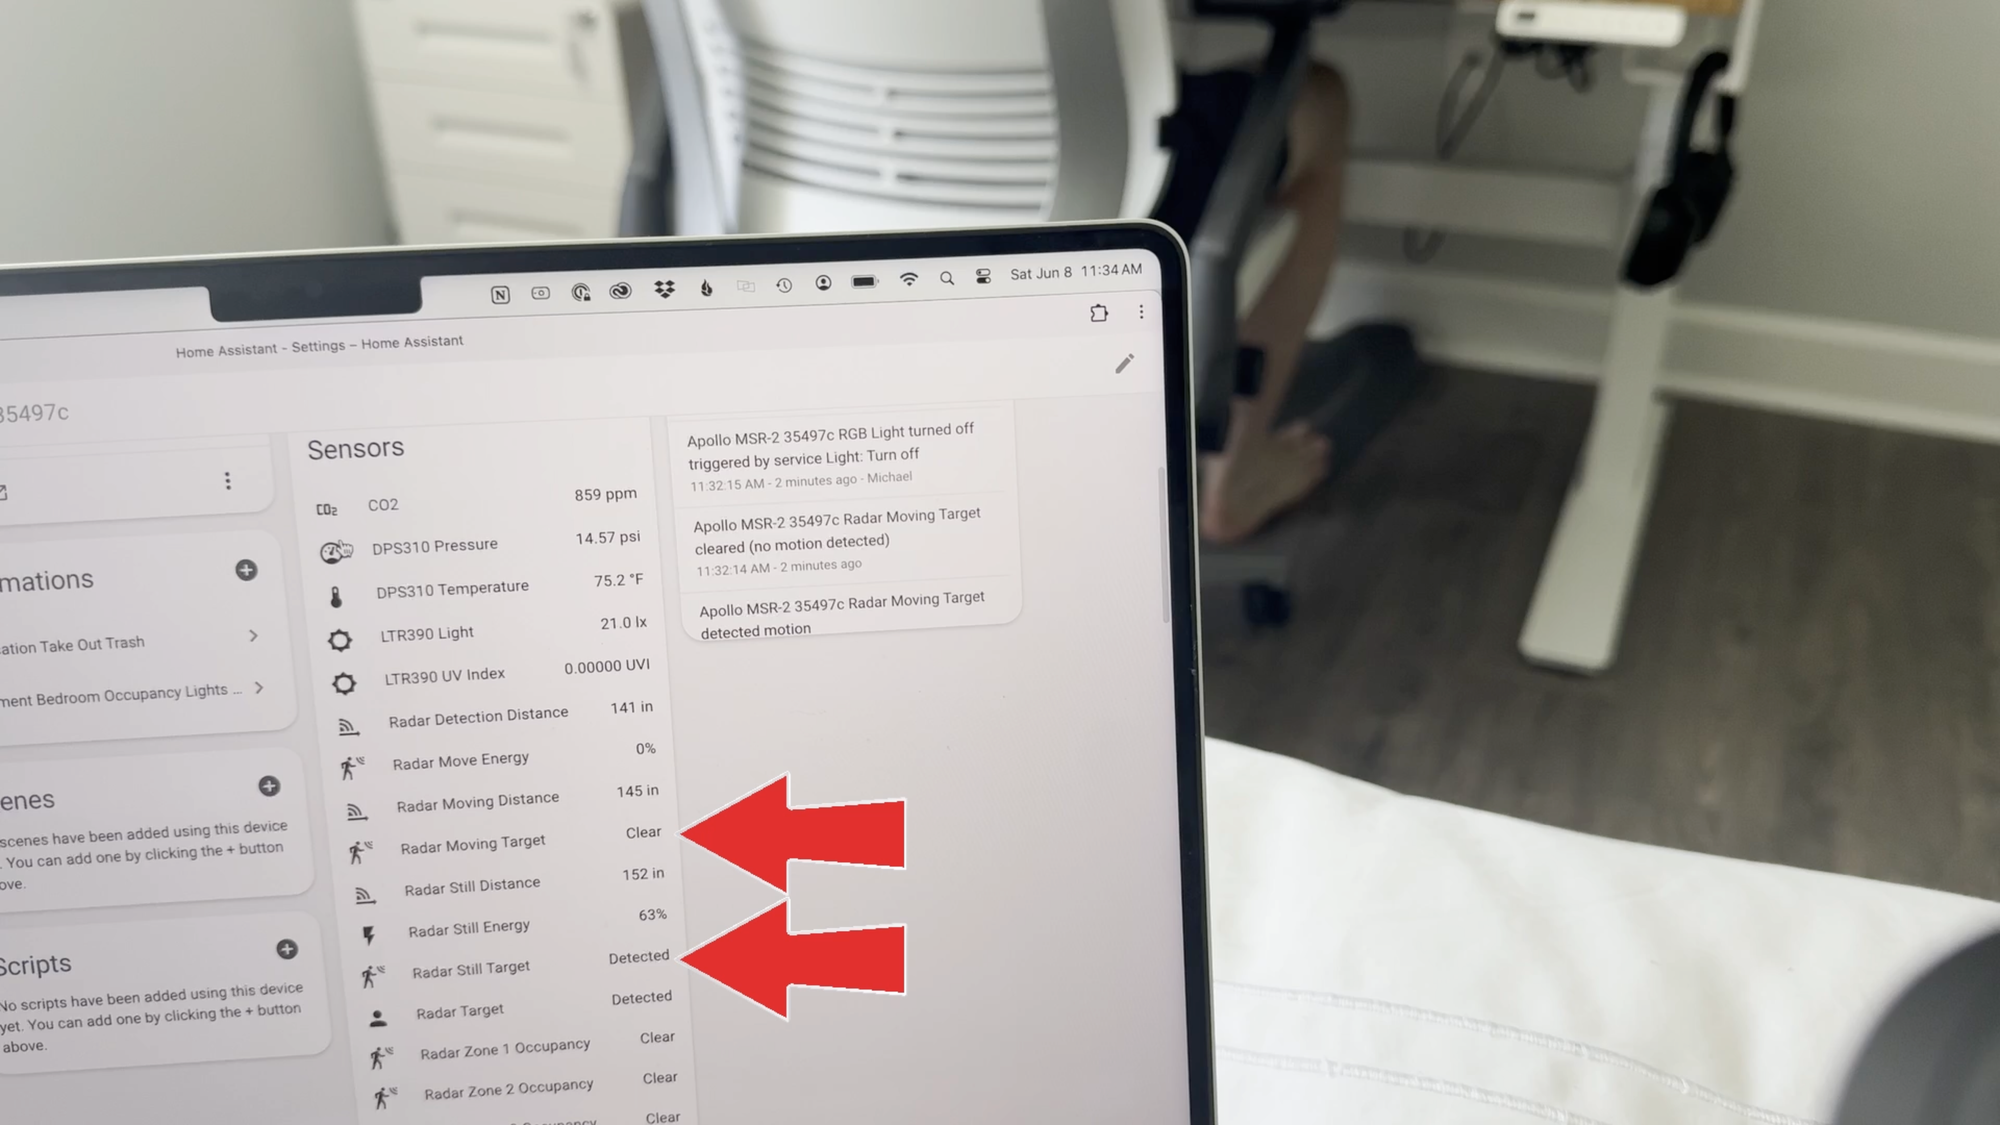
I like how it has separate entities for still and moving targets. When I’m working at my desk chair, the moving target is clear, but the still target is detected, which is crazy!
Finally, the guys at Apollo Automation are super active on their Discord channel, where you can quickly get help with any troubleshooting. They also have lots of helpful documentation on their website for setup, calibration, dashboard cards, and suggested use cases.
What to Improve
So, how could this thing be improved?
Well, smart lighting is the most common home automation in my house. I like to use a PIR motion sensor for turning on lights, and mmWave for turning them off. This is because mmWave is really sensitive, and I don’t want a light turning on because a curtain moved. I know the MSR-2 is already packed full of sensors, but I’d be interested in a version that includes PIR, depending on the cost.
The other thing I’d like to see is an easier way to fine tune the mmWave radar. To do so, you need to turn on Radar Engineering Mode, and then monitor something called the gate energy across seven different gates. While Apollo Automation has documentation on this, I find the process a bit cumbersome, especially compared to the more straightforward tuning of something like The Everything Presence One.
Finally, depending on how you try to mount this, the tiny form factor may present a challenge. Because it weighs practically nothing, when connected to a USB-C cable it’s hard to get the sensor to sit still at the angle you want since the weight of the cable yanks it around. It really needs to be locked down, either using the outlet mount or sensor stand, but neither of those accessories is included in the base price.
Final Thoughts
For $34.99 with the case included, the MSR-2 mmWave Multisensor is a great value. It packs a ton of sensors at that price, plus a helpful RGB pixel and a quirky buzzer. The standout feature though is the mmWave sensor, which, if you don’t have one, can take your smart home automations to the next level. It will cost you an extra $20 though if you want the CO2 sensor. And if you want any of the mounting accessories that I mentioned, those will cost you another $5 to $13, depending on your selection.
Watch on YouTube
Featured Tech
Apollo Automation MSR-2 mmWave Multisensor: https://go.michaelsleen.com/msr-2