ULTIMATE Homey Pro Beginner’s Guide!
Everything you need to know about Homey Pro, including an overview of the Homey ecosystem, hardware, installation, smart home device management, and automations, from simple to advanced.
Introduction
If you’ve been following the channel, you know that I’m huge proponent of Home Assistant. But, I’m still able to acknowledge that Home Assistant may not be the right home automation platform for everyone. The challenge is that there is a big gap between the out-of-the-box simplicity yet limitations of smart homes from Amazon, Apple, and Google, with the unlimited possibilities yet complexity with something like Home Assistant.
But this device just may be the perfect hybrid solution, offering a friendly user interface with what just may be the best smart home automation editor I have ever seen.
I’m talking about the Homey Pro, a device that aims to be a truly universal smart home hub with its own app marketplace. You just power on a single device without the need to purchase or install separate controllers or figure out overly-complicated installation hacks to support the smart home devices you care about. It is the best balance that I have seen between catering to “it just works” tech skeptics and “automate everything” power users.
If you’re wondering what smart home hub is right for you or how Homey works, you’re in the right place. I’m going to tell you everything you need to know about Homey Pro, including an overview of the Homey ecosystem, hardware, installation, smart home device management, and automations, from simple to advanced. I’ve built out my smart home to around 400 devices, and I’ve tested most of the smart home platforms out there, so I know what each has to offer.
Main Points
Apps
Homey is a universal smart home hub from the Dutch company Athom. They sent me Homey Pro to test out, but they’re not sponsoring this video. Homey supports over 50,000 different smart home devices from more than 1,000 brands, so there’s a good chance the smart home stuff you use or want to use will work with Homey.
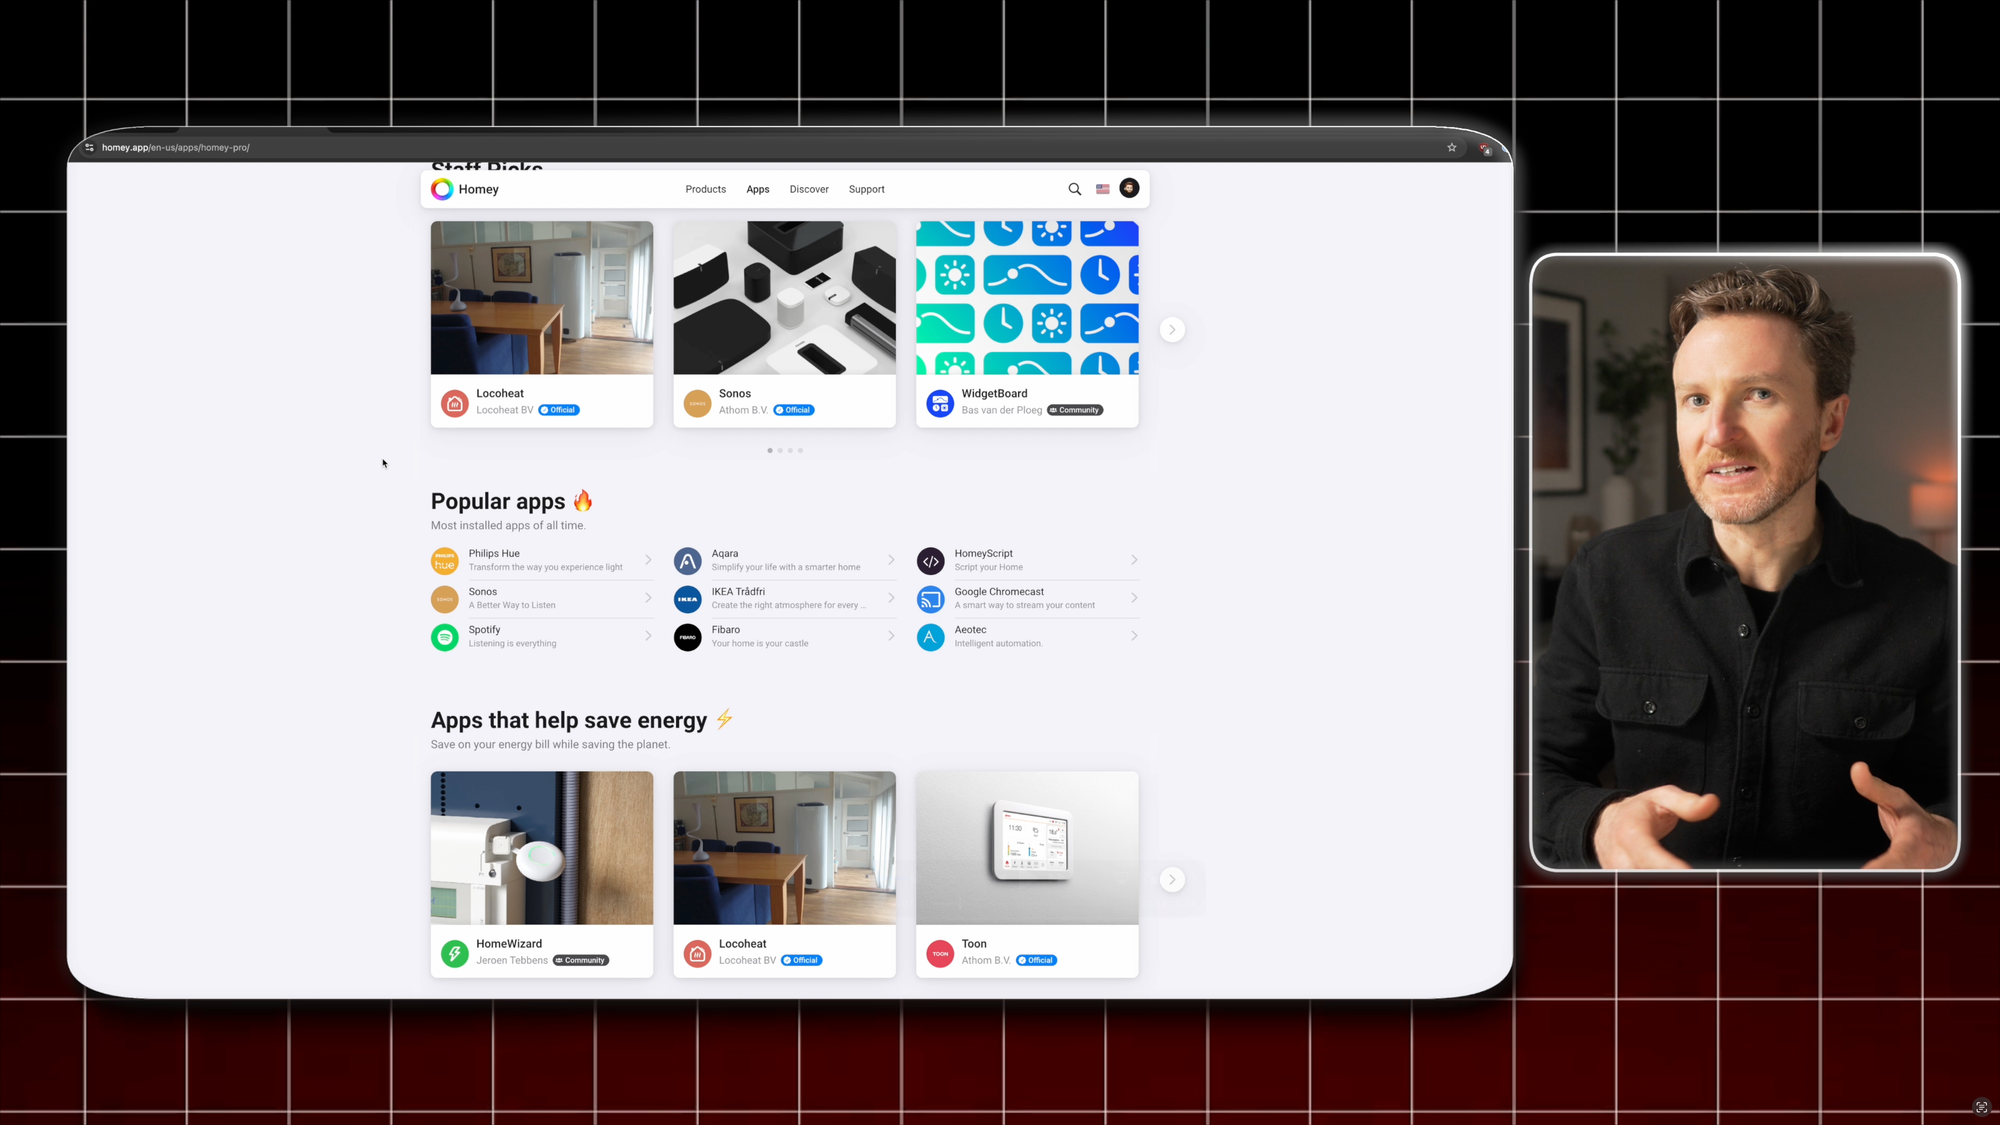
To connect your smart home devices to Homey, you install apps from the Homey App store. It’s literally as simple as browsing an app store, and clicking “install” on any app you’d like. There are both official Homey Apps and community-built ones. A badge indicates which is which. If you’re coming from another smart home platform, there are evens apps to bring all your Home Assistant devices into Homey Pro, control all of your Homey devices from the Apple Home app, add your Amazon Echo devices to Homey Pro, and more.
There are separate apps for Homey Cloud and Homey Pro. Homey Pro apps prioritize running locally on a Homey Pro device, while Homey Cloud apps rely more on cloud-based processing, but more on the hardware and software options later.
Homey Pro apps
Flows
As a smart home platform, Homey allows you to create automations, and it sets the bar for what an automation editor should be. Do you want to just click and be done? Or create automations with dozens of conditions? Or even write code? Yep, you can do all of that.
Flows is the Homey term for automations. When you create a Flow, you choose between Standard and Advanced. Standard Flows use the When…And…Then logic to determine the trigger, conditions, and actions for your automation. This is great for creating quick and simple automations, and Homey makes it really simple to get started. Seriously, I love how easy and beautiful this is, but more on creating an actual automation later in the video.
If you want to do just about anything with your automations, then you’ll want to check out Advanced Flows. This opens up an infinite canvas that reminds me of the Node-RED programming tool, but less complex. Advanced Flows include additional Blocks and Cards for making more elaborate automations, like adding a 5-second delay between actions, or running a script to get a certain number, and then using that number in a notification. What’s cool is you can even pin a sticky note to the automation editor to help you remember stuff as your Advanced Flows get more complex. You could also add tags that can do things like notify you if some part of an automation fails to run as expected, so you’re not left suprised.
Homey Pro flows
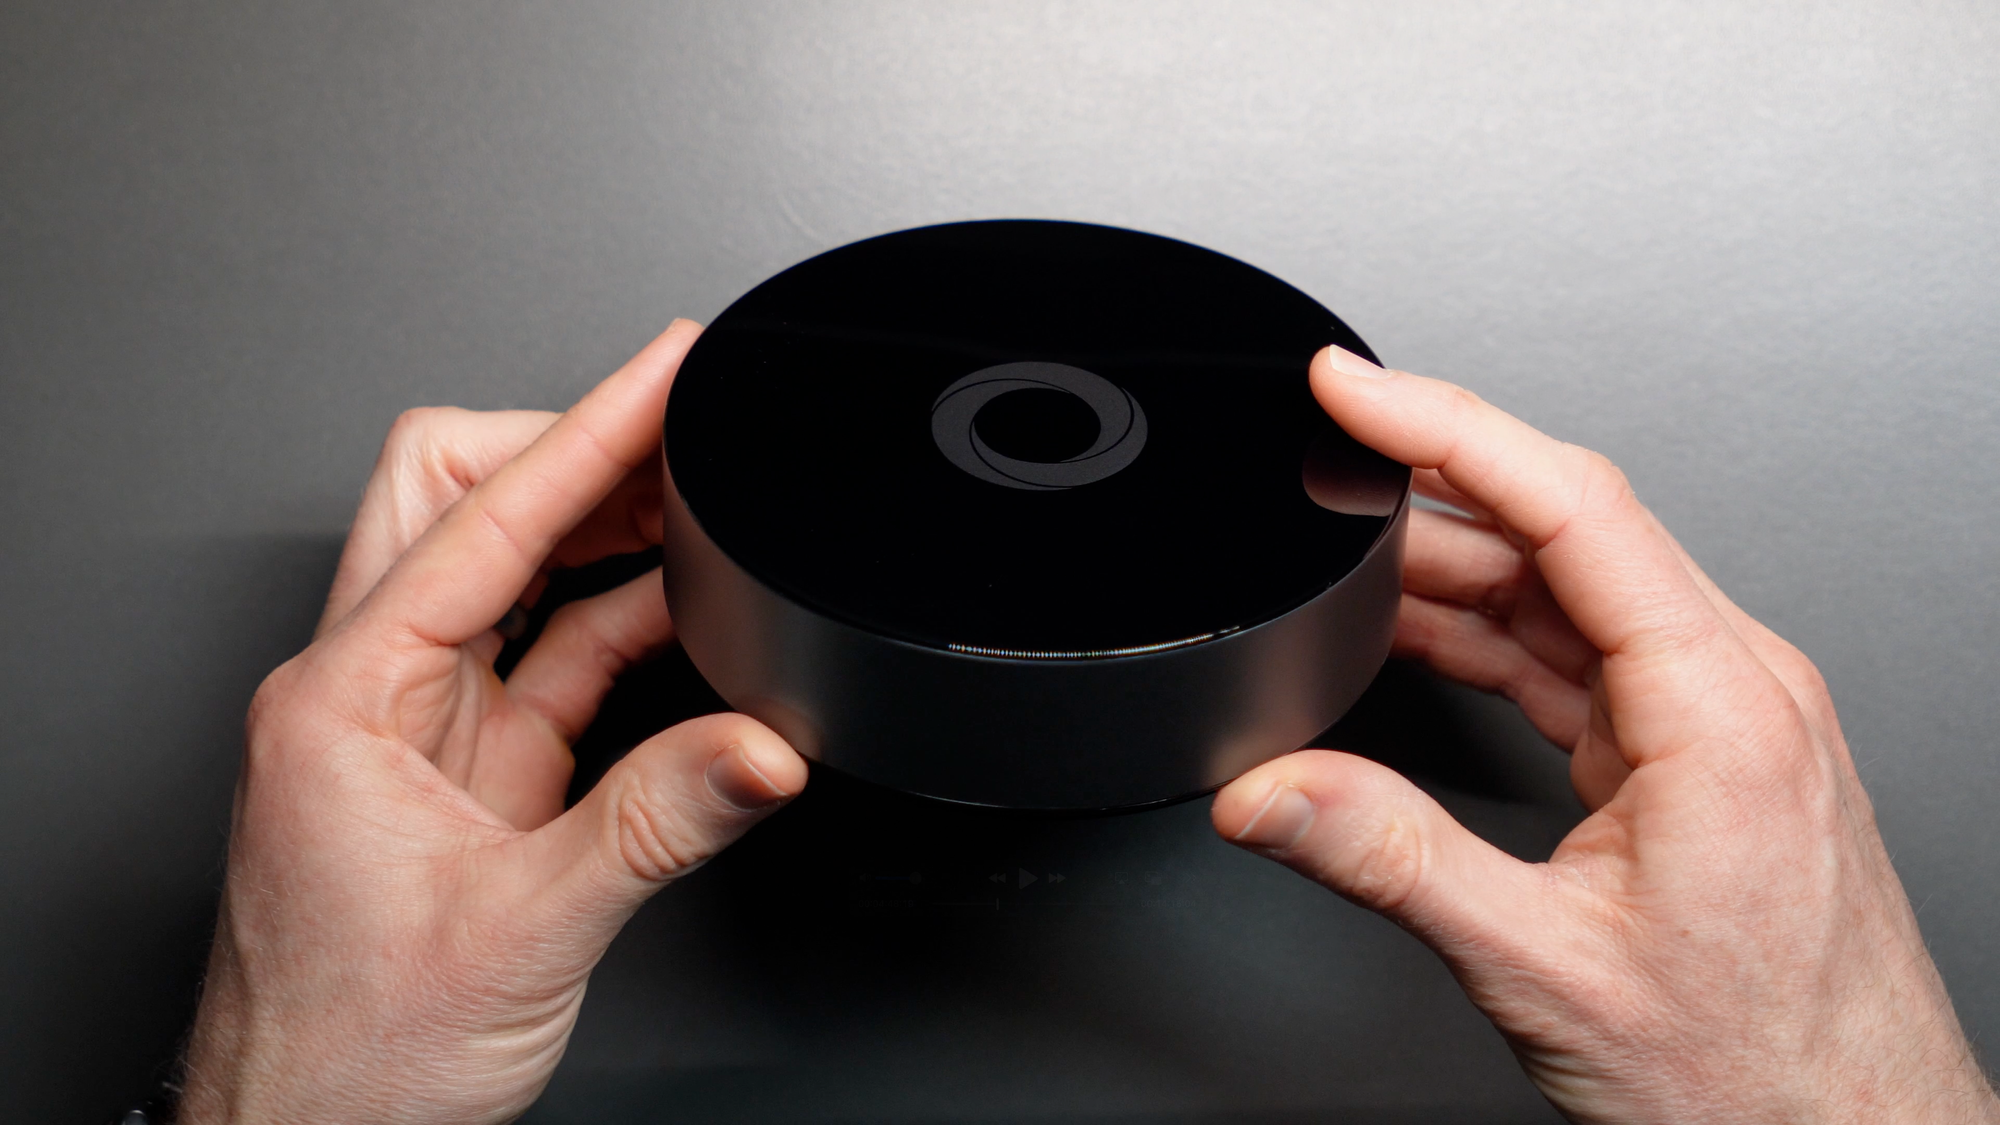
Homey Pro
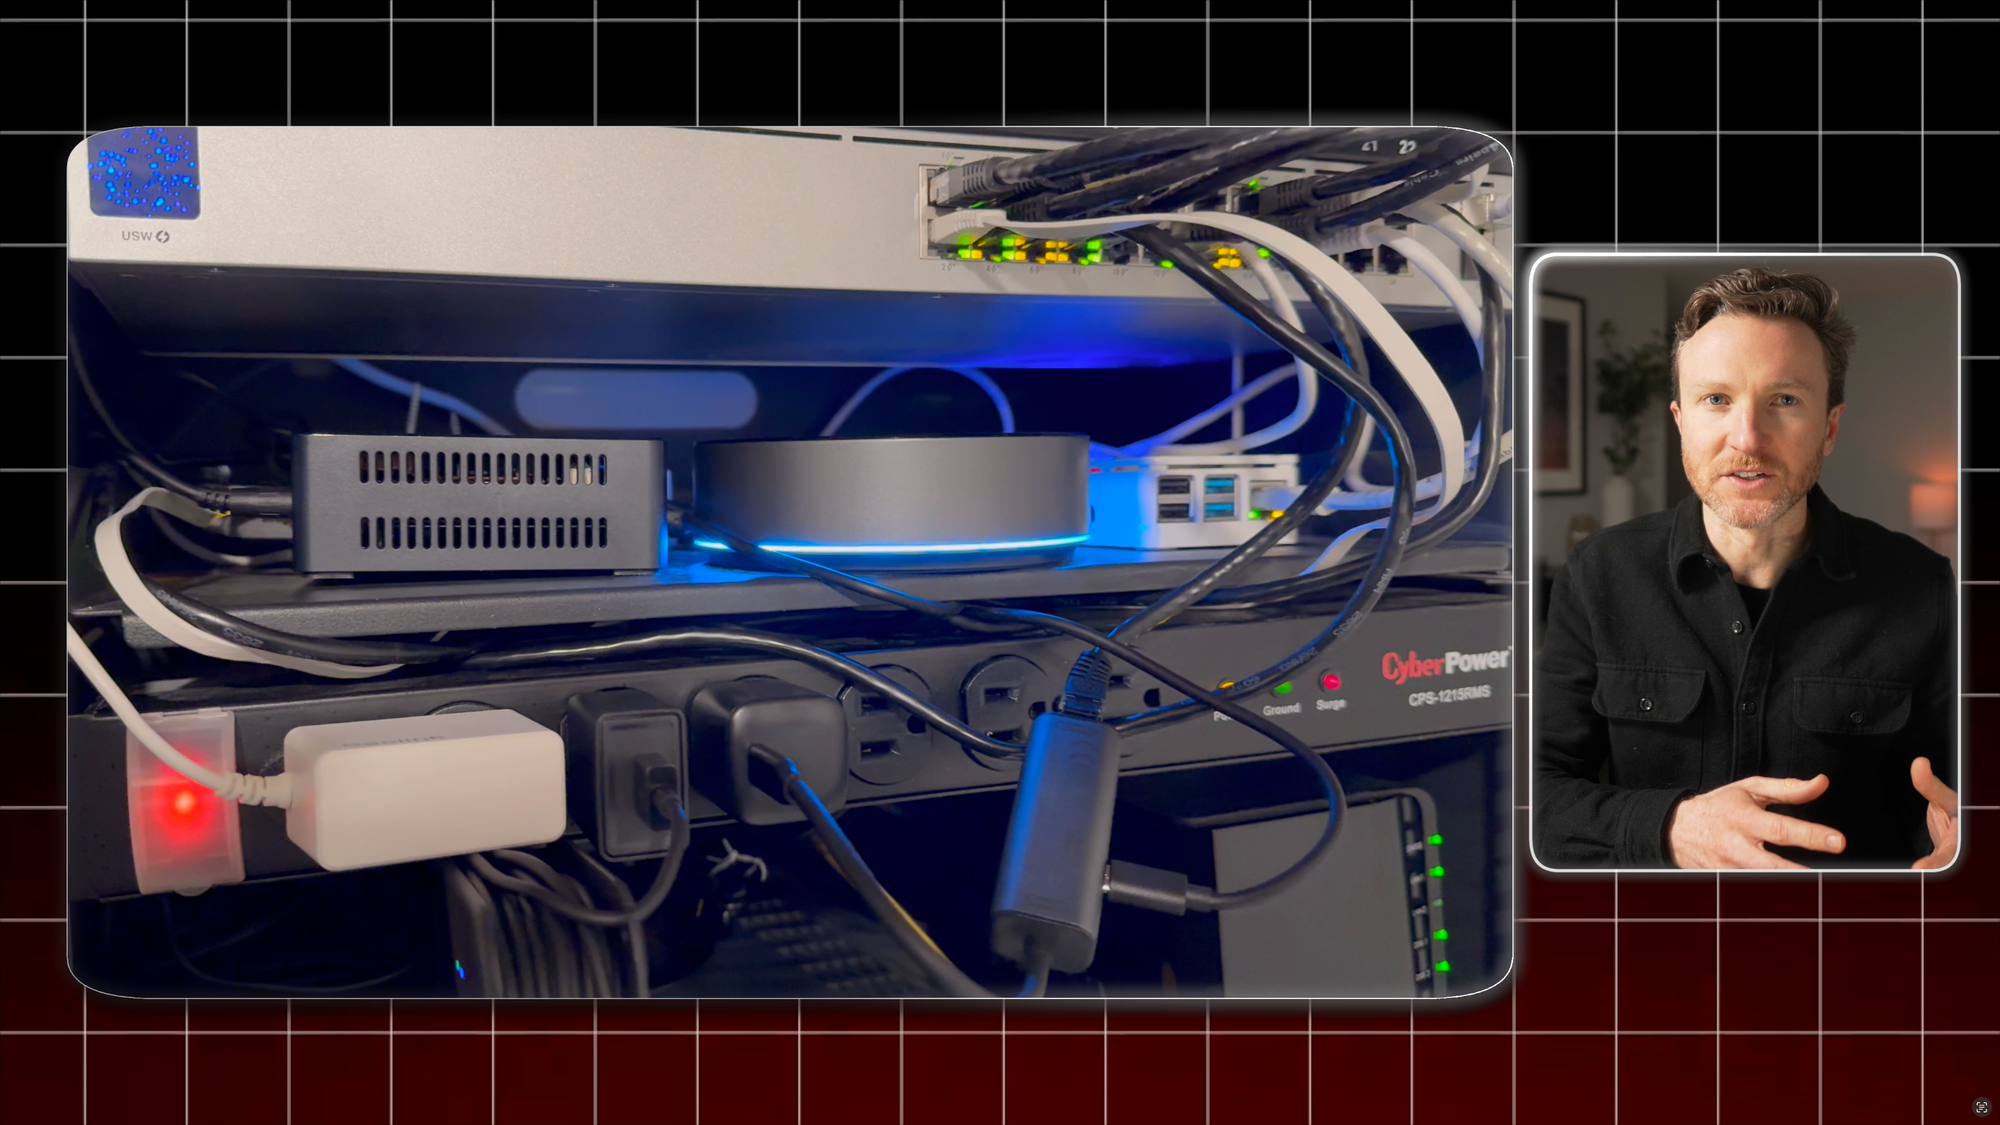
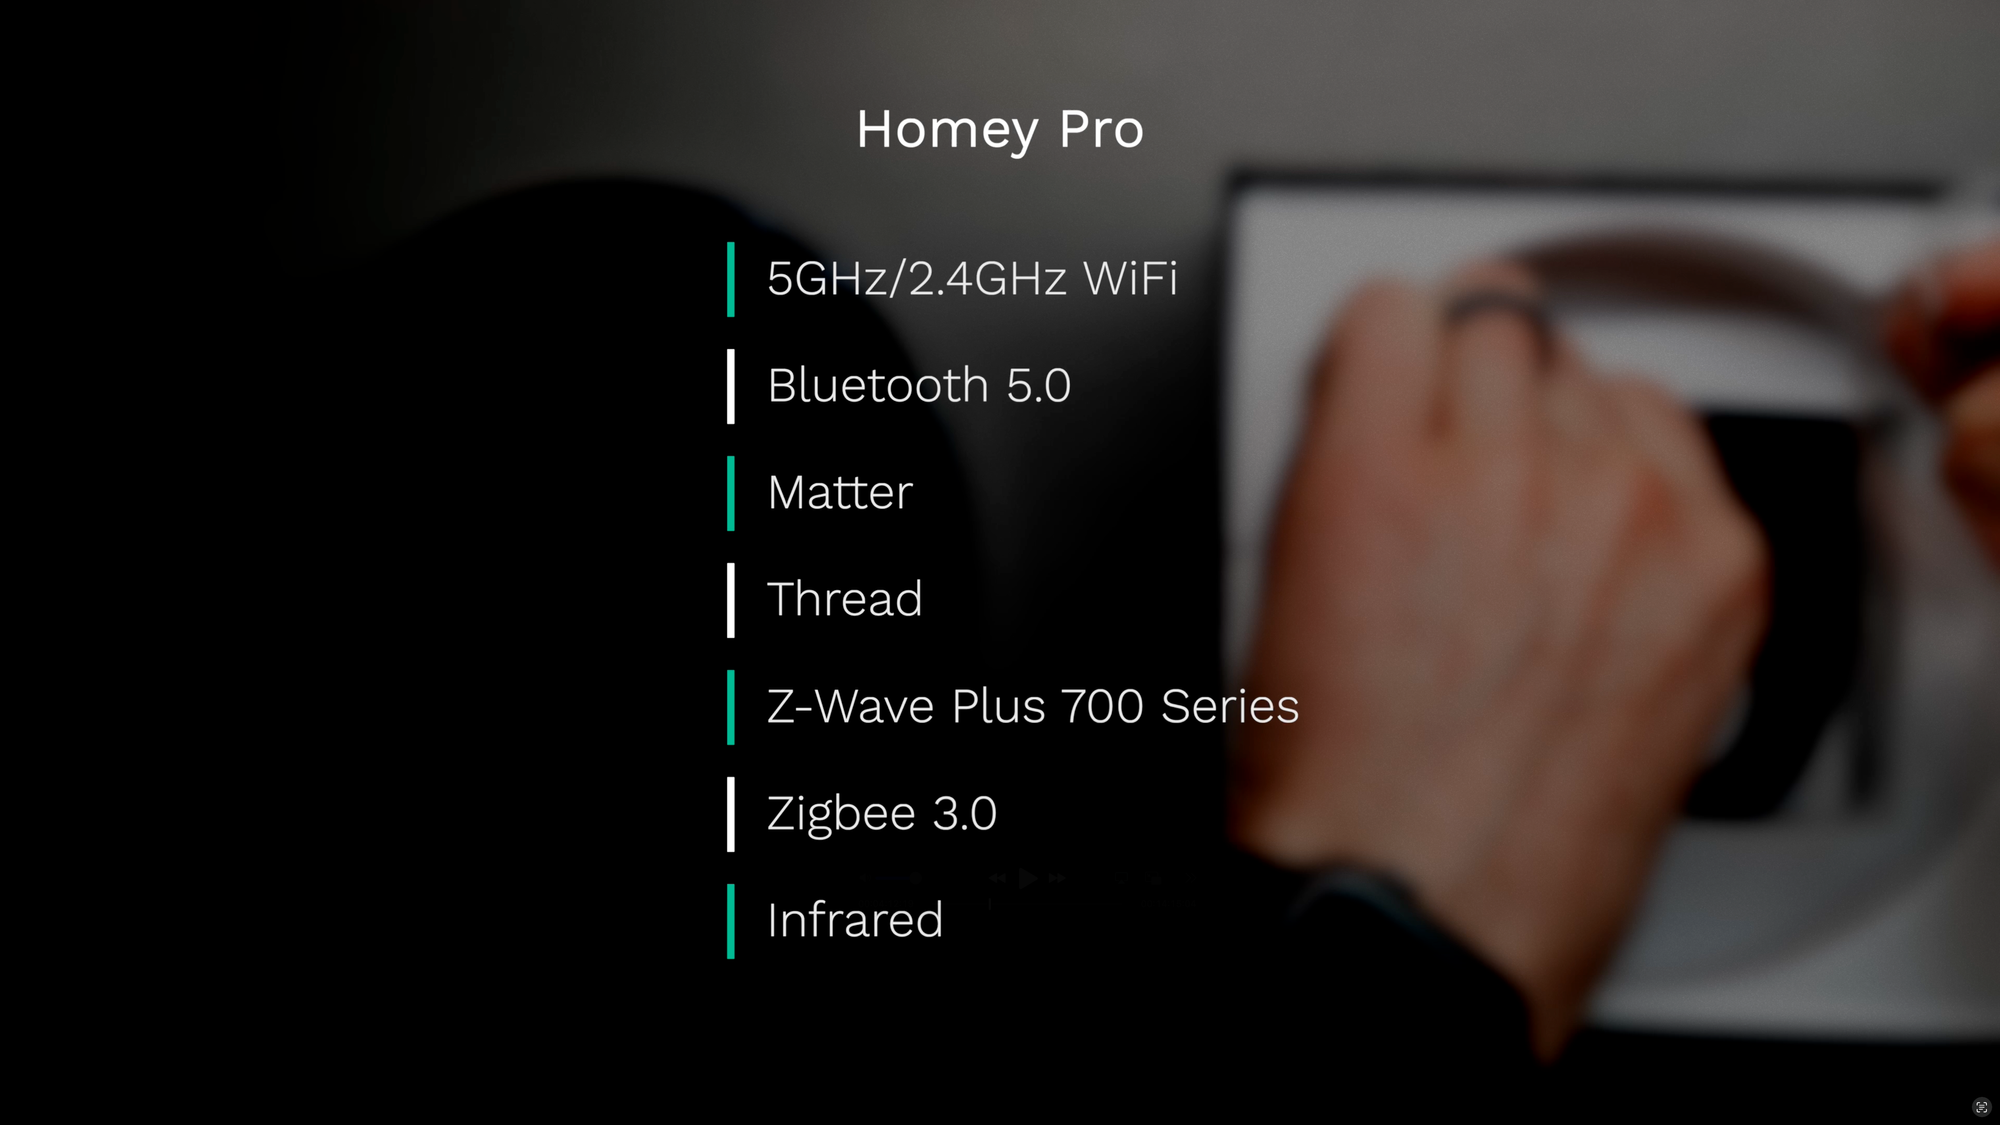
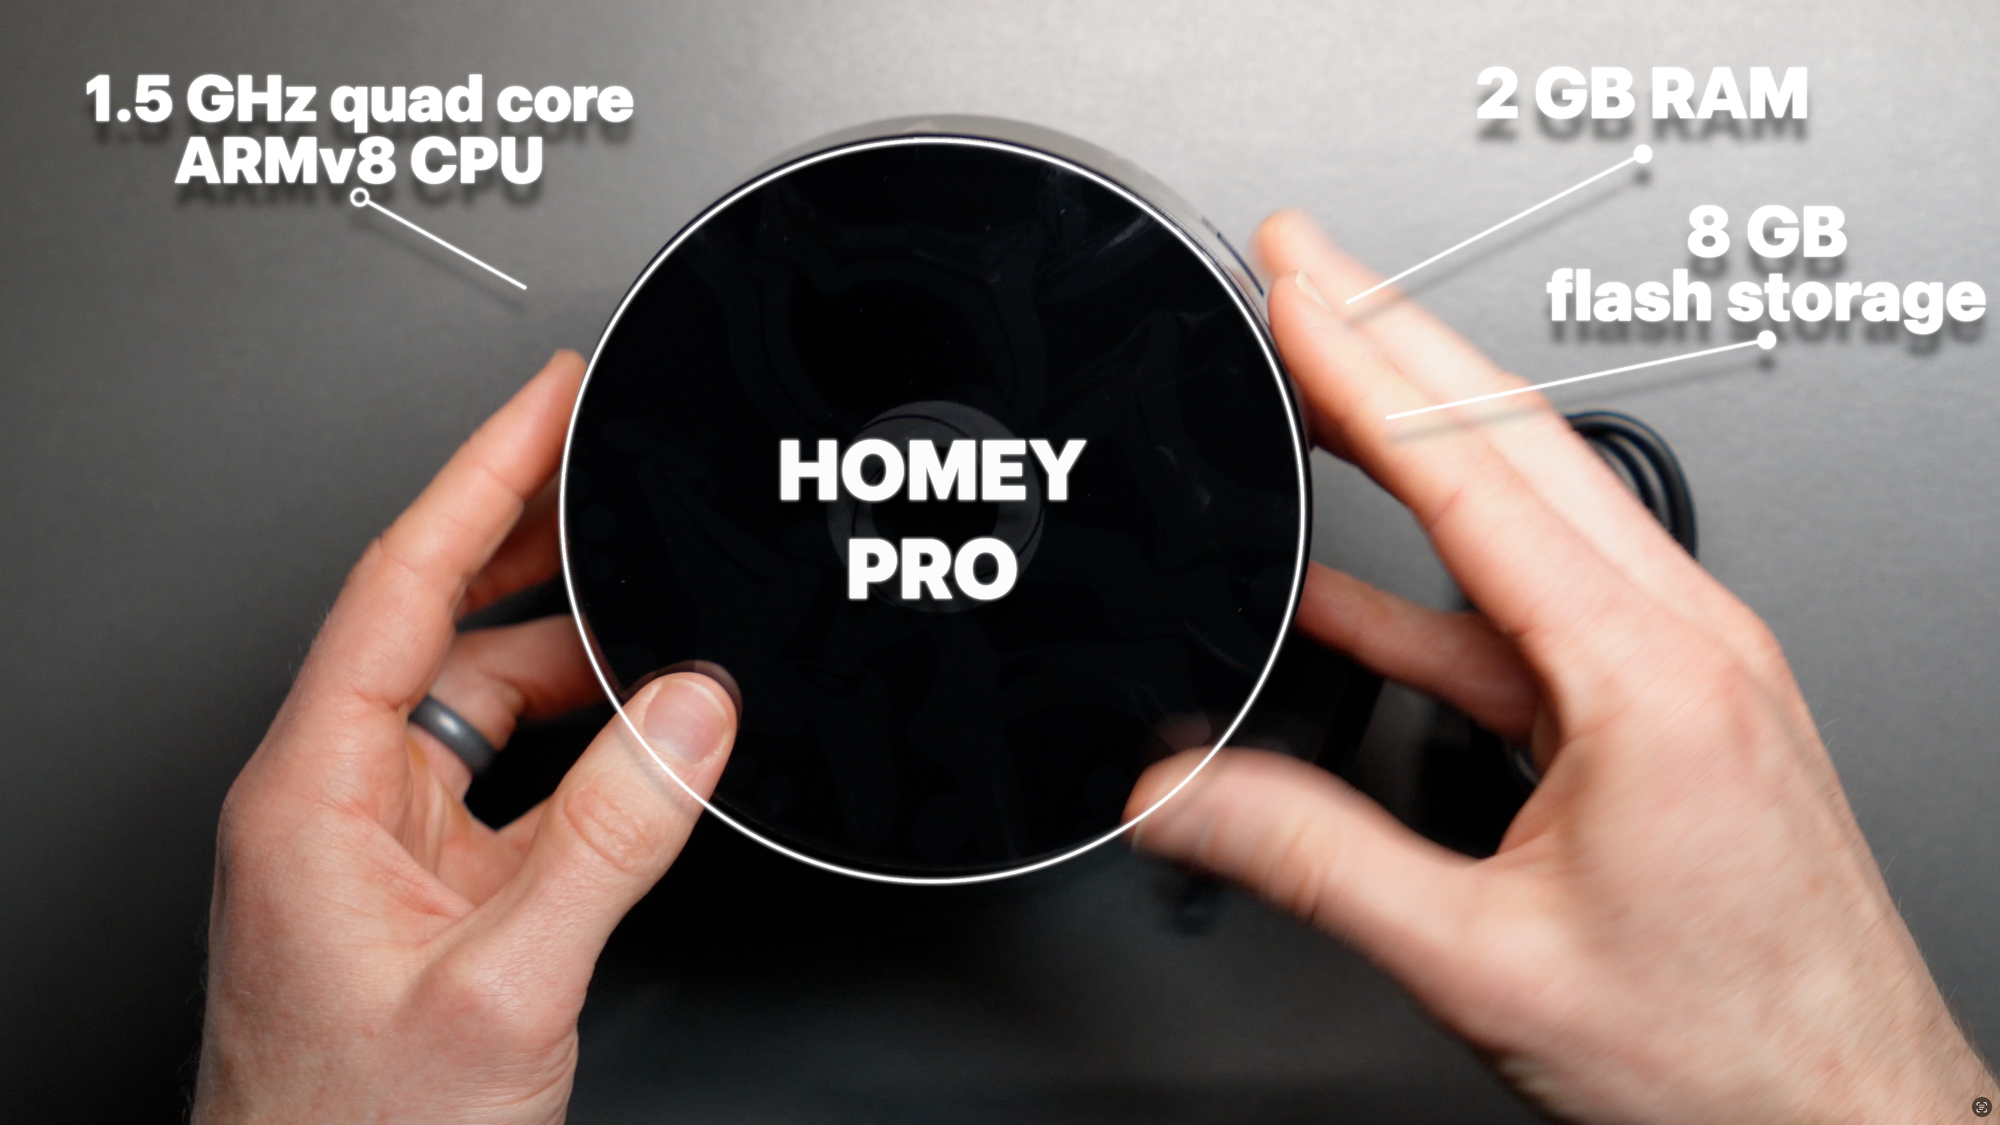
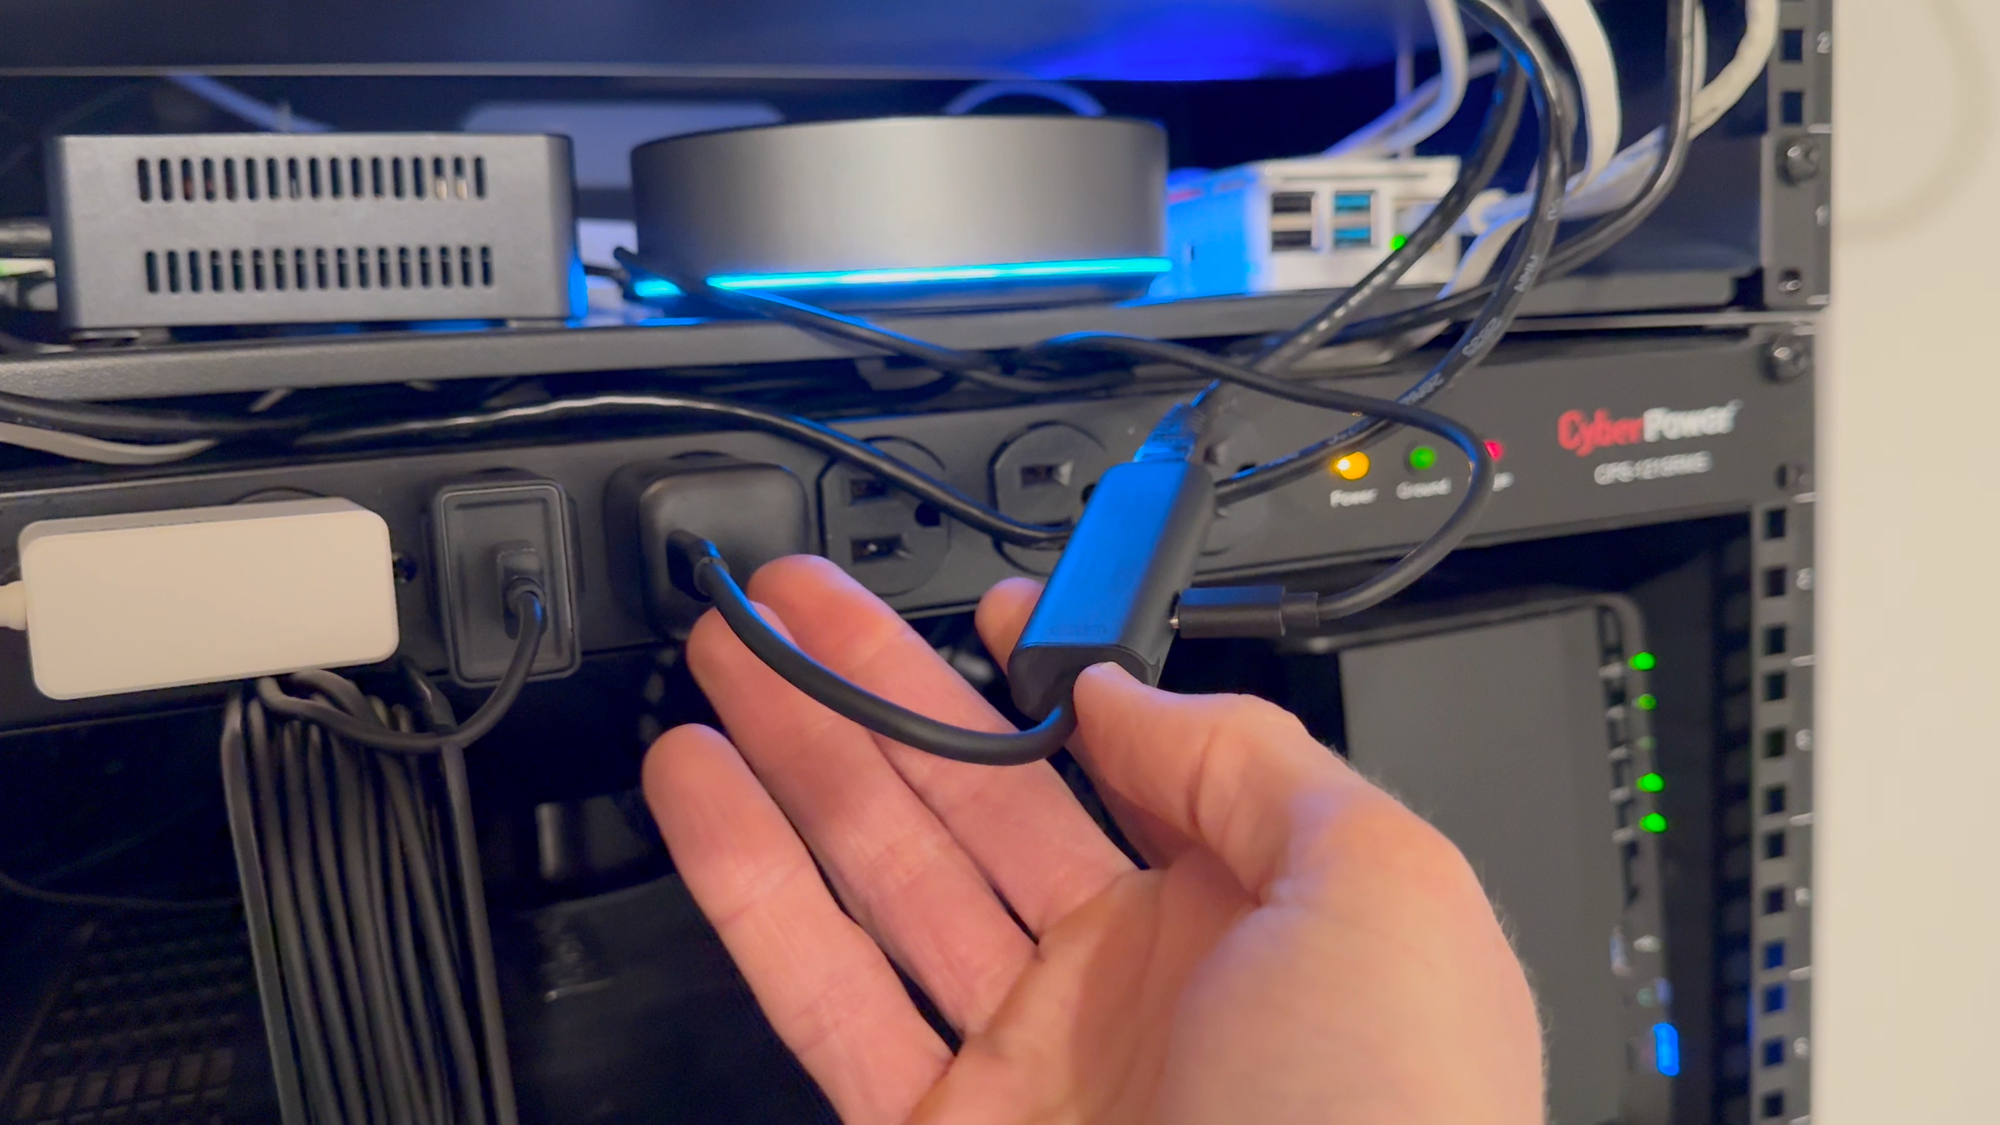
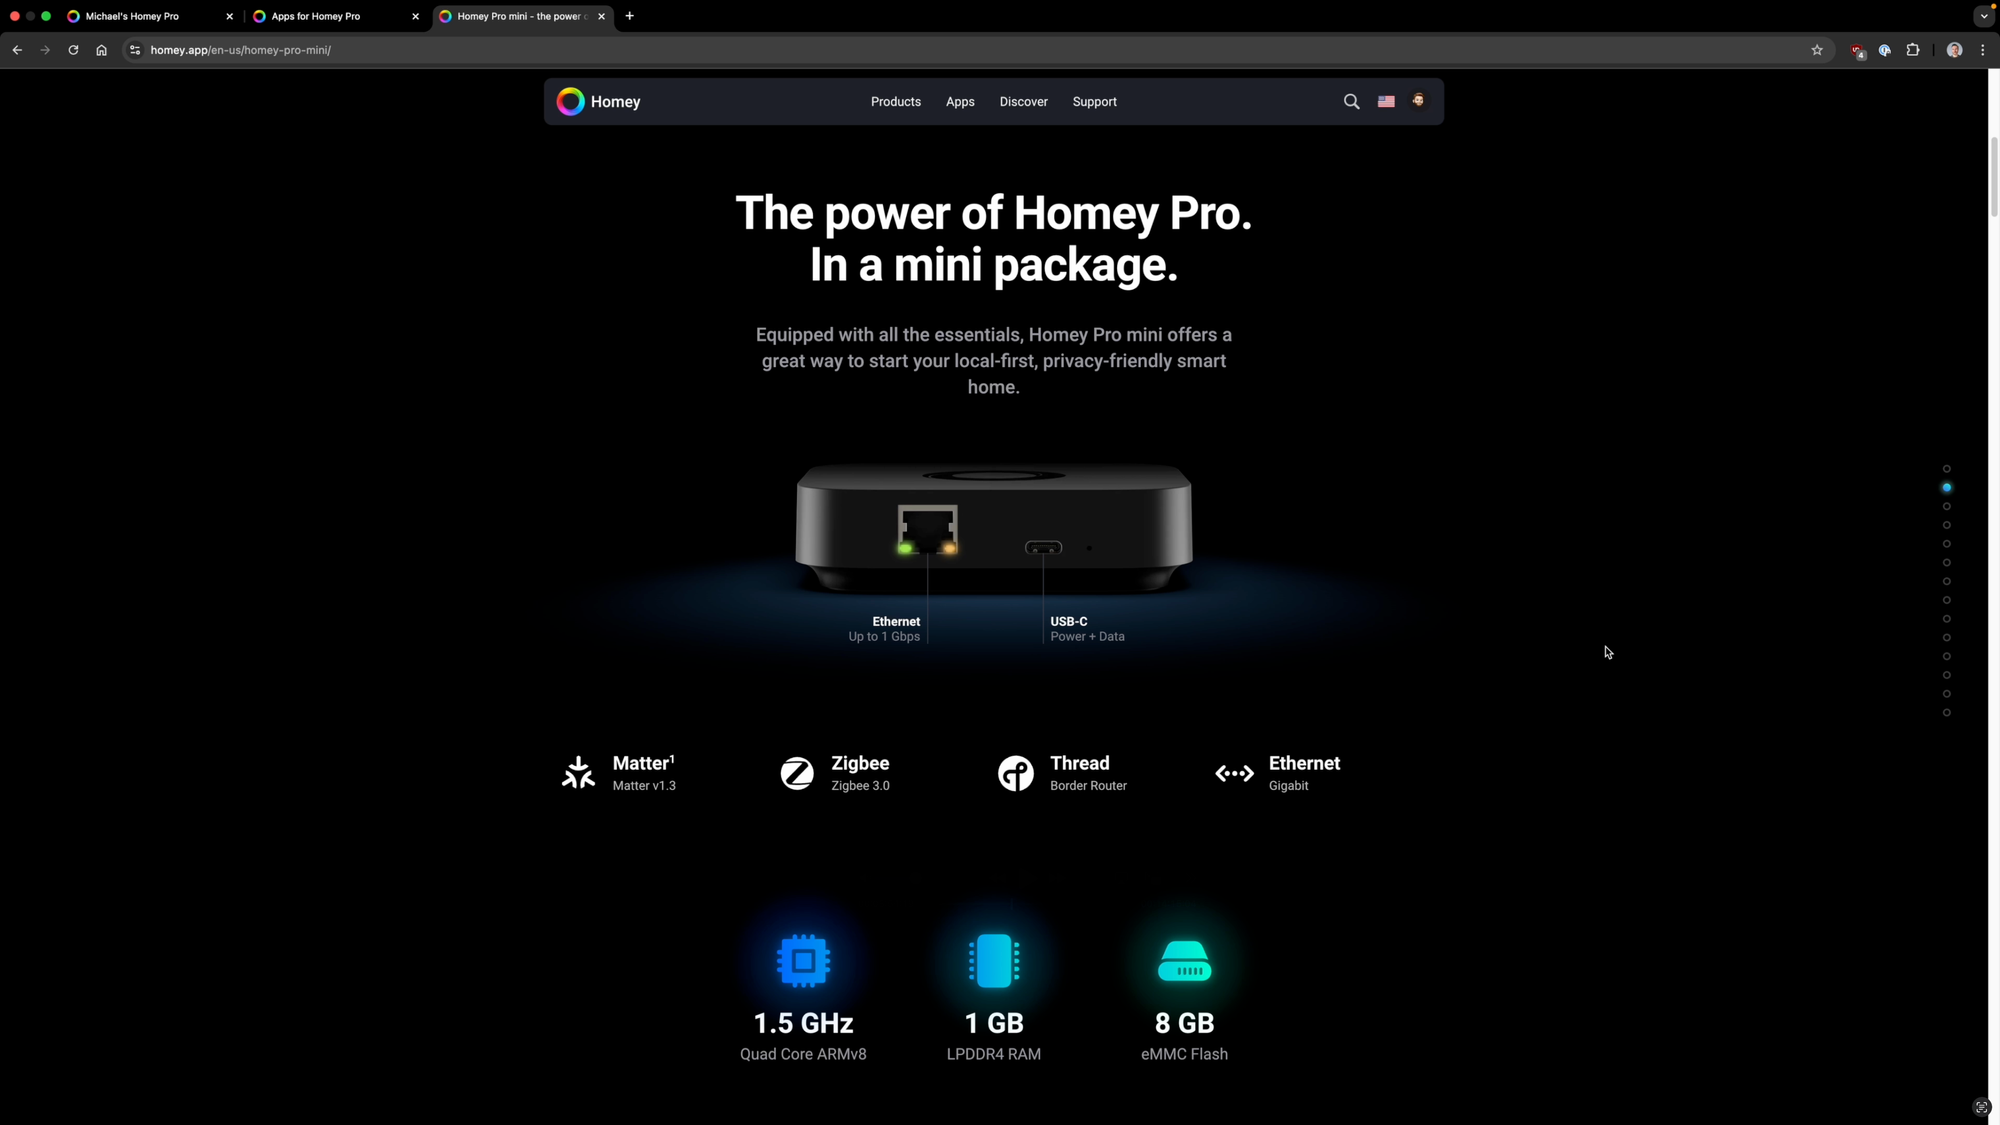
To run Apps and Flows, you’ll need a way to run Homey, and you’ve got a few choices. The flagship option is the Homey Pro, which is what I am using. Homey Pro is simply the most versatile smart home hub that I have ever seen. This one device supports 5GHz and 2.4GHz WiFi, Bluetooth 5.0, Matter, Thread, Z-Wave Plus 700 Series — though I would have liked to see the latest 800 Series — Zigbee 3.0, and Infrared. Users outside of the US also have access to the 433 MHz band. You can use an optional adapter to connect Homey Pro to Ethernet rather than WiFi. Inside Homey Pro is a 1.5 GHz quad core ARMv8 CPU, 2 GB RAM, and 8 GB of flash storage.
The intent of Homey Pro is to unify everything that you might need to control your smart home into a single device, without the need for additional hubs or gateways, or even a subscription. Homey Pro runs and processes your smart home requests locally for privacy and speed, and it continues to operate even when the internet is down. It can also be backed-up locally, and connect to local LAN devices.
The part where some folks may struggle is the price: Homey Pro is $399. But it’s helpful to put that number in context. If I were to create my own home automation server using a mini PC and separate gateways for Matter, Thread, Z-Wave, and Zigbee, it would cost around $286, and that still would not include infrared. Yes, you could do create this for even less, but for the person who just wants to buy one thing and have it do it all for them, I don’t think the price of Homey Pro is entirely unreasonable. With that said, for the price tag, I would have liked to see Ethernet built-in without the need for an adapter, along with better hardware specs, like higher memory and flash storage.

Homey Pro hardware
Homey Pro Mini
But if you’re interested in Homey and would prefer something less expensive, another option is Homey Pro Mini. For $199 (or $200 less), you get the same core functionality as Homey Pro, but without Z-Wave, Bluetooth, Infrared, or 433 MHz. Homey Pro Mini does include Ethernet, so no adapter is needed. Homey Pro Mini is their latest device, with shipping expected in April 2025.
Homey Pro Mini hardware
Homey Bridge
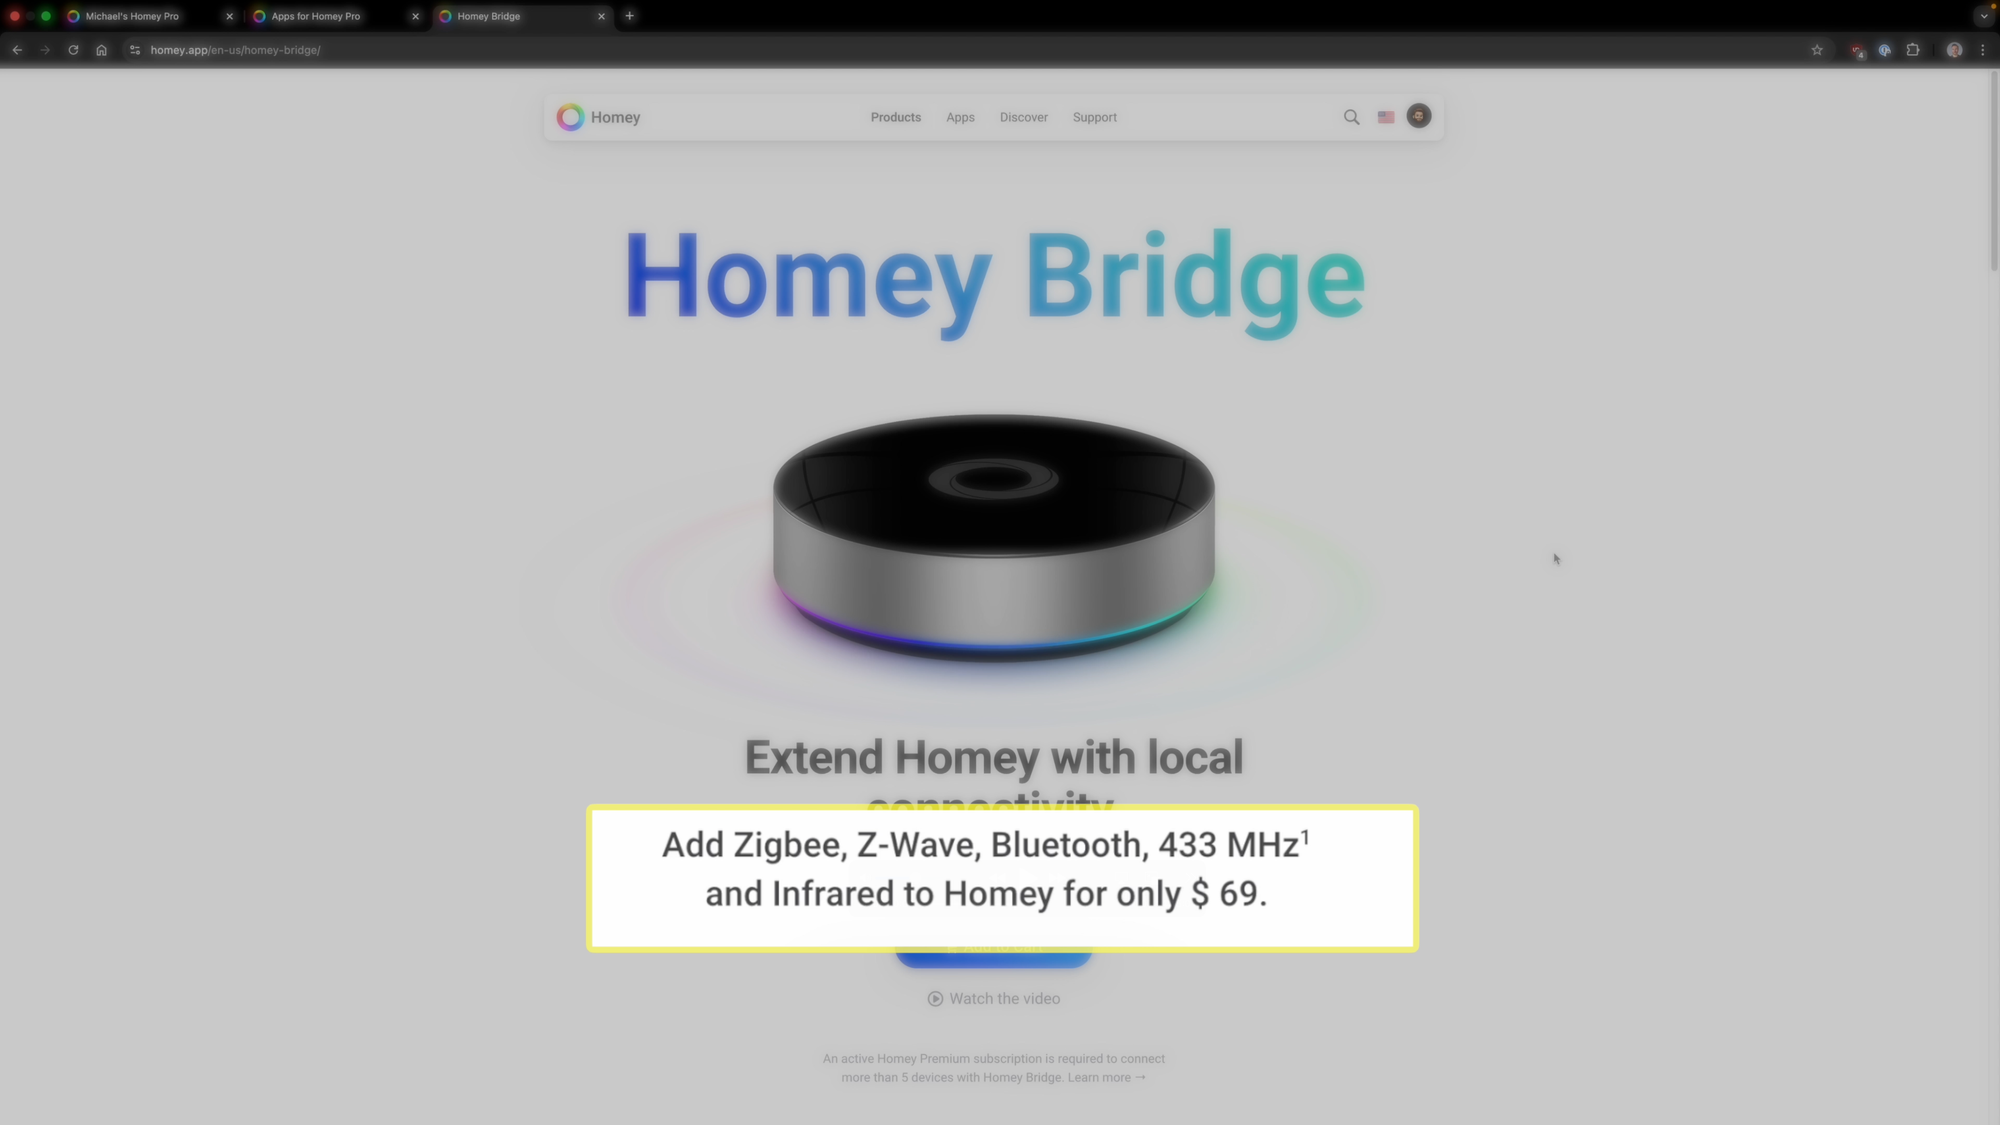
For the least expensive entry into Homey, there is the Homey Bridge. This device is just $69, and includes support for the same protocols as Homey Pro, except for Matter and Thread. You can also use Homey Bridge to extend the coverage of a Homey Pro or Homey Pro Mini. I think it’s more fitting for a Homey Pro Mini since with the two combined you get all the protocols of the Homey Pro.
Homey Bridge is so much less expensive for a reason: It has less powerful hardware and limited features. For example, it only allows you to add up to five devices for free. I would think of Homey Bridge as more of an add-on than a standalone device.
Homey Bridge hardware
Homey Premium
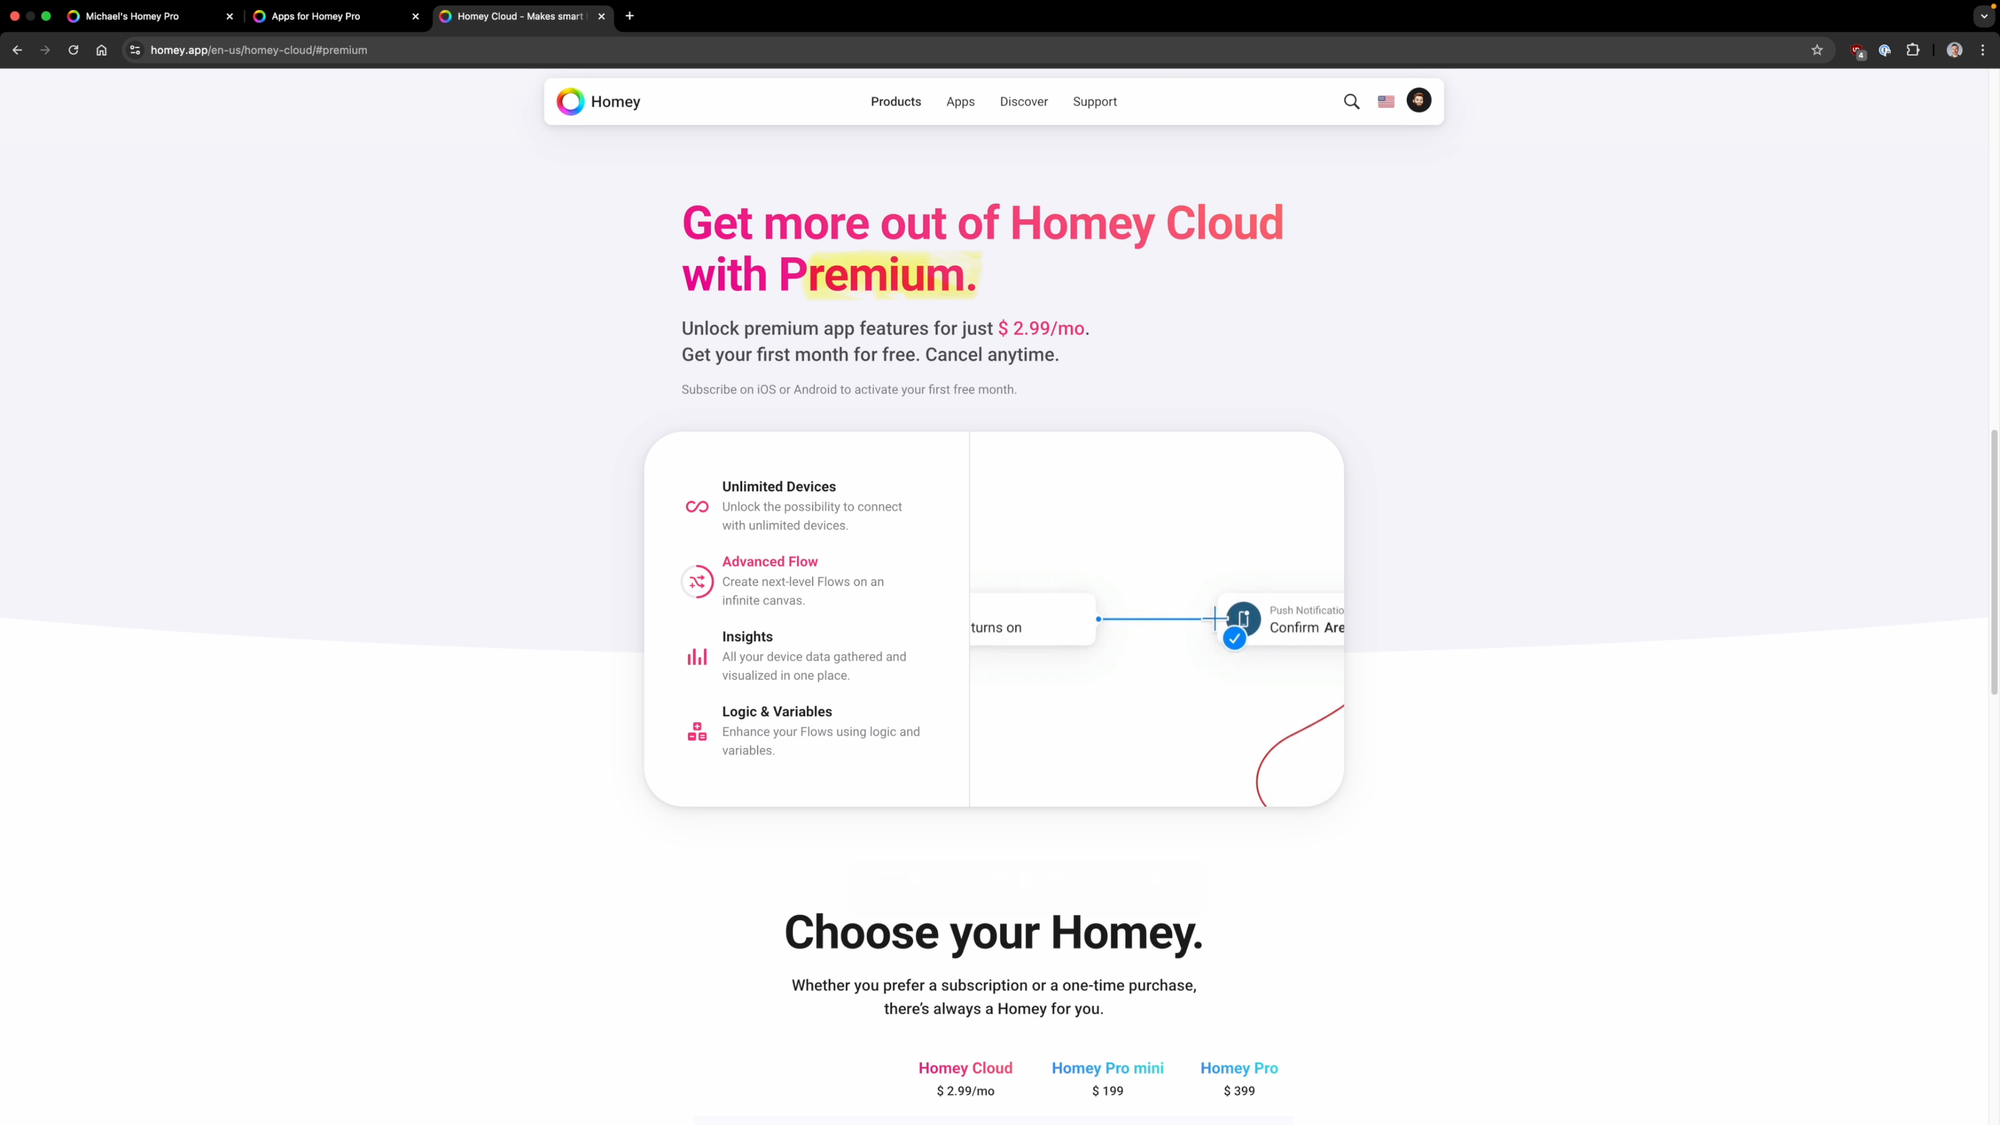
Now if you prefer the low entry cost of a Homey Bridge and don’t mind paying a subscription, you can subscribe to Homey Premium. For $2.99/month, you get support for unlimited devices, Advanced Flows for more complex home automations along with logic and variables, and insights into your smart home devices. But this subscription isn’t needed with Homey Pro — all of those features are included.
Homey Premium
Setting up Homey Pro
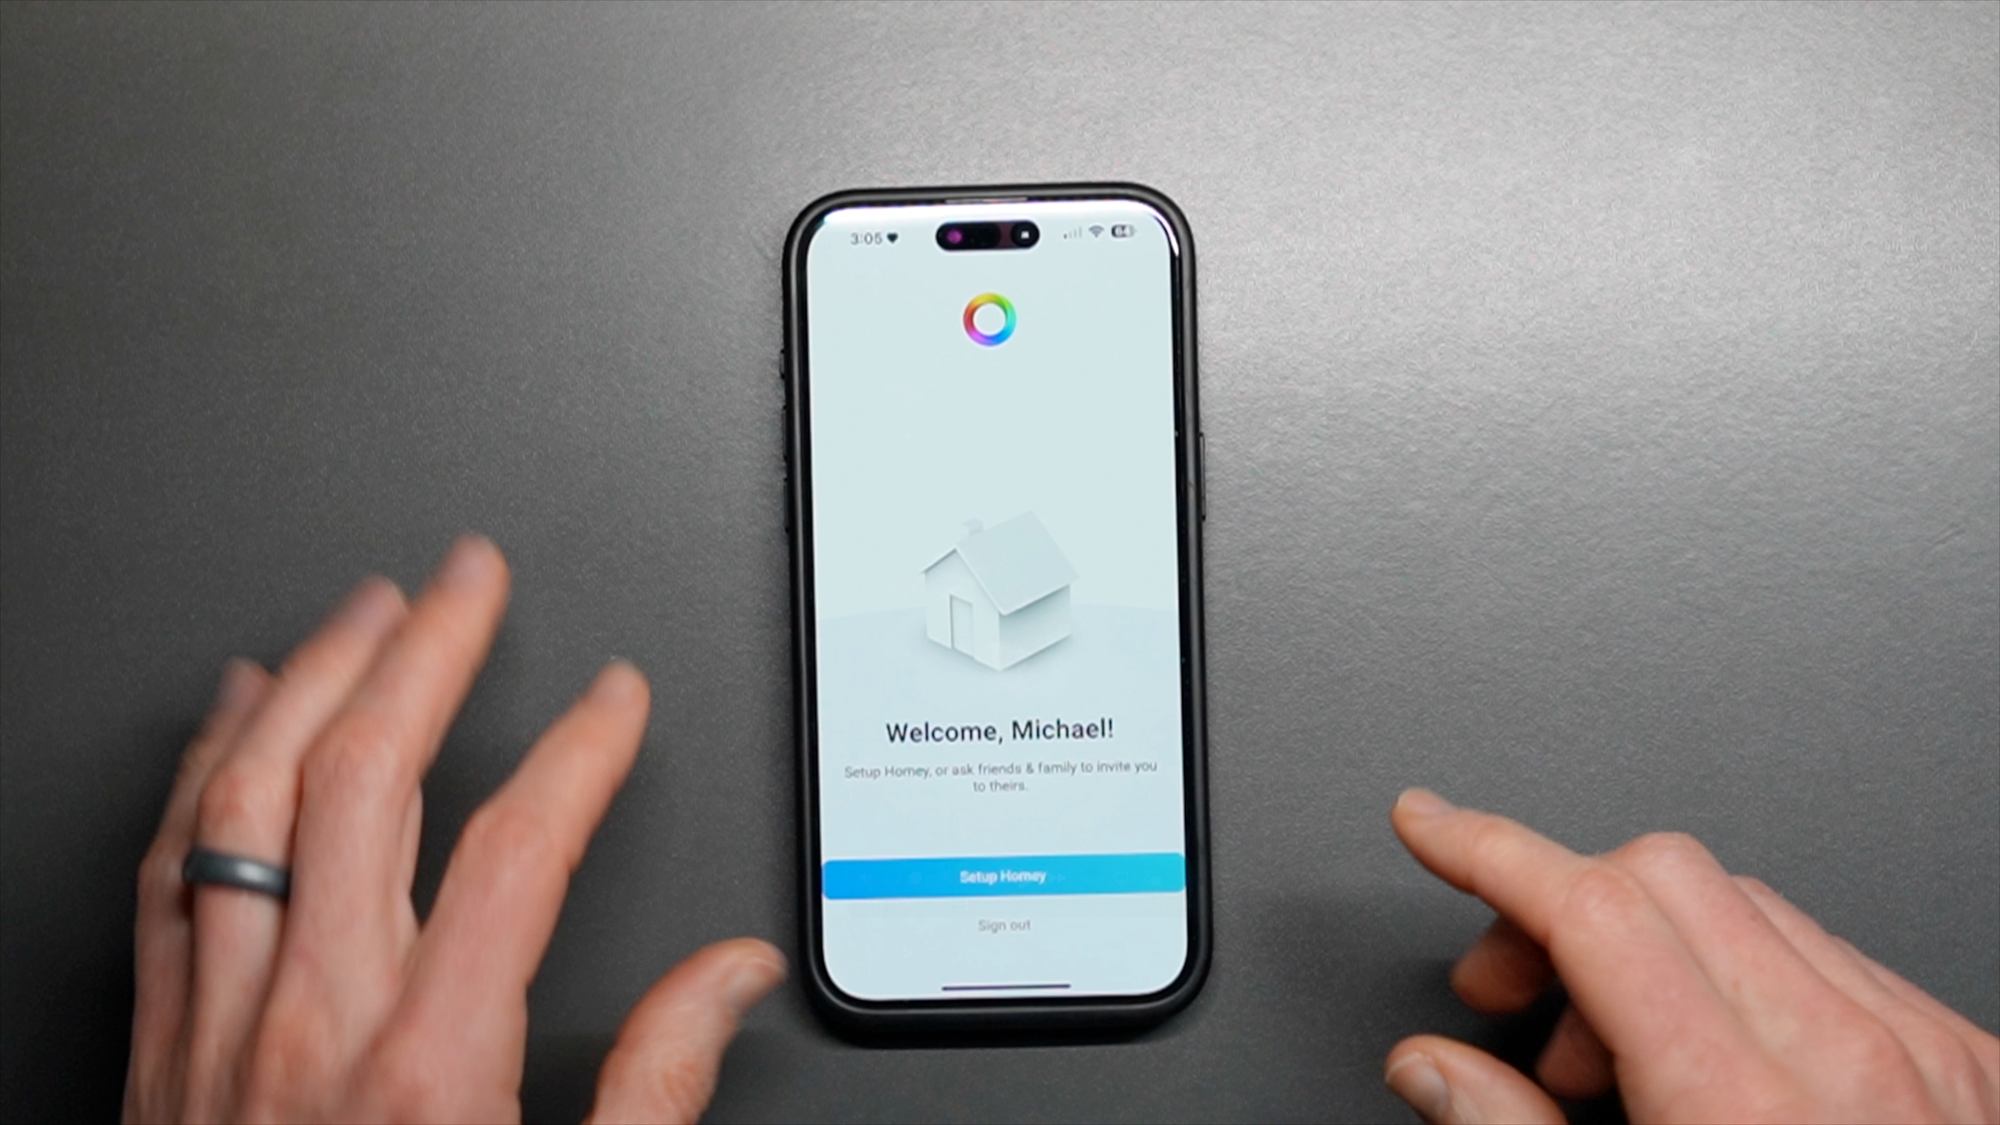
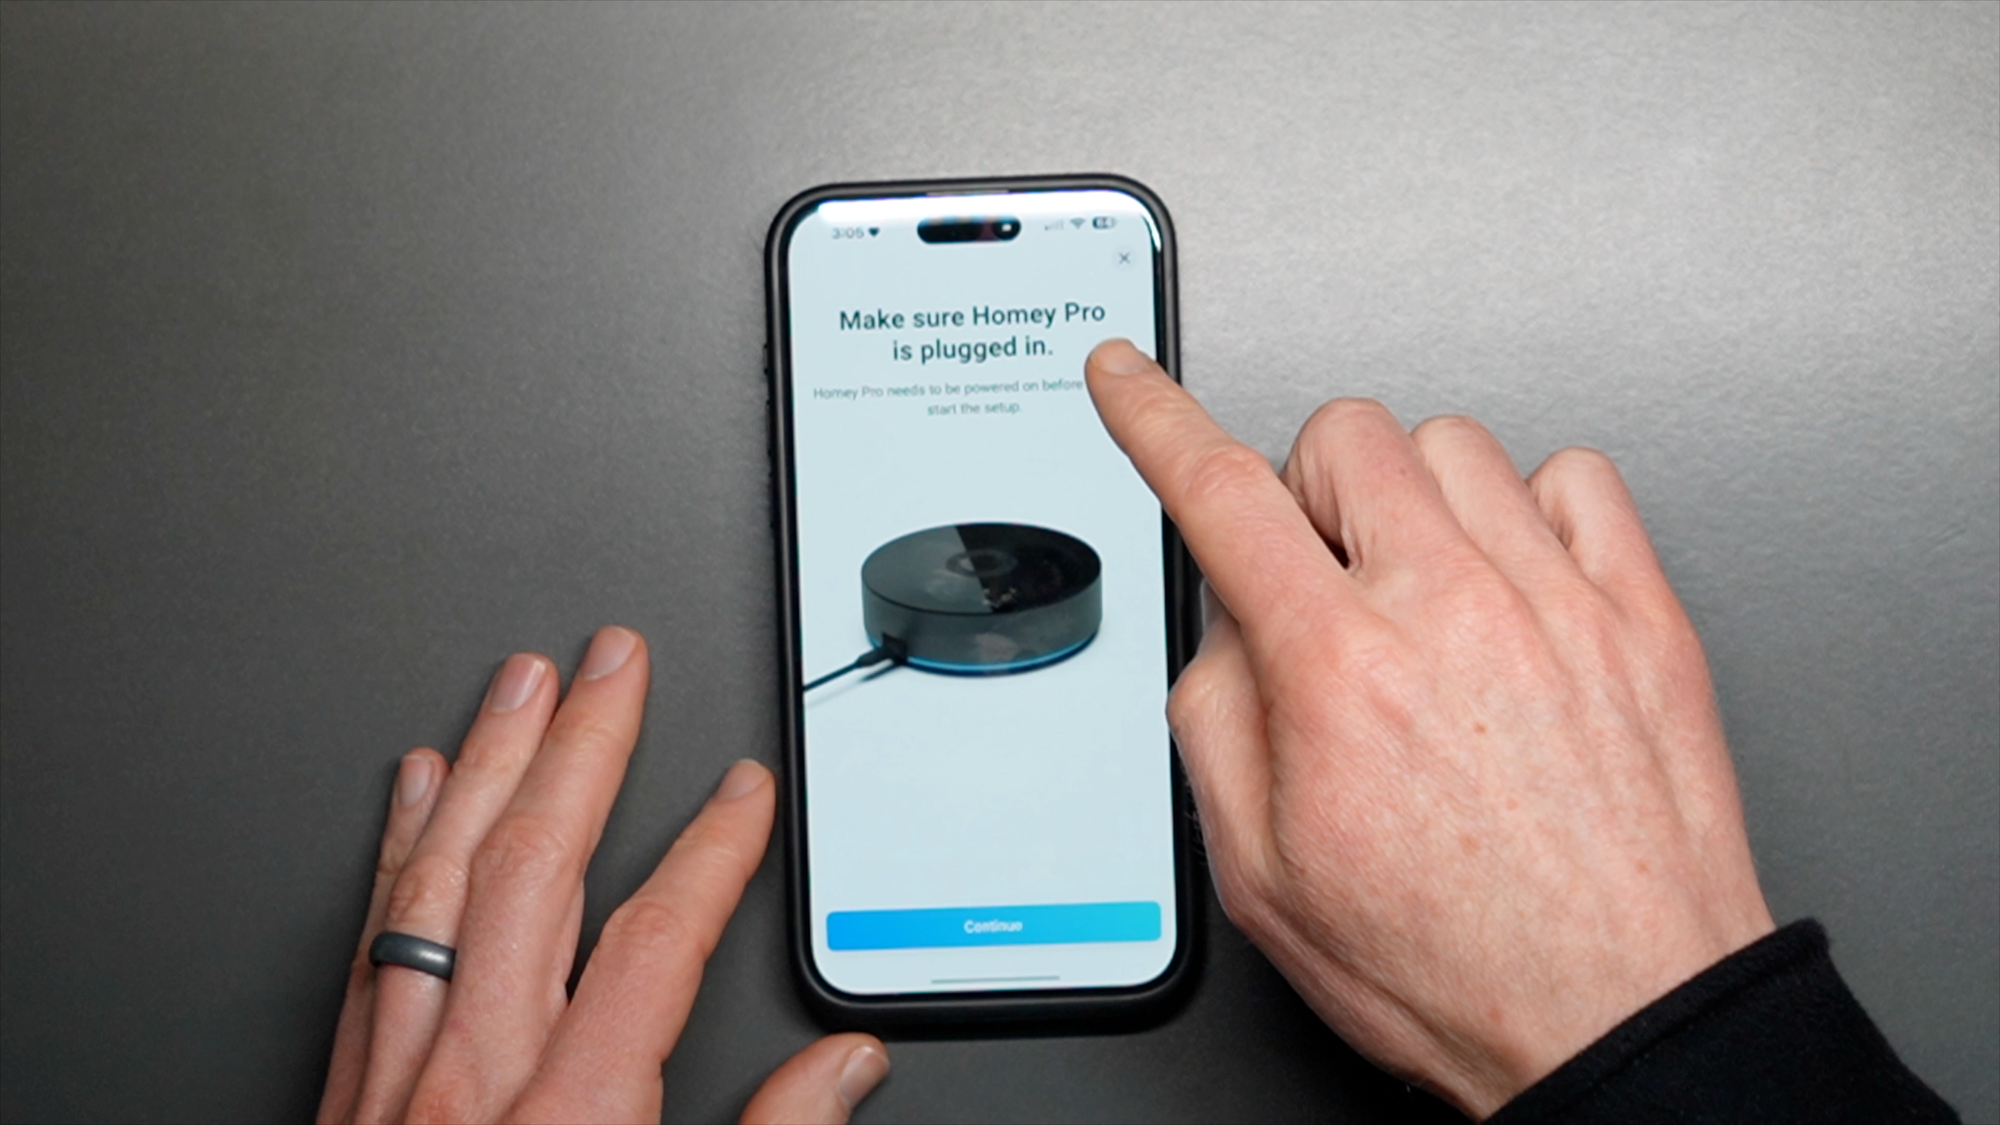
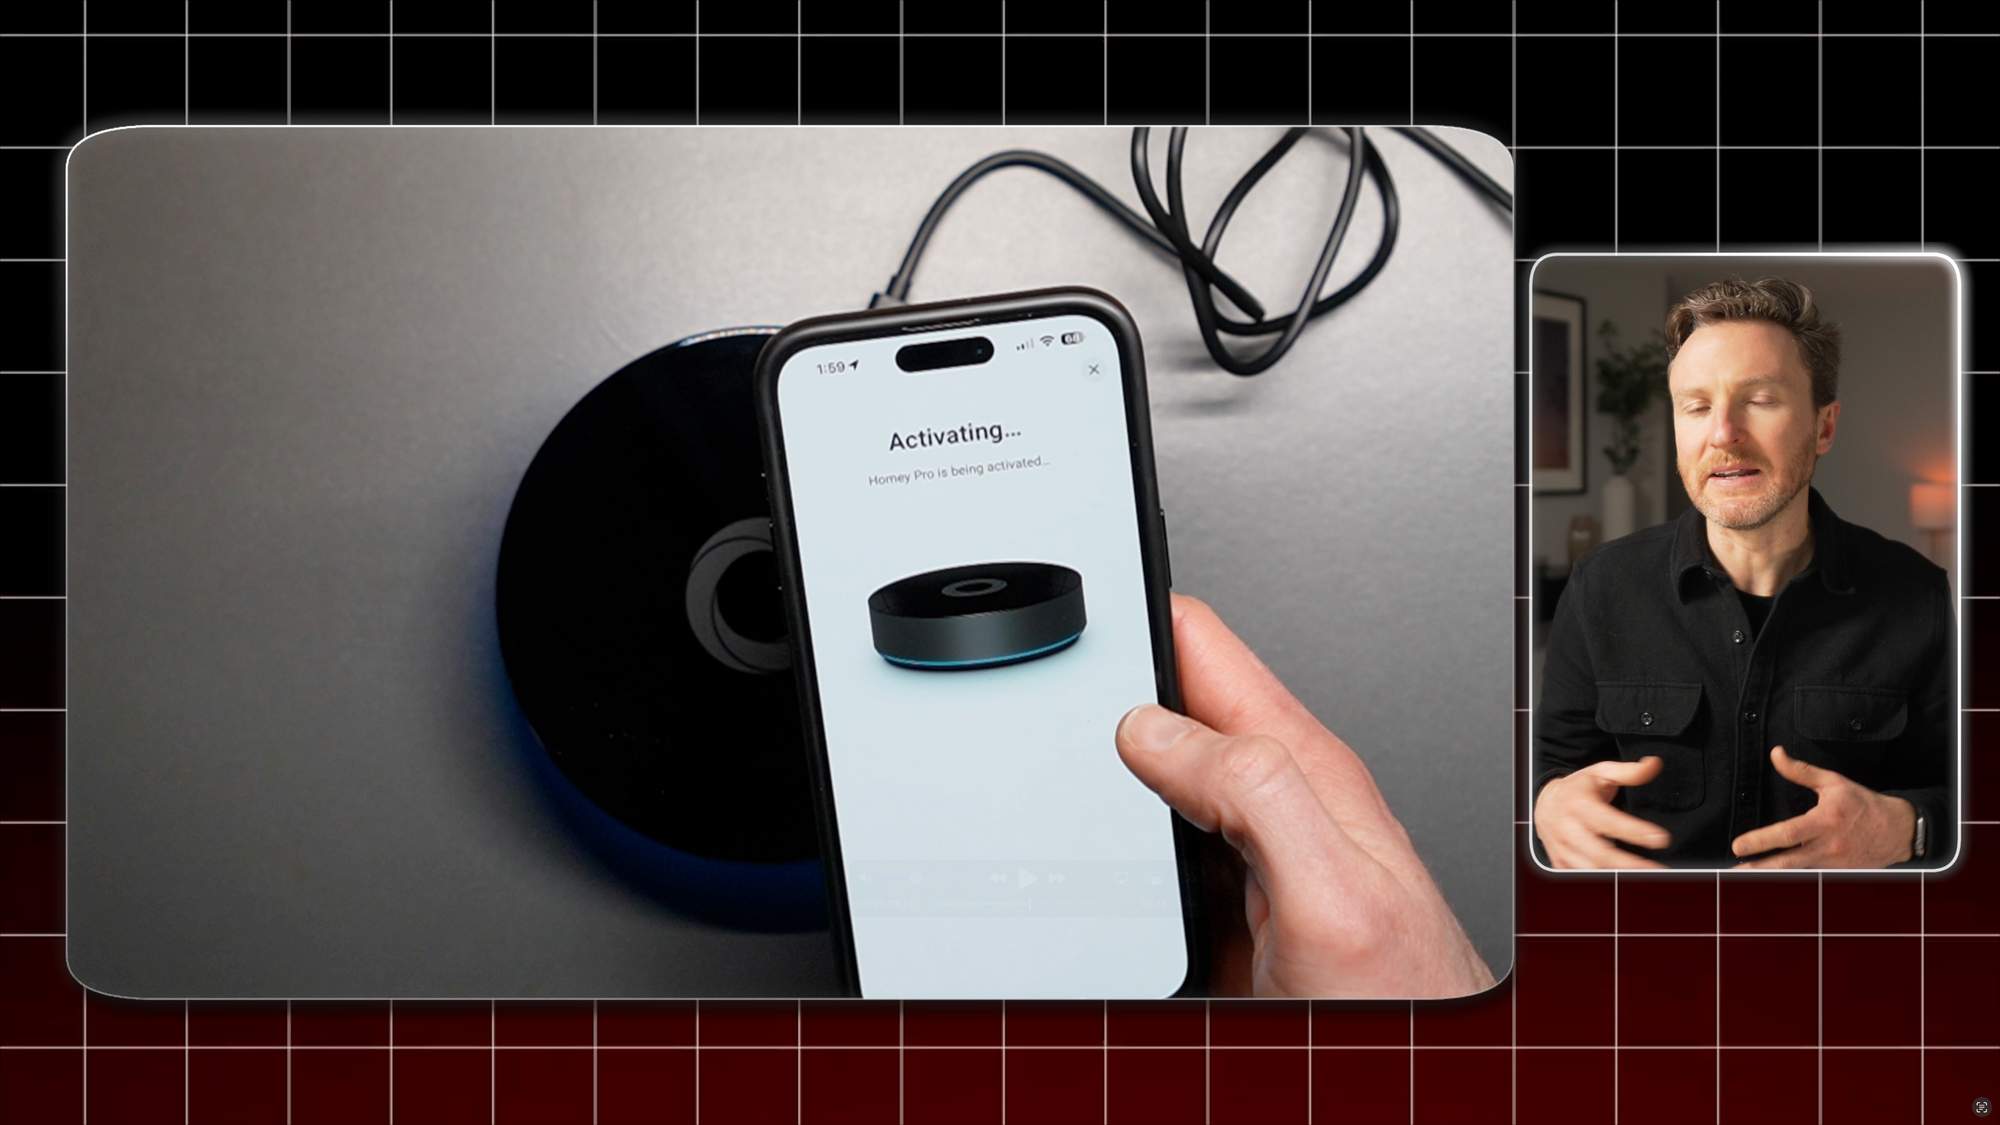
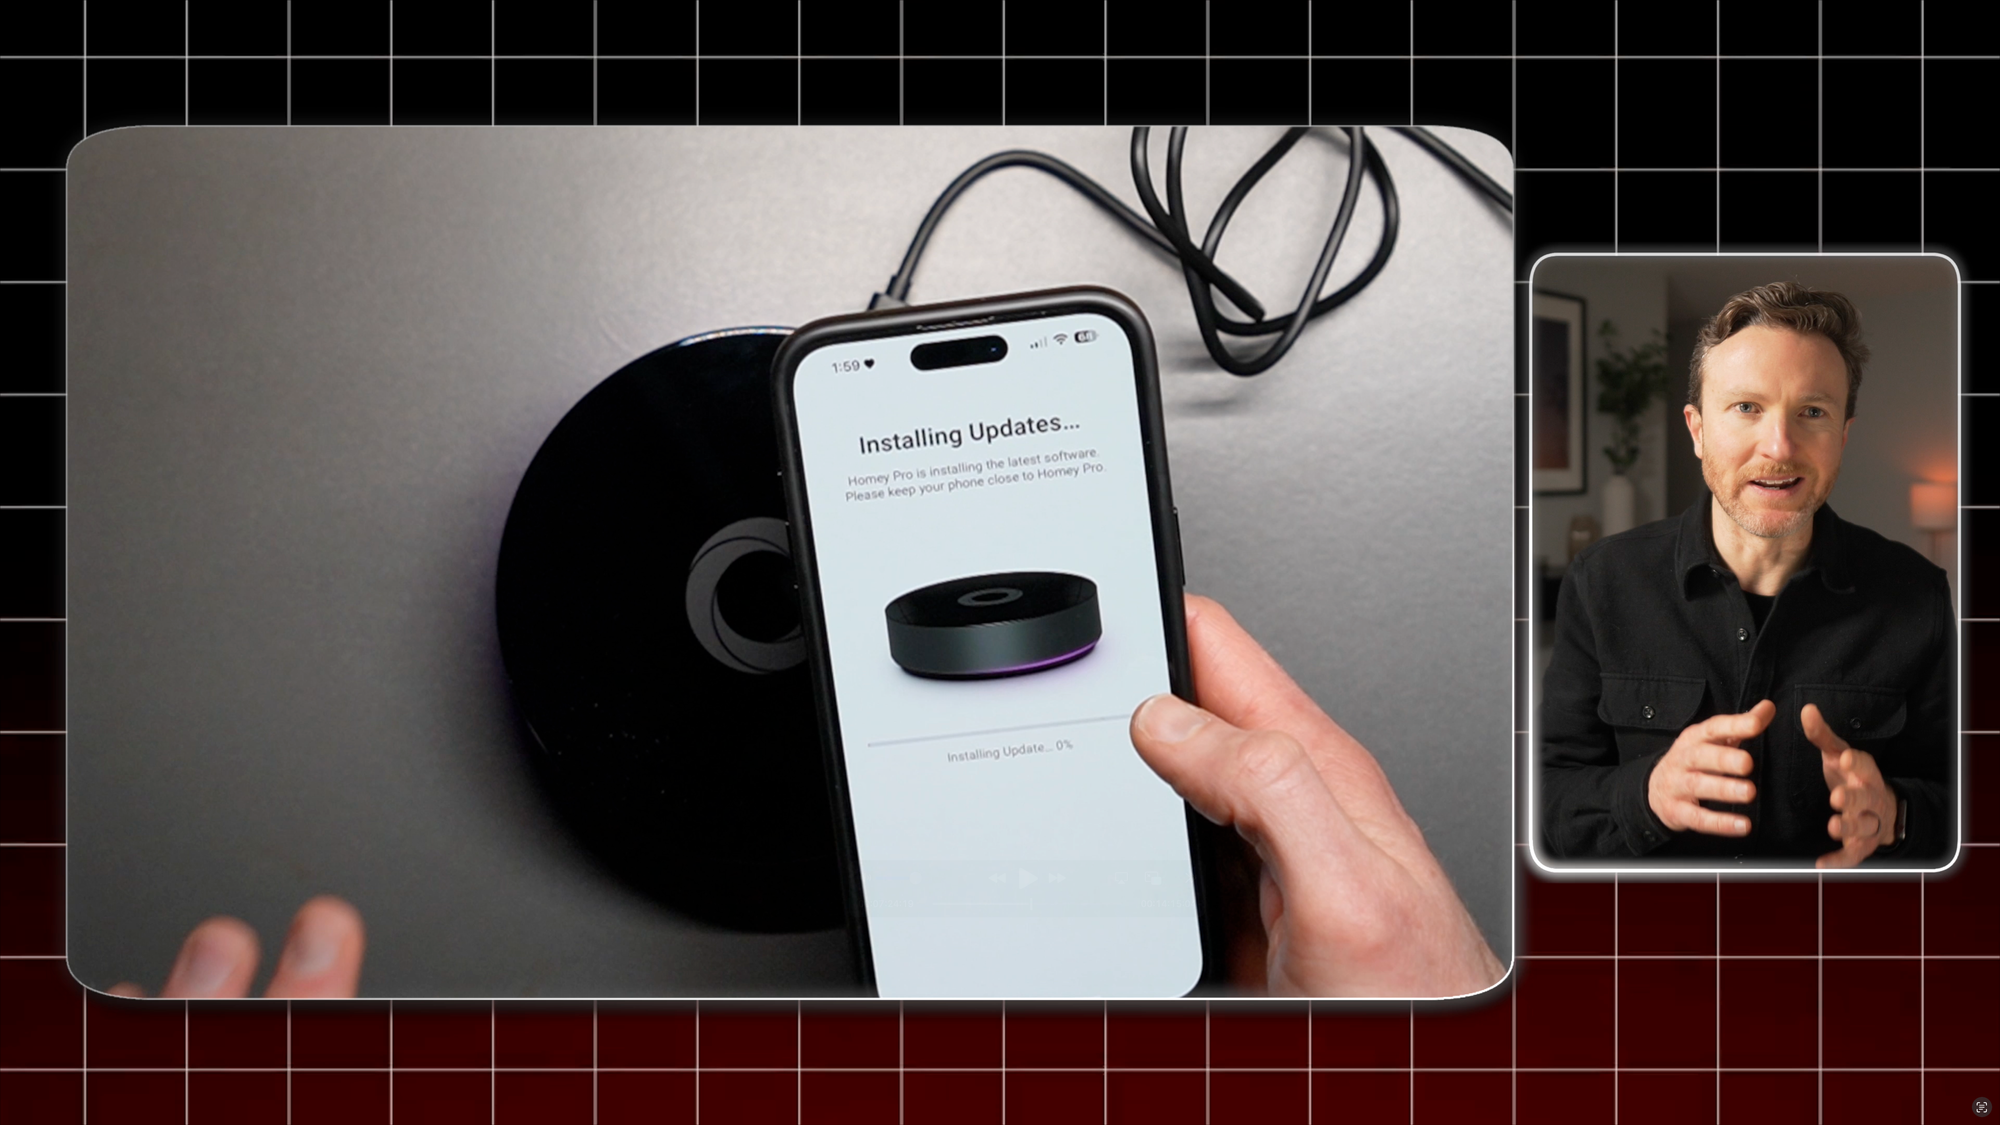
To set up a Homey Pro, first download the Homey App on your phone, and create an account. Once signed in, select the device you want to set up, which in this case is a Homey Pro. Plug the Homey Pro into power. If you plan on using it with the optional Ethernet Adapter, make sure that is plugged in as well to your router or switch port. Then, the app will search for and connect to Homey Pro. If you plan on using it over WiFi, you’ll need to enter the credentials for your WiFi network. Once connected, it may need to install updates before you can start using it.
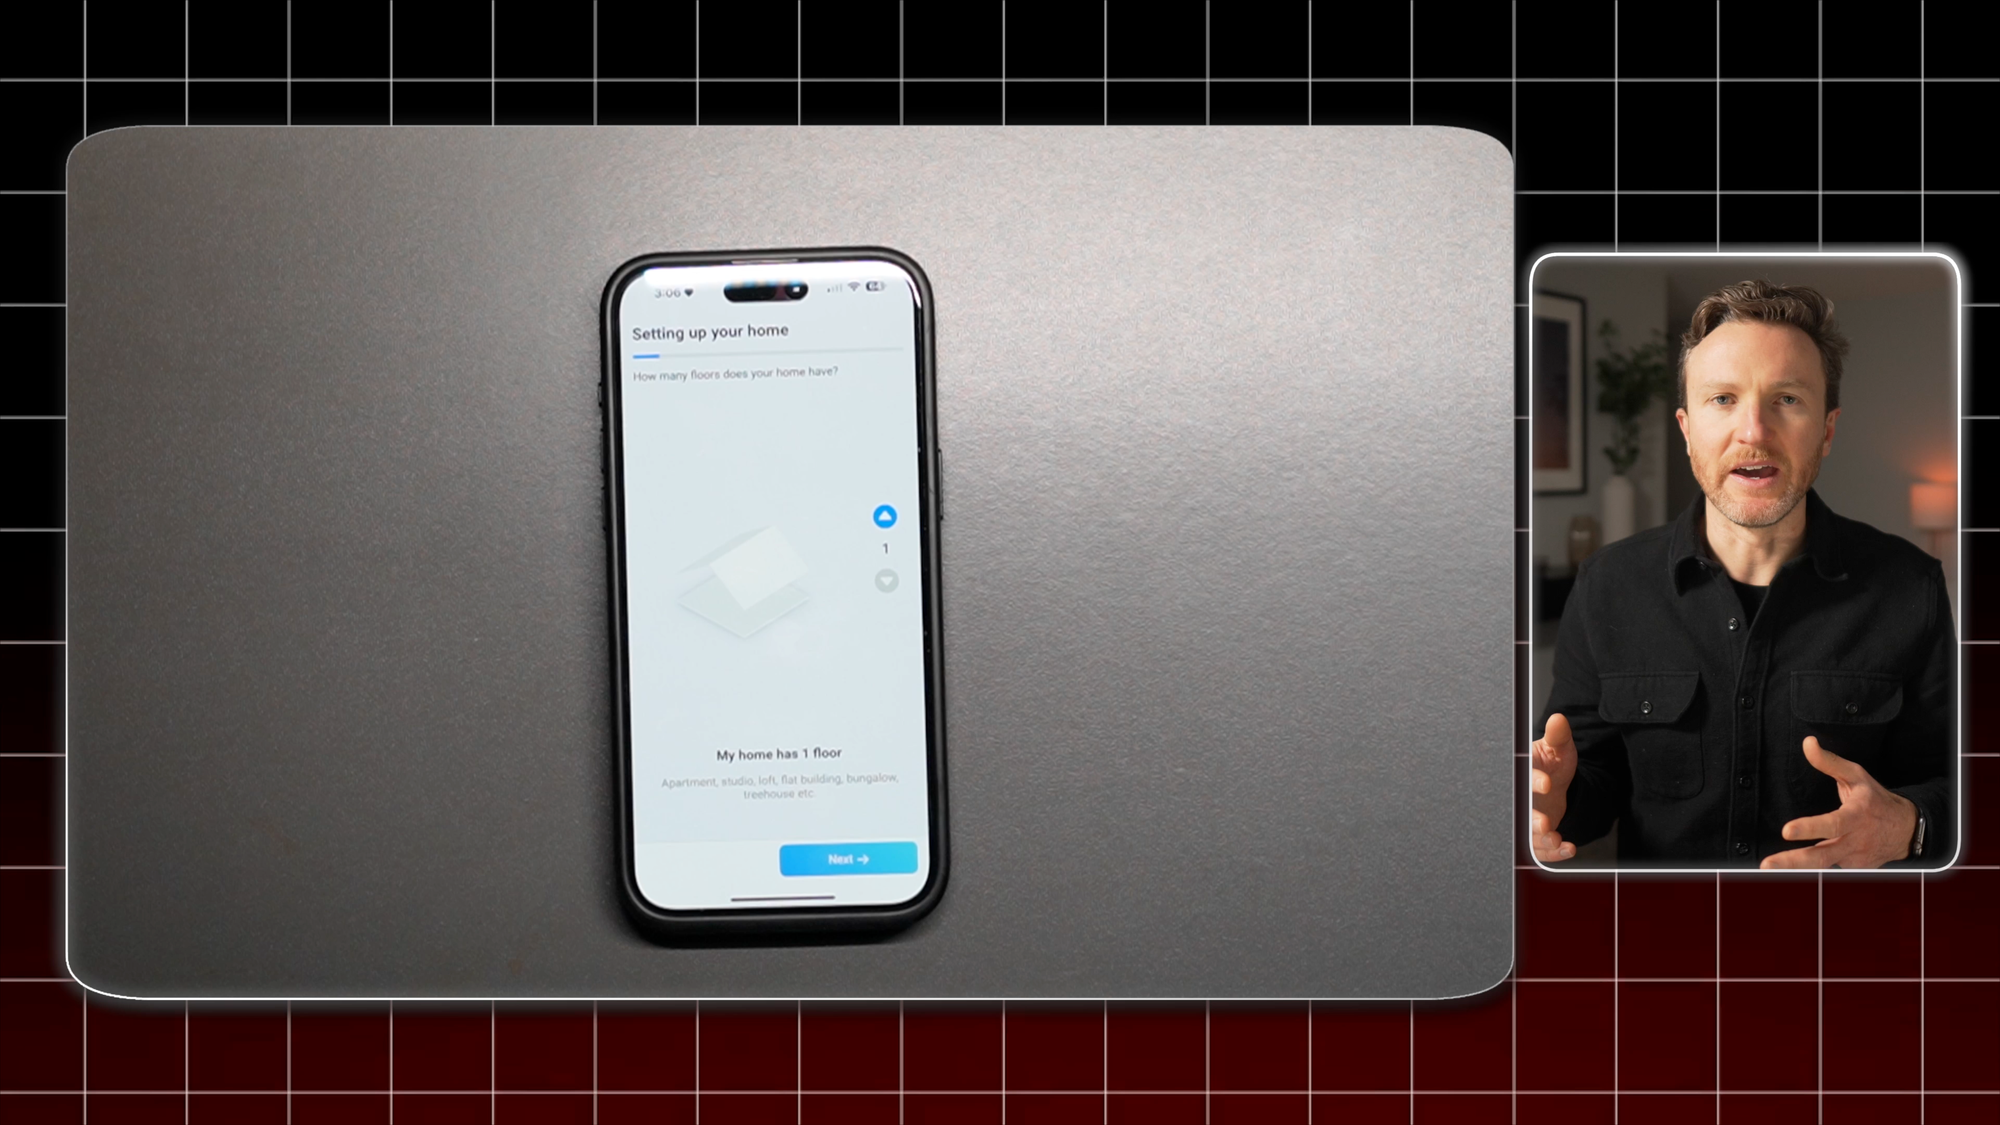
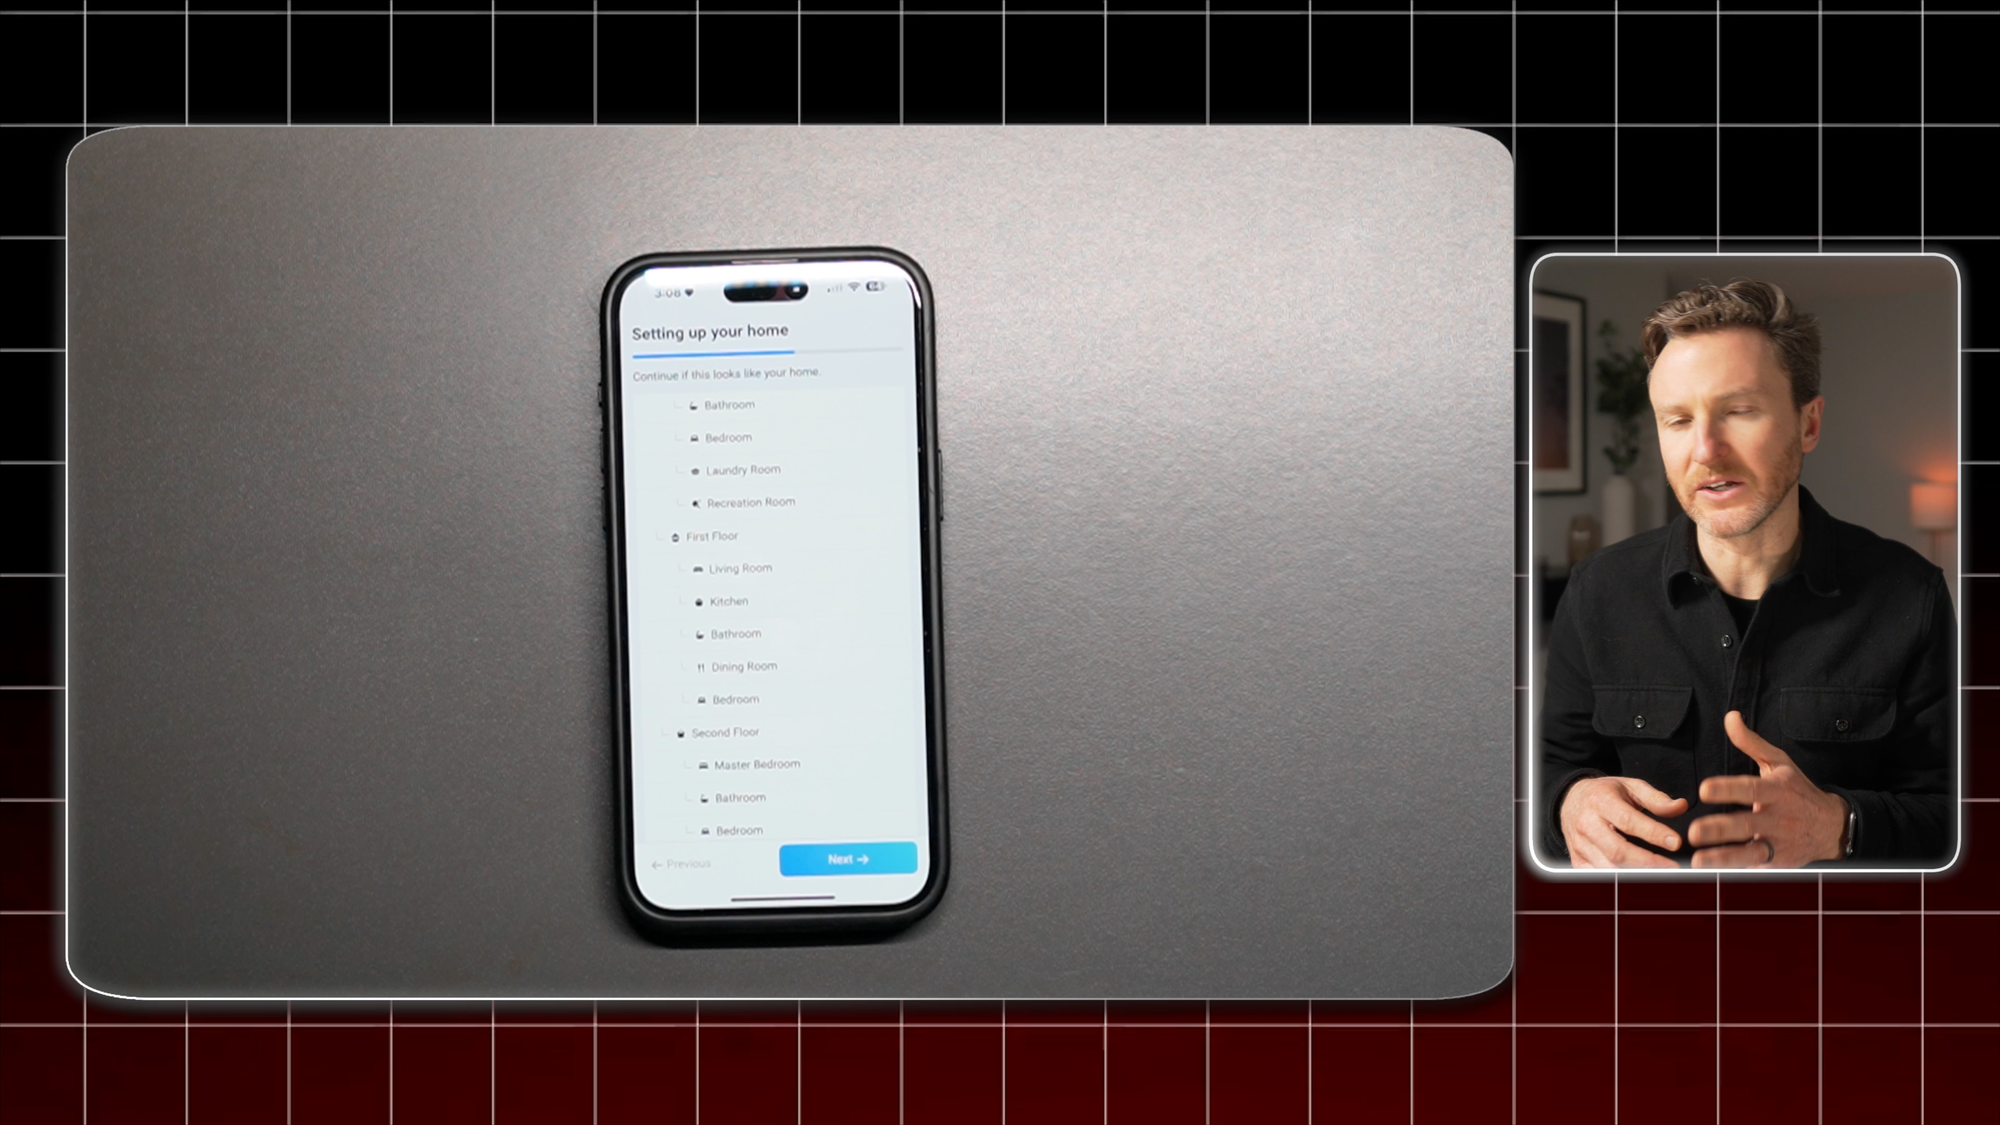
Once Homey Pro is connected to your network and updated, it will walk through a process to set up your home. You can tell it how many floors you have, and the different rooms or zones on each floor. You can then look over an outline to make sure everything looks correct. But you can always edit floors and rooms, and their names and icons later in the app. It will then ask for your location so it can start Flows based on when you arrive or leave home, which can be really helpful.
Homey Pro set up
Navigating the Homey App
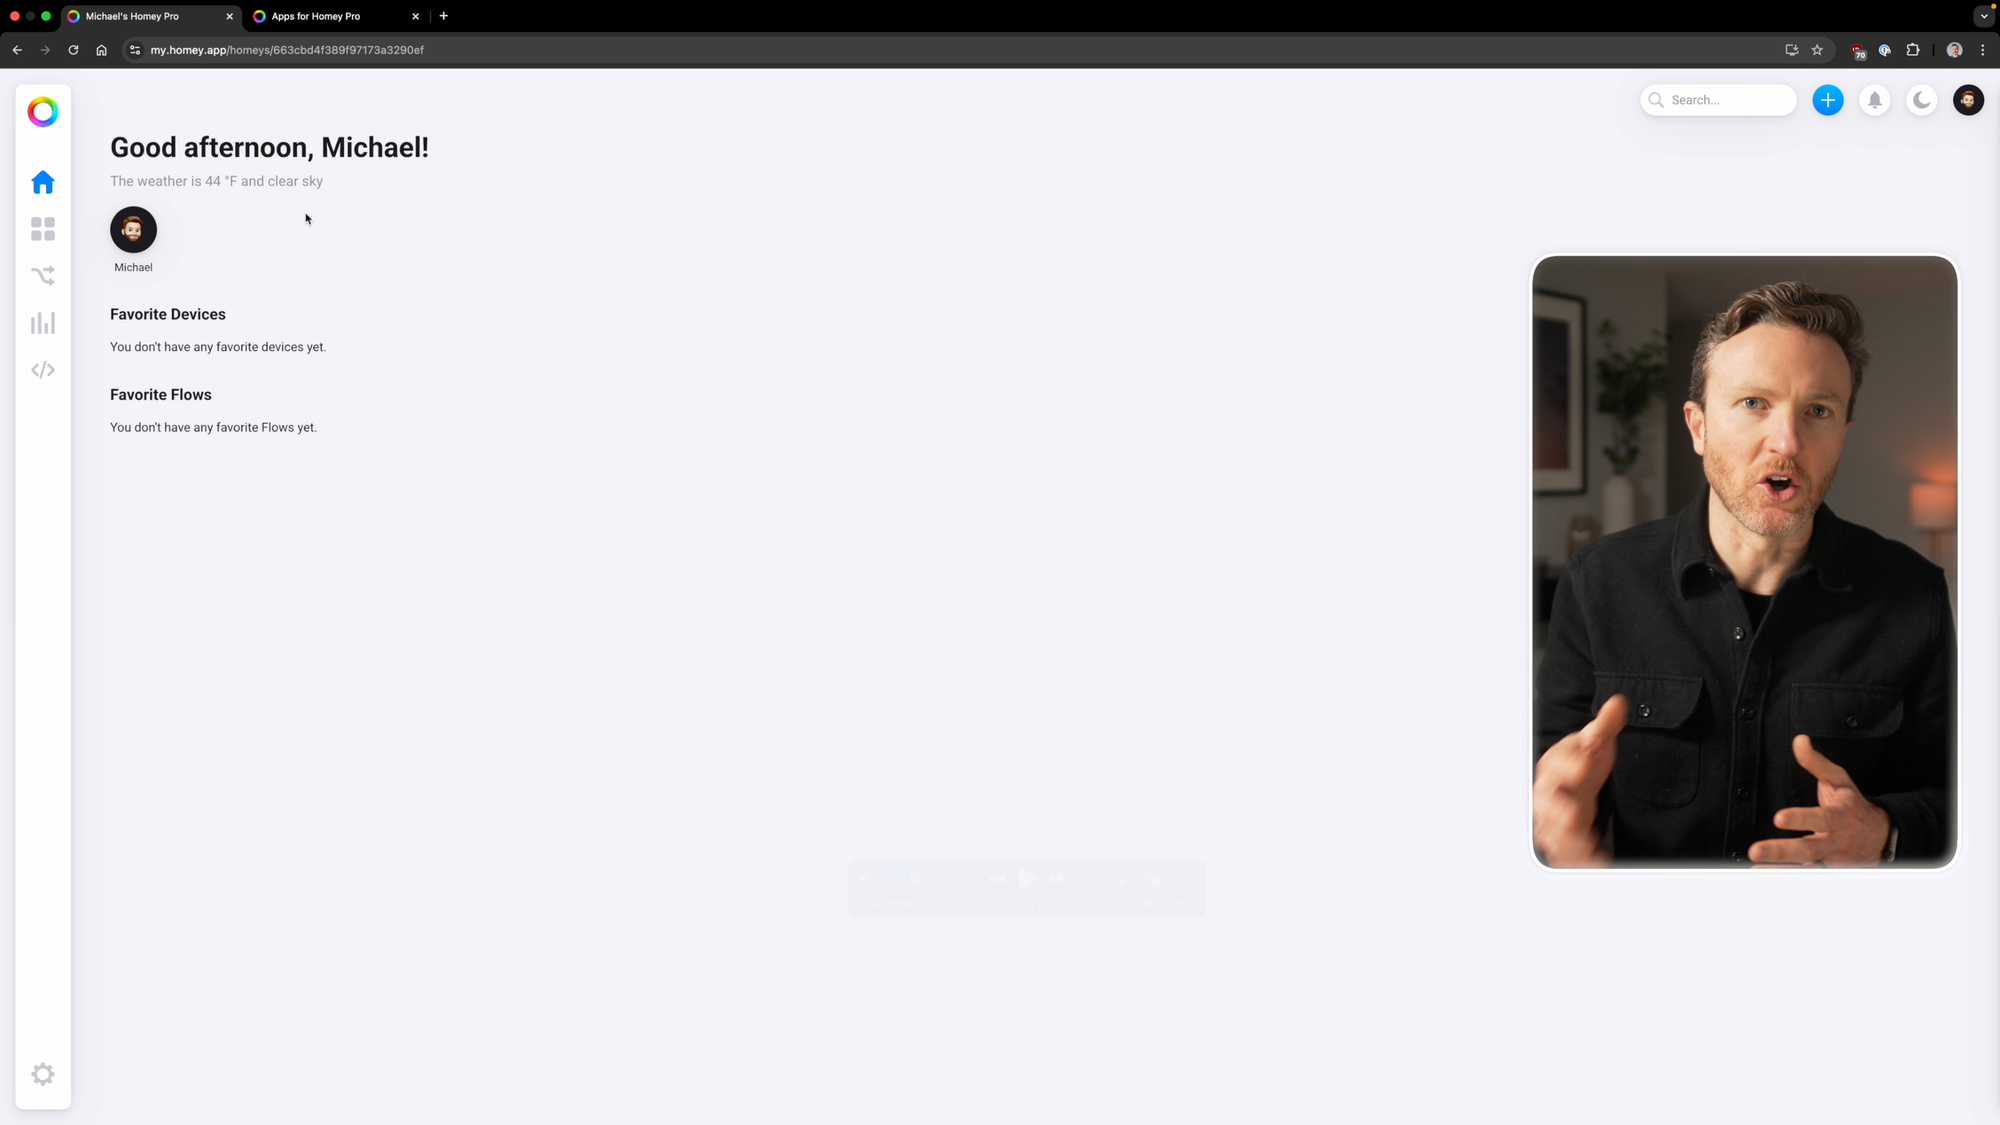
I found the user interface really elegant as I went through the setup process, and was even more impressed when I arrived at the home screen. The visual design is beautiful in my opinion. Everything looks and feels modern and quick, and responds instantly.
The mobile app layout is broken out into a Home screen, Devices, and Flows. The web app includes dedicated sections for Insights and HomeyScripts. On the Home screen, it tells you the current weather conditions, and you can add your favorite devices and Flows for quick access.
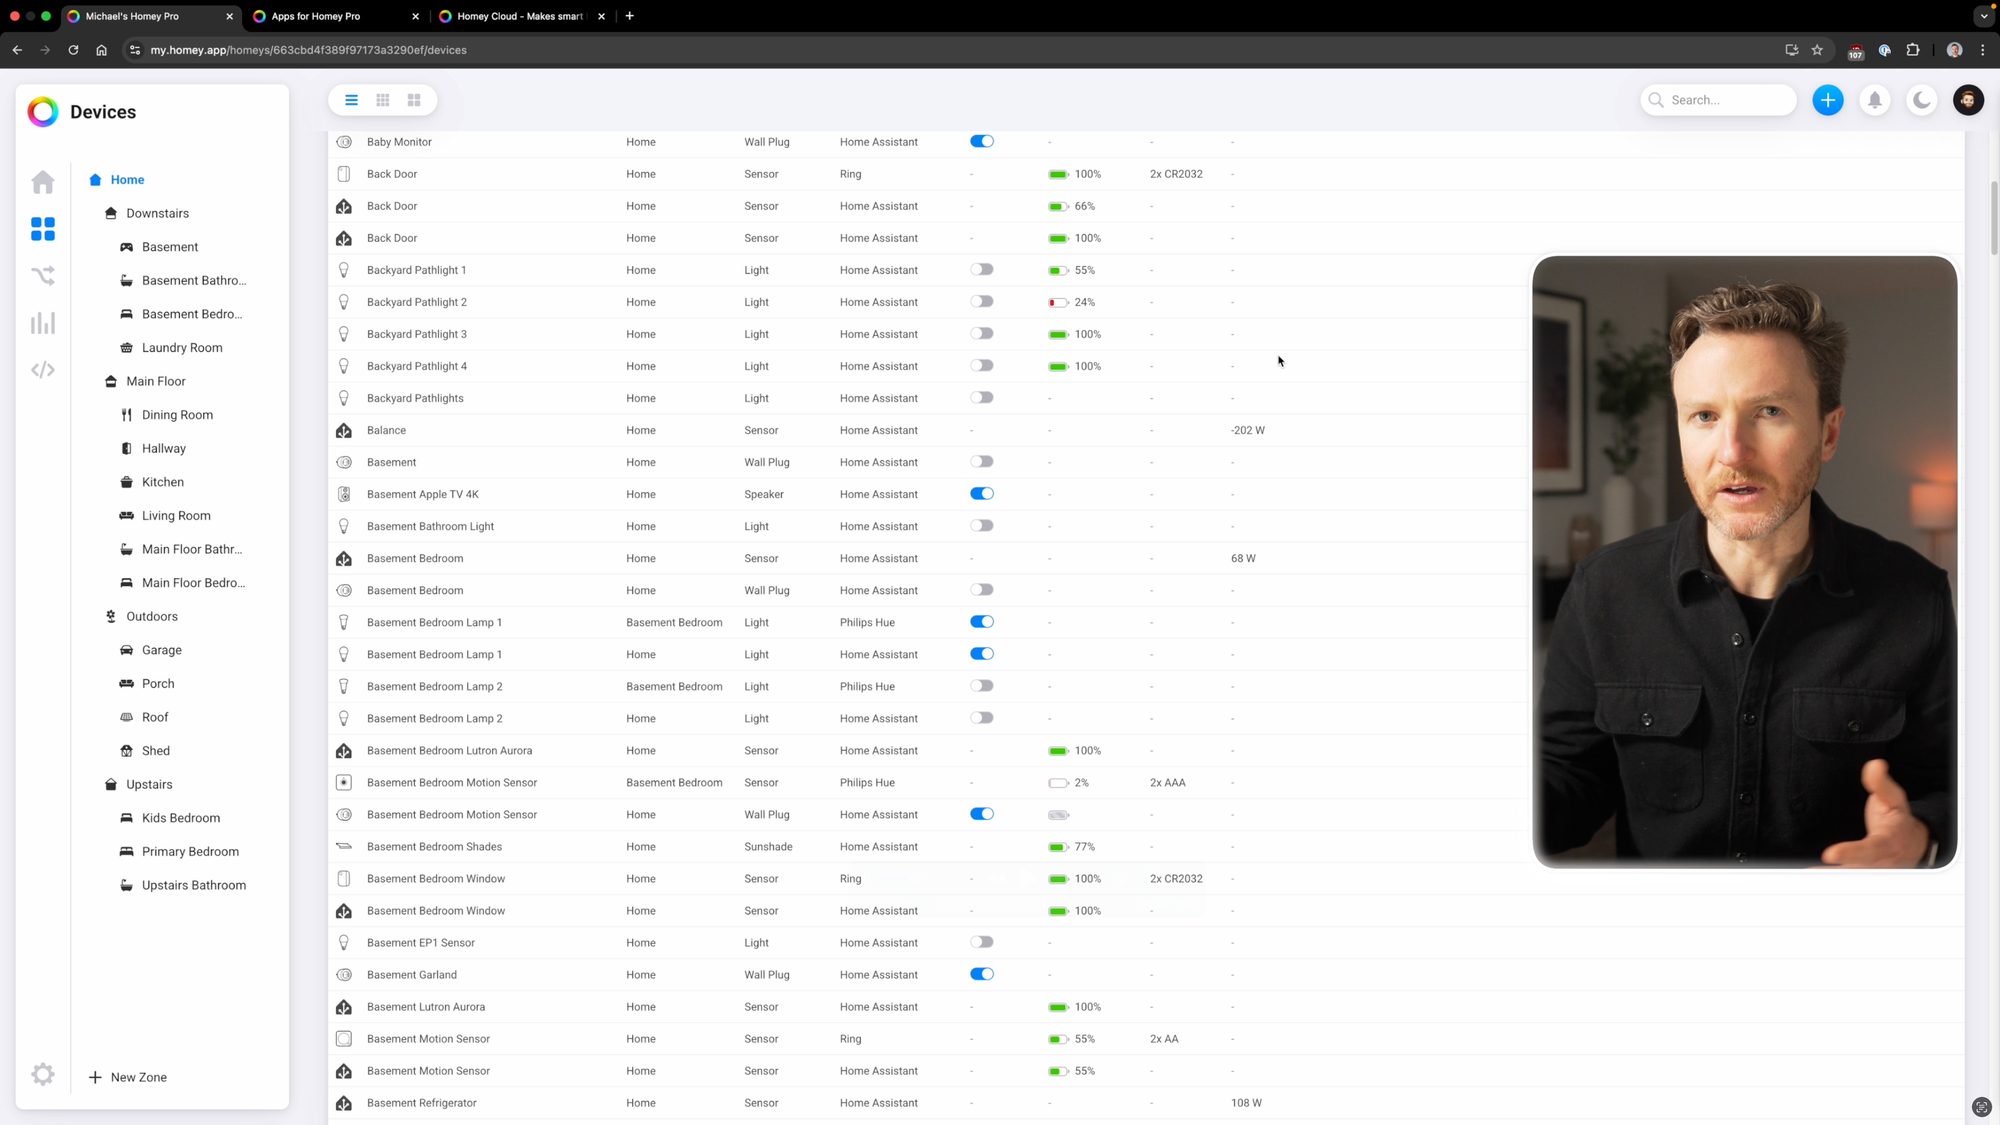
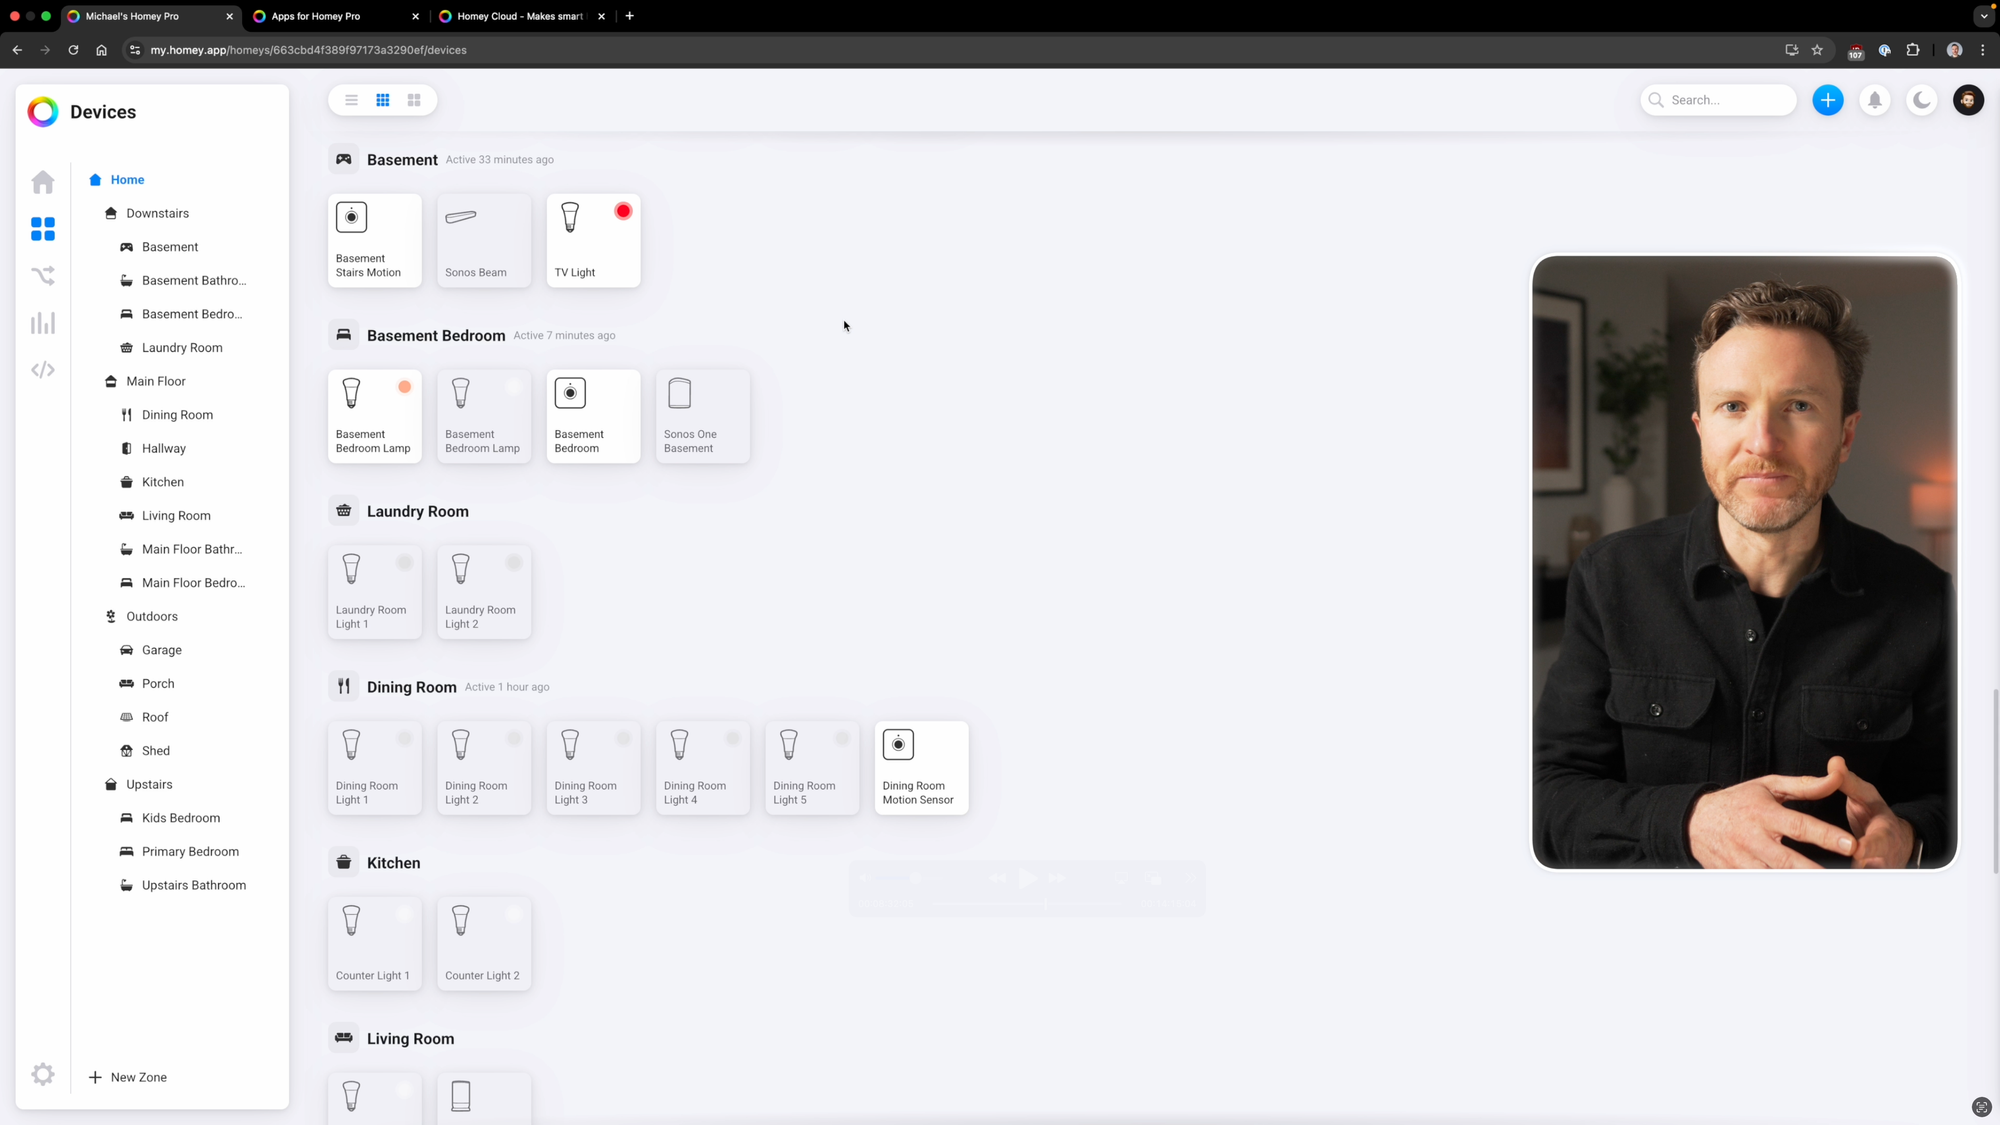
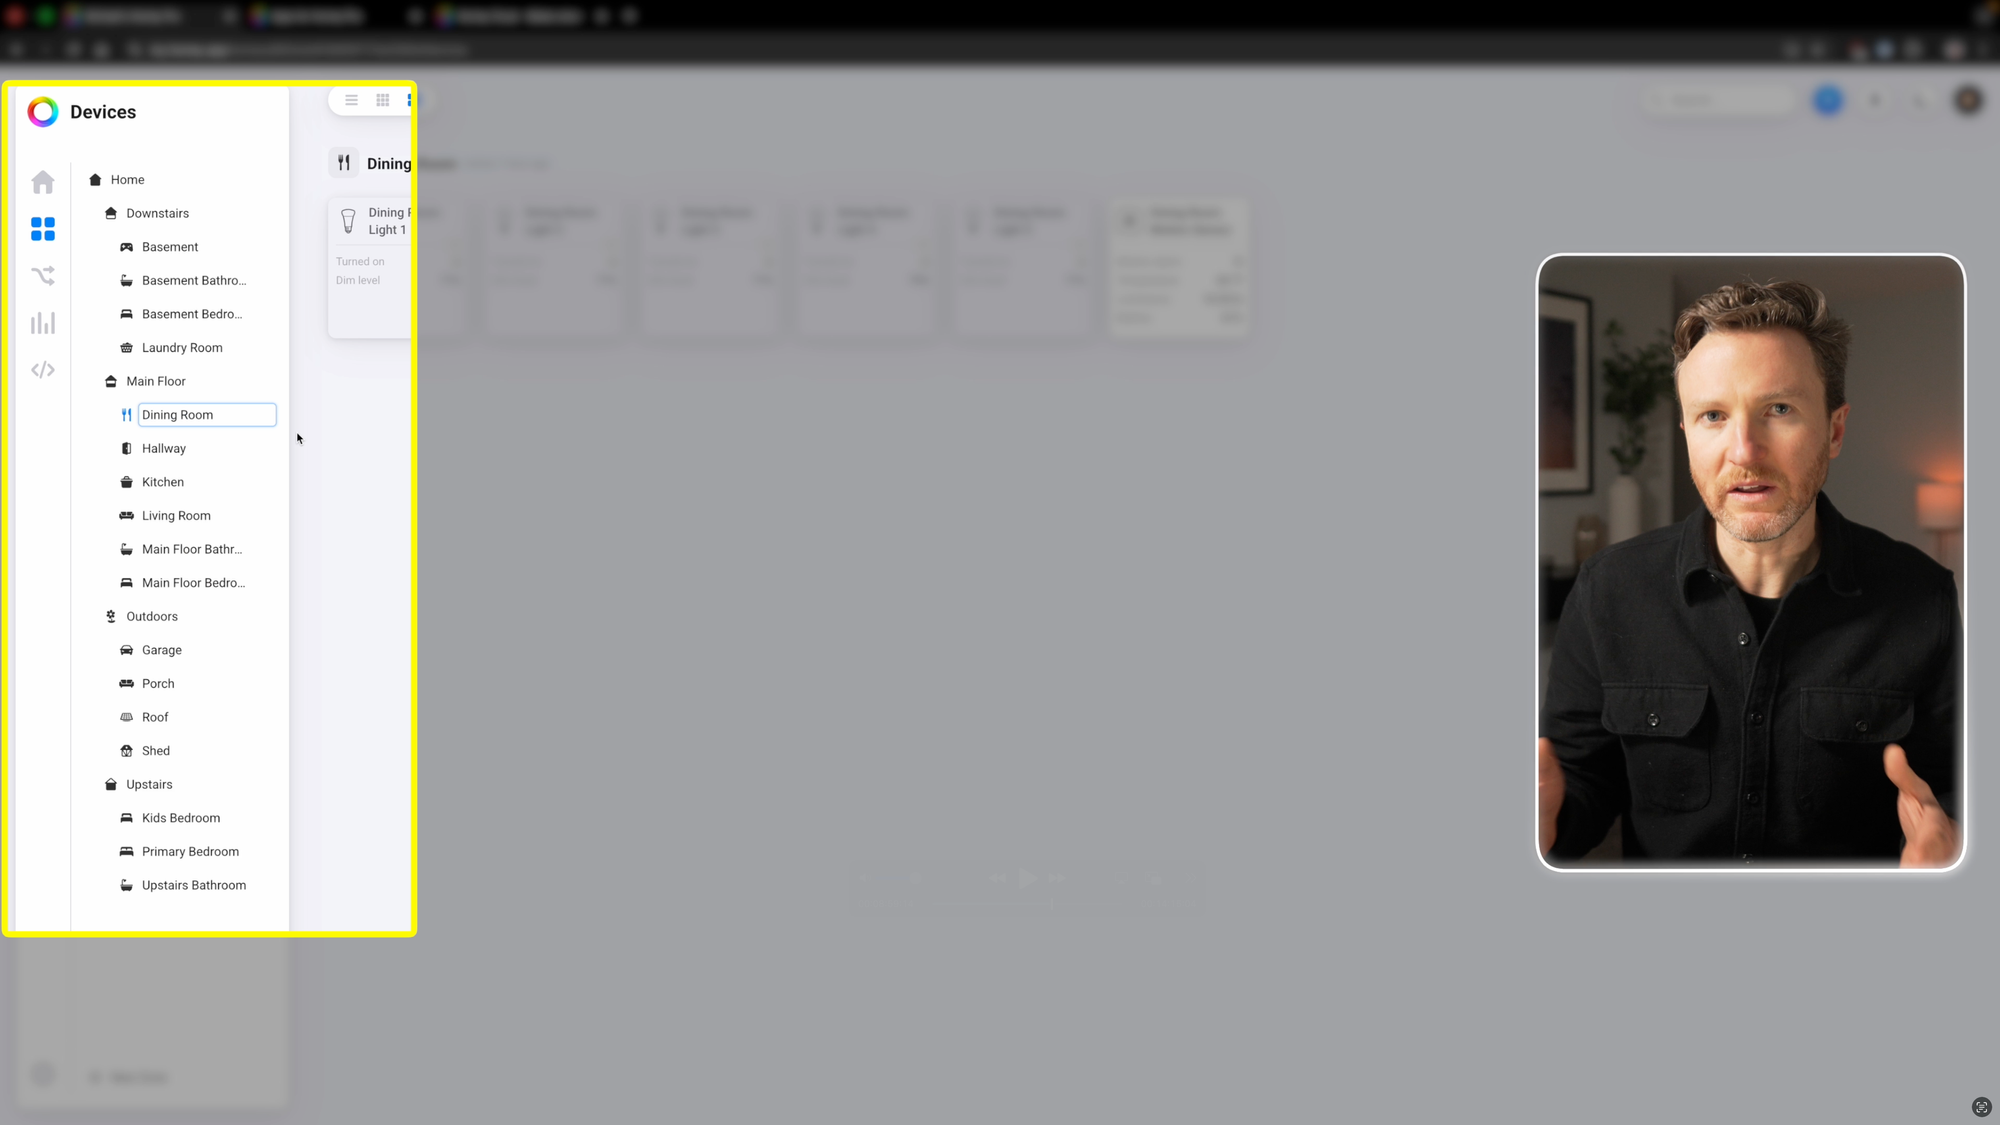
The Devices page includes expanded and collapsed views on mobile. On the web app, you can see your devices as a list, collapsed icons, or expanded icons. For example, the list view makes it really easy to see where every device is located and its battery status, if applicable. The icon view makes it easy to control one of your smart home devices or to see its state with a visual indicator, such as the color of a light that is turned on, an exclamation point if a motion sensor detects movement, or the real-time energy consumption of an appliance. The expanded icon view shows you pretty much everything you want to know about that device. Taking a light as an example, you can tap to turn it on or off, change the brightness, color, or color temperature, and see logs of recent device activity. I think it all looks really beautiful, and I appreciate each of the different layout options.
On the left-hand side of the web app, you can see an outline of the floors and rooms in your home. You can click any one of them to edit the name or icon, or drag and drop to re-position something. It’s really easy to manage.
Homey Pro navigation
Adding Devices
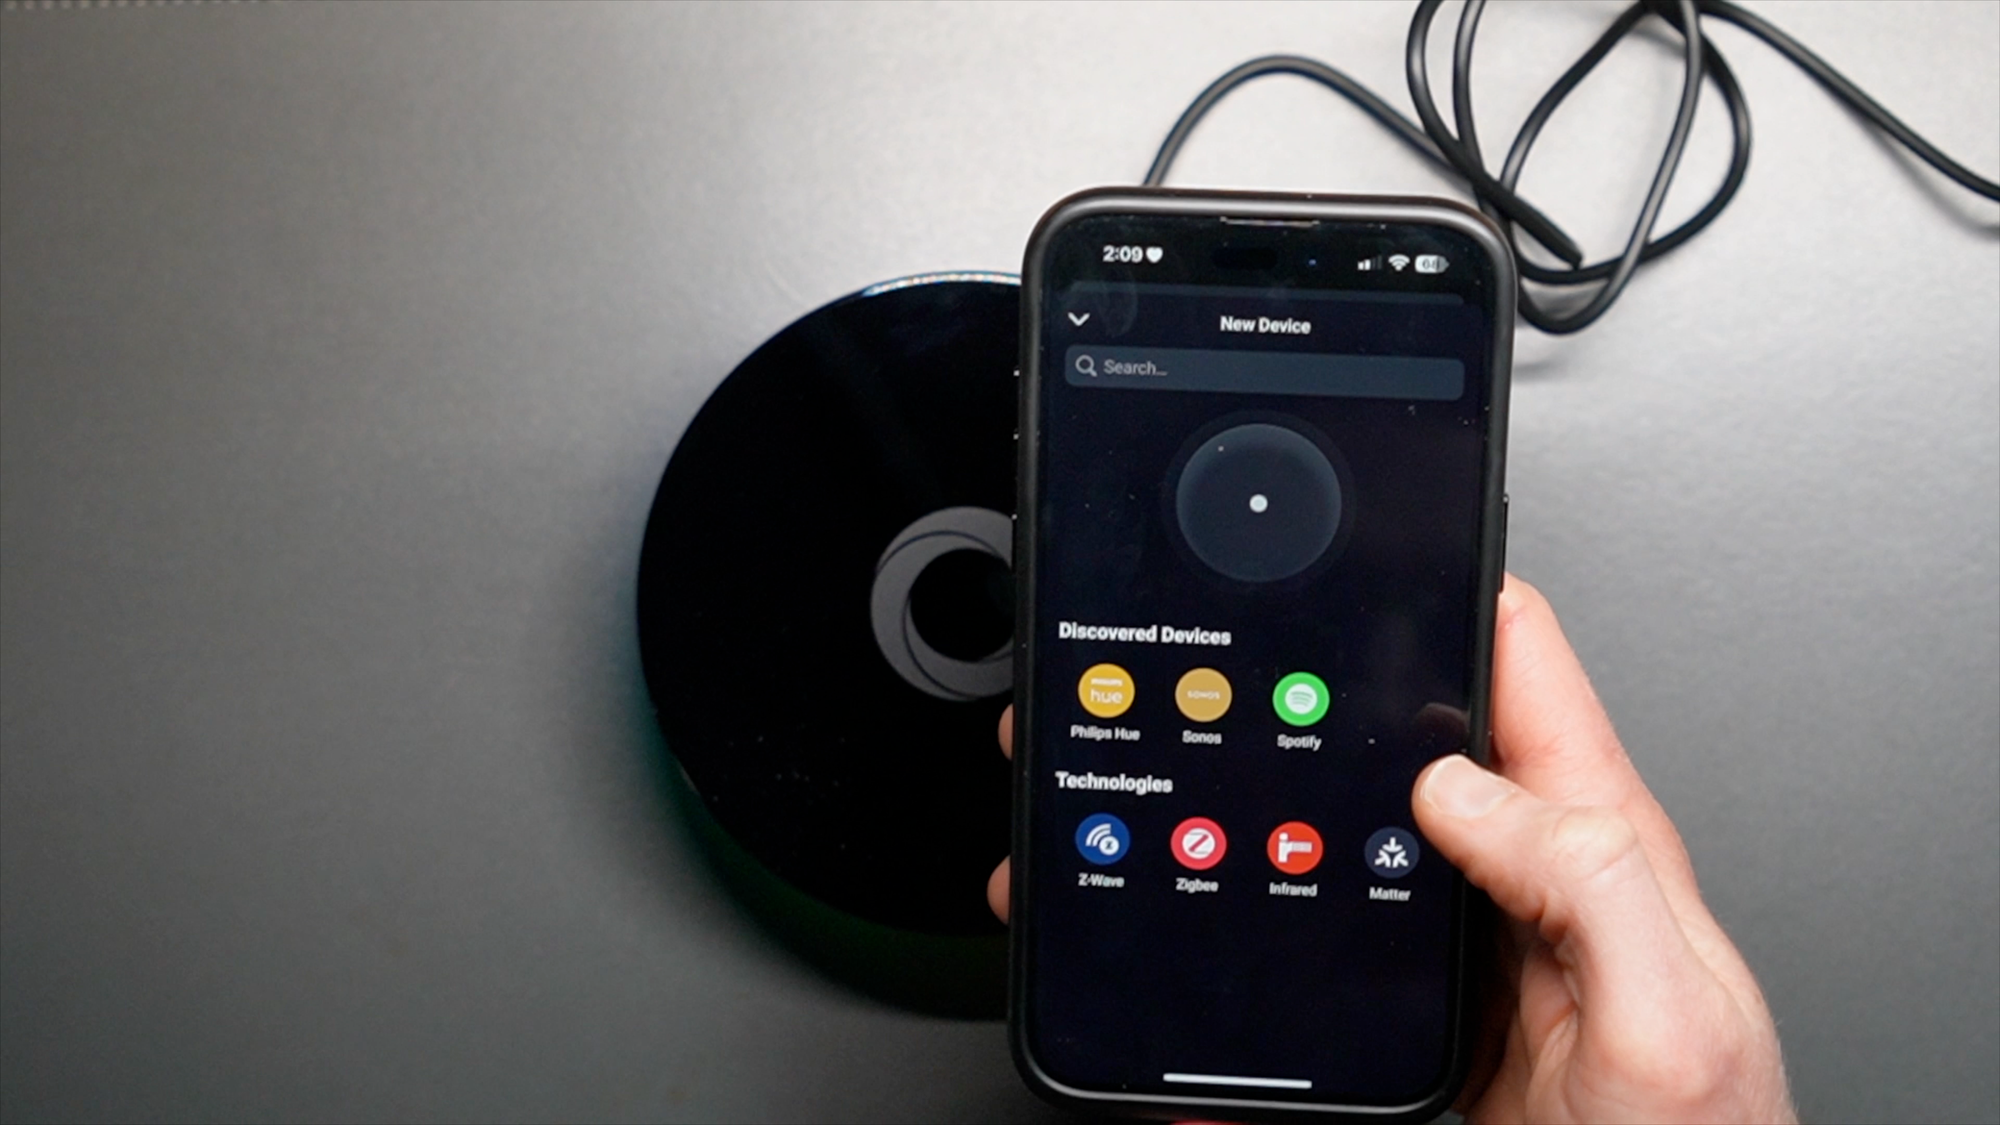
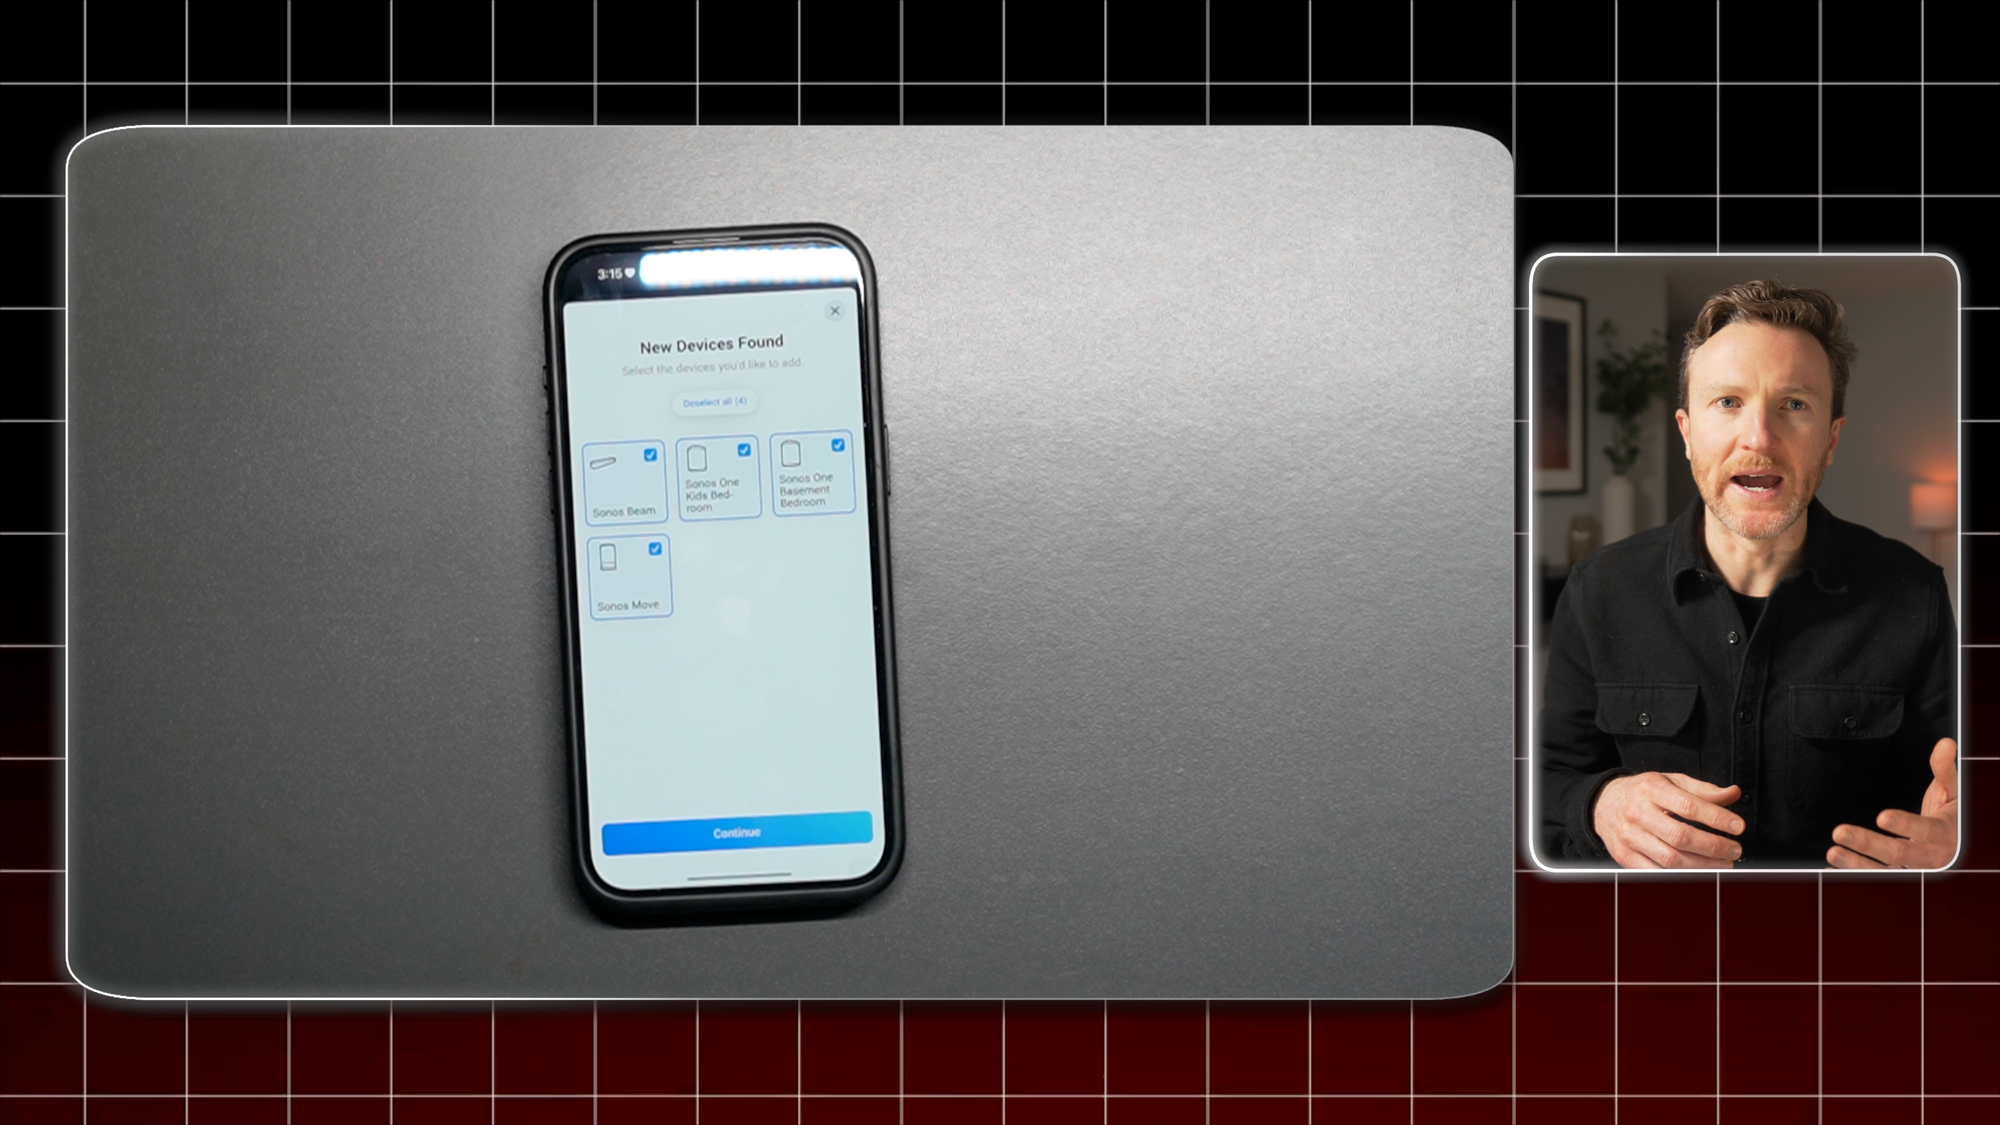
Once the basic setup is complete, and it’s time to start adding smart home devices. From the Devices page, Homey Pro will try to auto-discover devices on your network. In my case, it auto-discovered my Philips Hue lights and Sonos smart speakers. You can also choose to add devices by protocol, such as Z-Wave, Zigbee, or Matter.
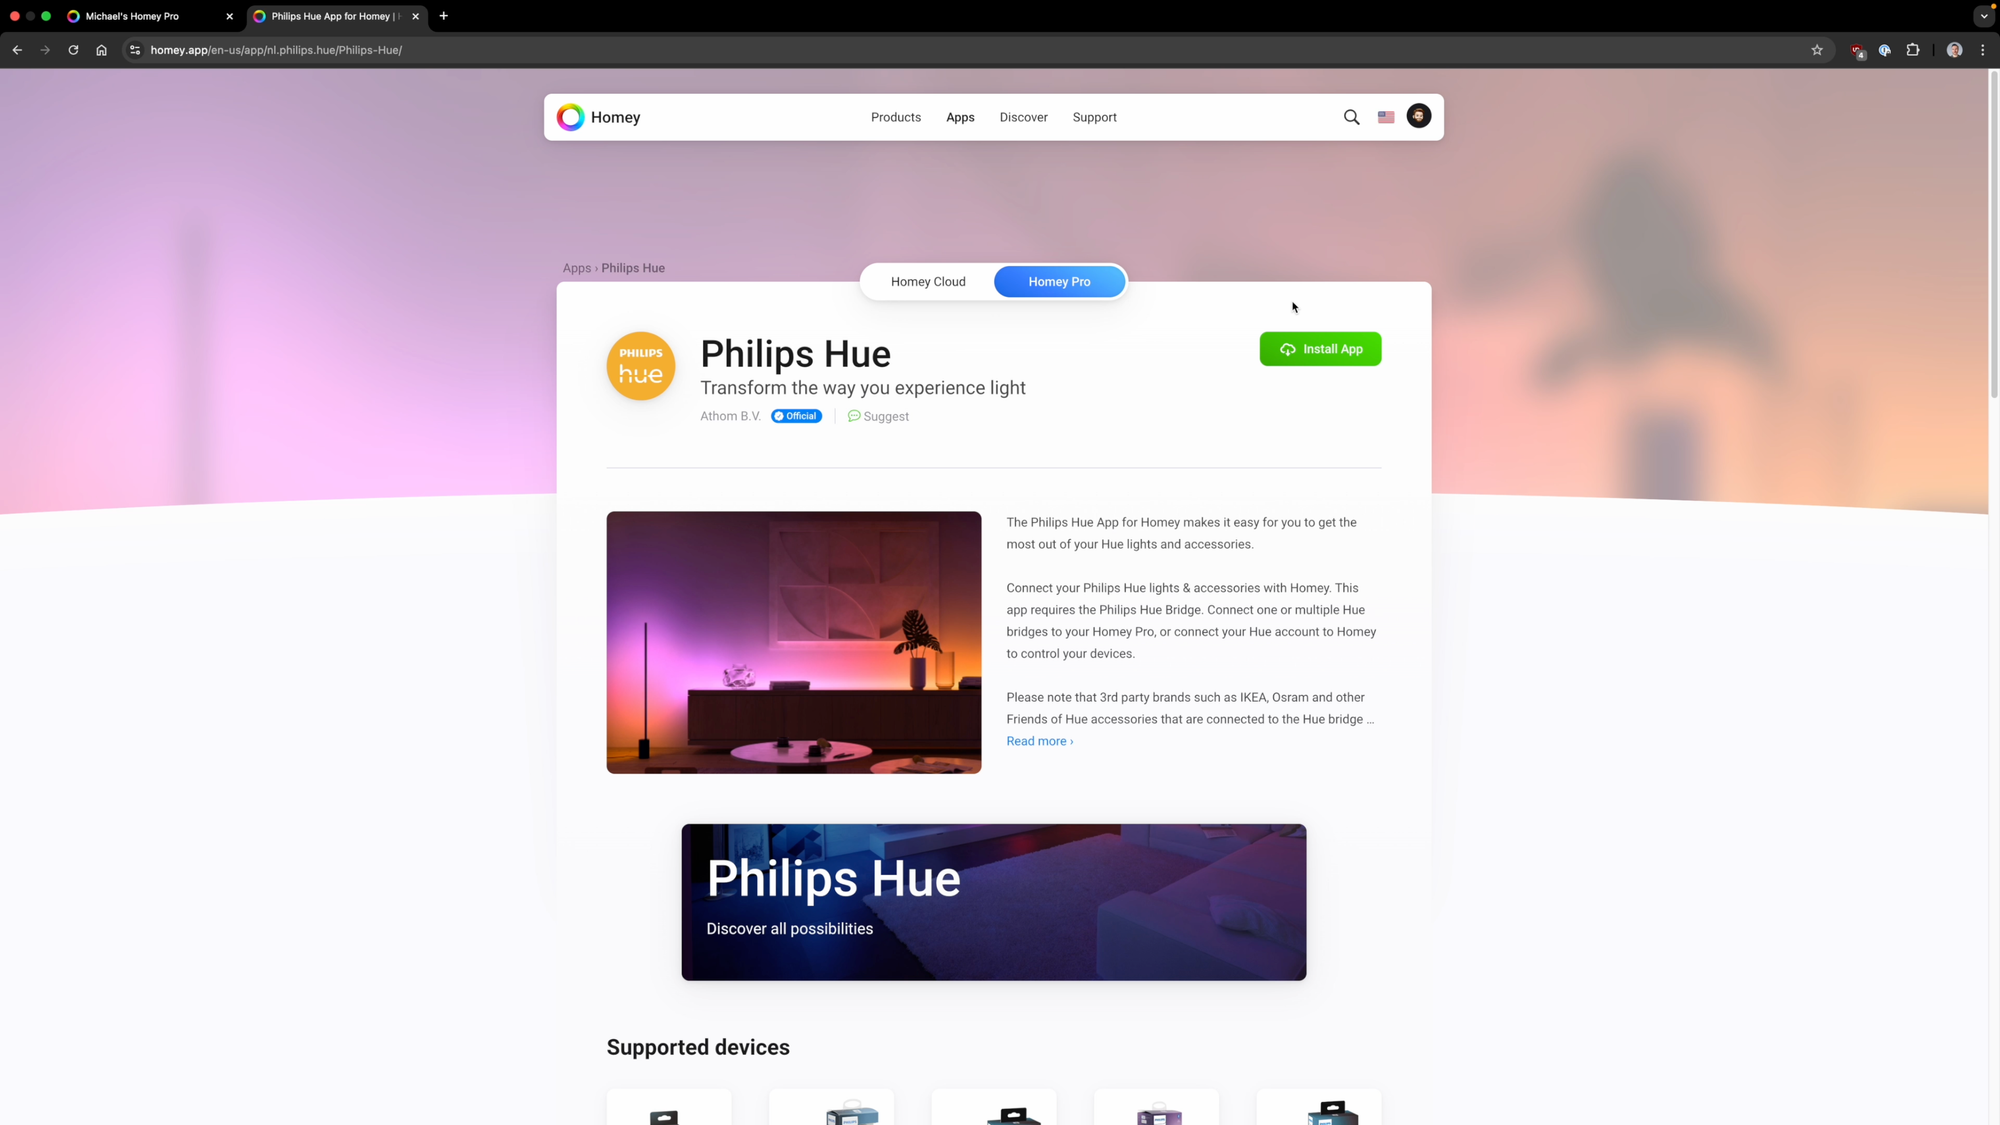
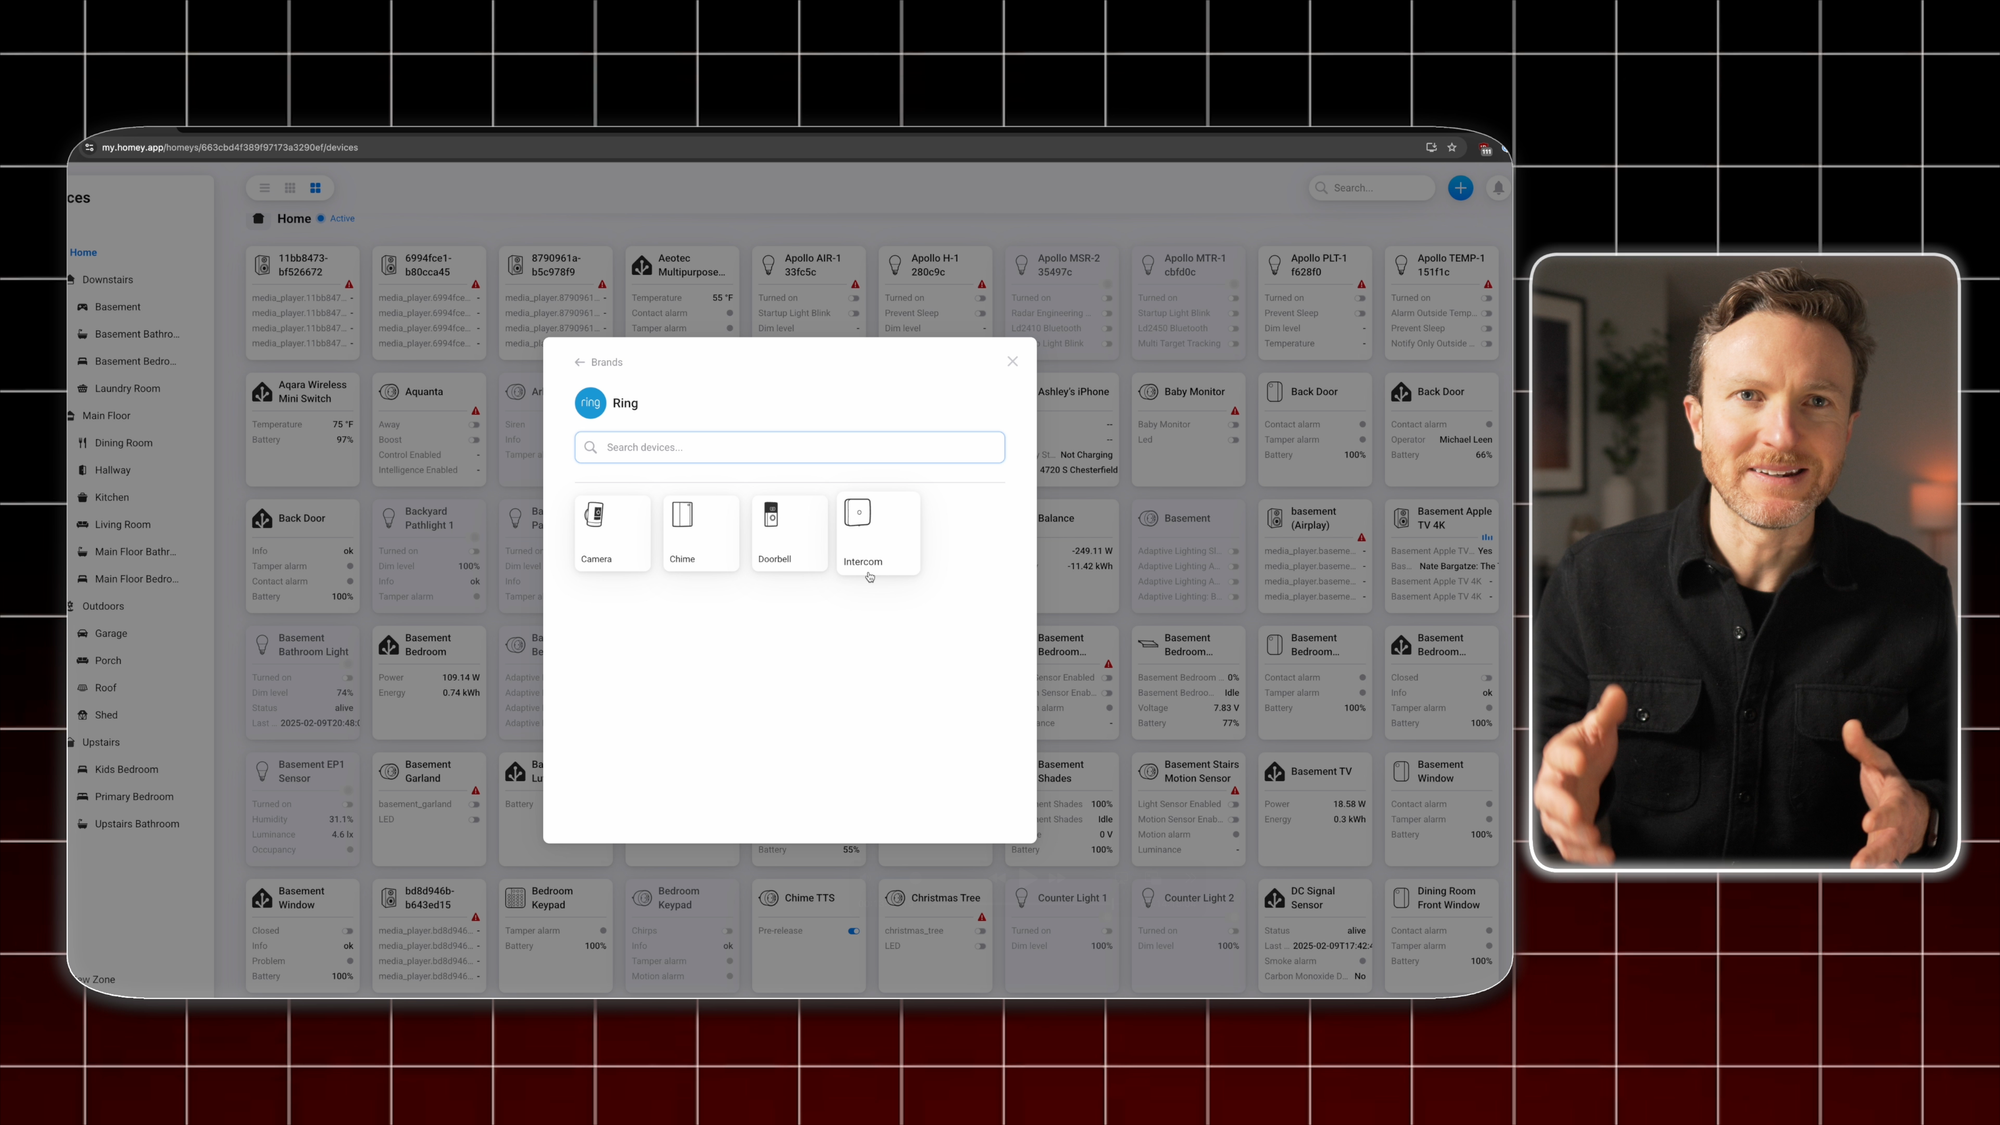
Or, you can just jump into the Homey App store. There, you can see popular apps, browse apps by category, or search for your smart home brands. Each app has a badge to tell you if it’s an official Homey app, or if it’s a community-built one. In both cases, installing an app is as simple as clicking Install.
Once an app is installed, the next step can vary. Some apps will require you to go to Settings > open the app > and click Configure. There you may need to provide account log-in credentials for the smart home brand you are trying to use, or provide other information, like a device IP address. But, most apps don’t require you to visit the settings, since there isn’t anything to configure. Instead, once the app is installed, just go to add a new device, and you can find the app under Your Brands. Tap the app > choose the type of device you want to add > and then click Connect. Some apps will ask for log-in credentials at this point.
Homey Pro device management
Creating Flows
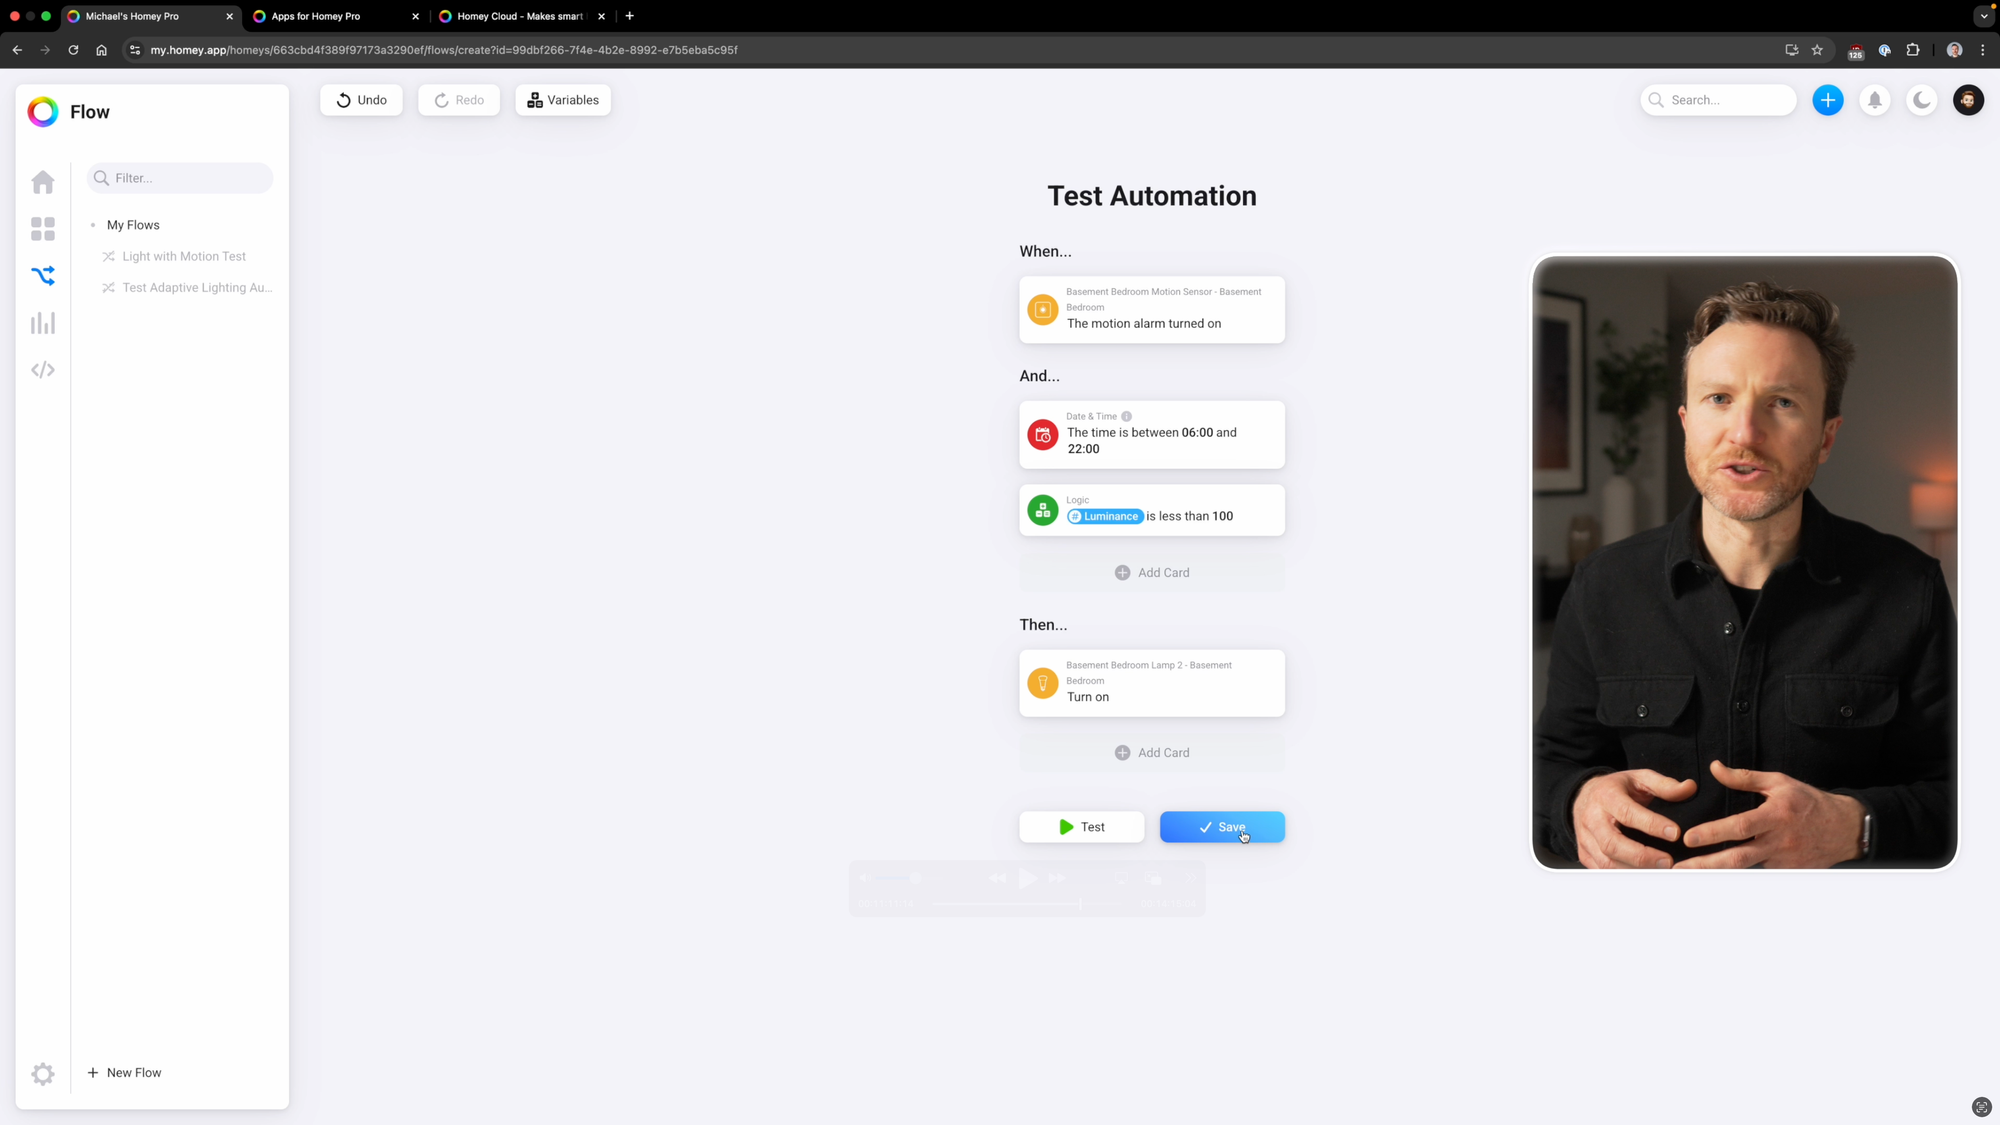
Once you’ve got your devices added to Homey Pro, it’s time to start automating them with Flows. From the Flows tab, click “Create a Flow.” Let’s start with a Standard Flow for turning on a light when motion is detected in a room, but only if it’s kind of dark in that room and during waking hours. To start, give it a name. I’ll just call this a test automation. Then, choose a trigger for when the automation should begin. In this case, I want to search for a motion sensor in my basement bedroom, and say the trigger is when the motion alarm turns on. Now I can set my conditions so the light only turns on when I want it to, meaning when it’s dark in the room and we’re naturally awake. For the brightness condition, I’ll use a Logic that says when the luminance level measured by the motion sensor is less than a certain value. For the time condition, I can just choose a Date & Time card for when the time is between my desired interval. Now, it’s time to create the action, which will be turning on a light in the basement bedroom.
Like any automation editor, there is more than one way to achieve the same result, such as choosing a card for when a zone is active or it’s daytime. You can do whatever is more natural for you.
Homey Pro standard flows
Creating Advanced Flows
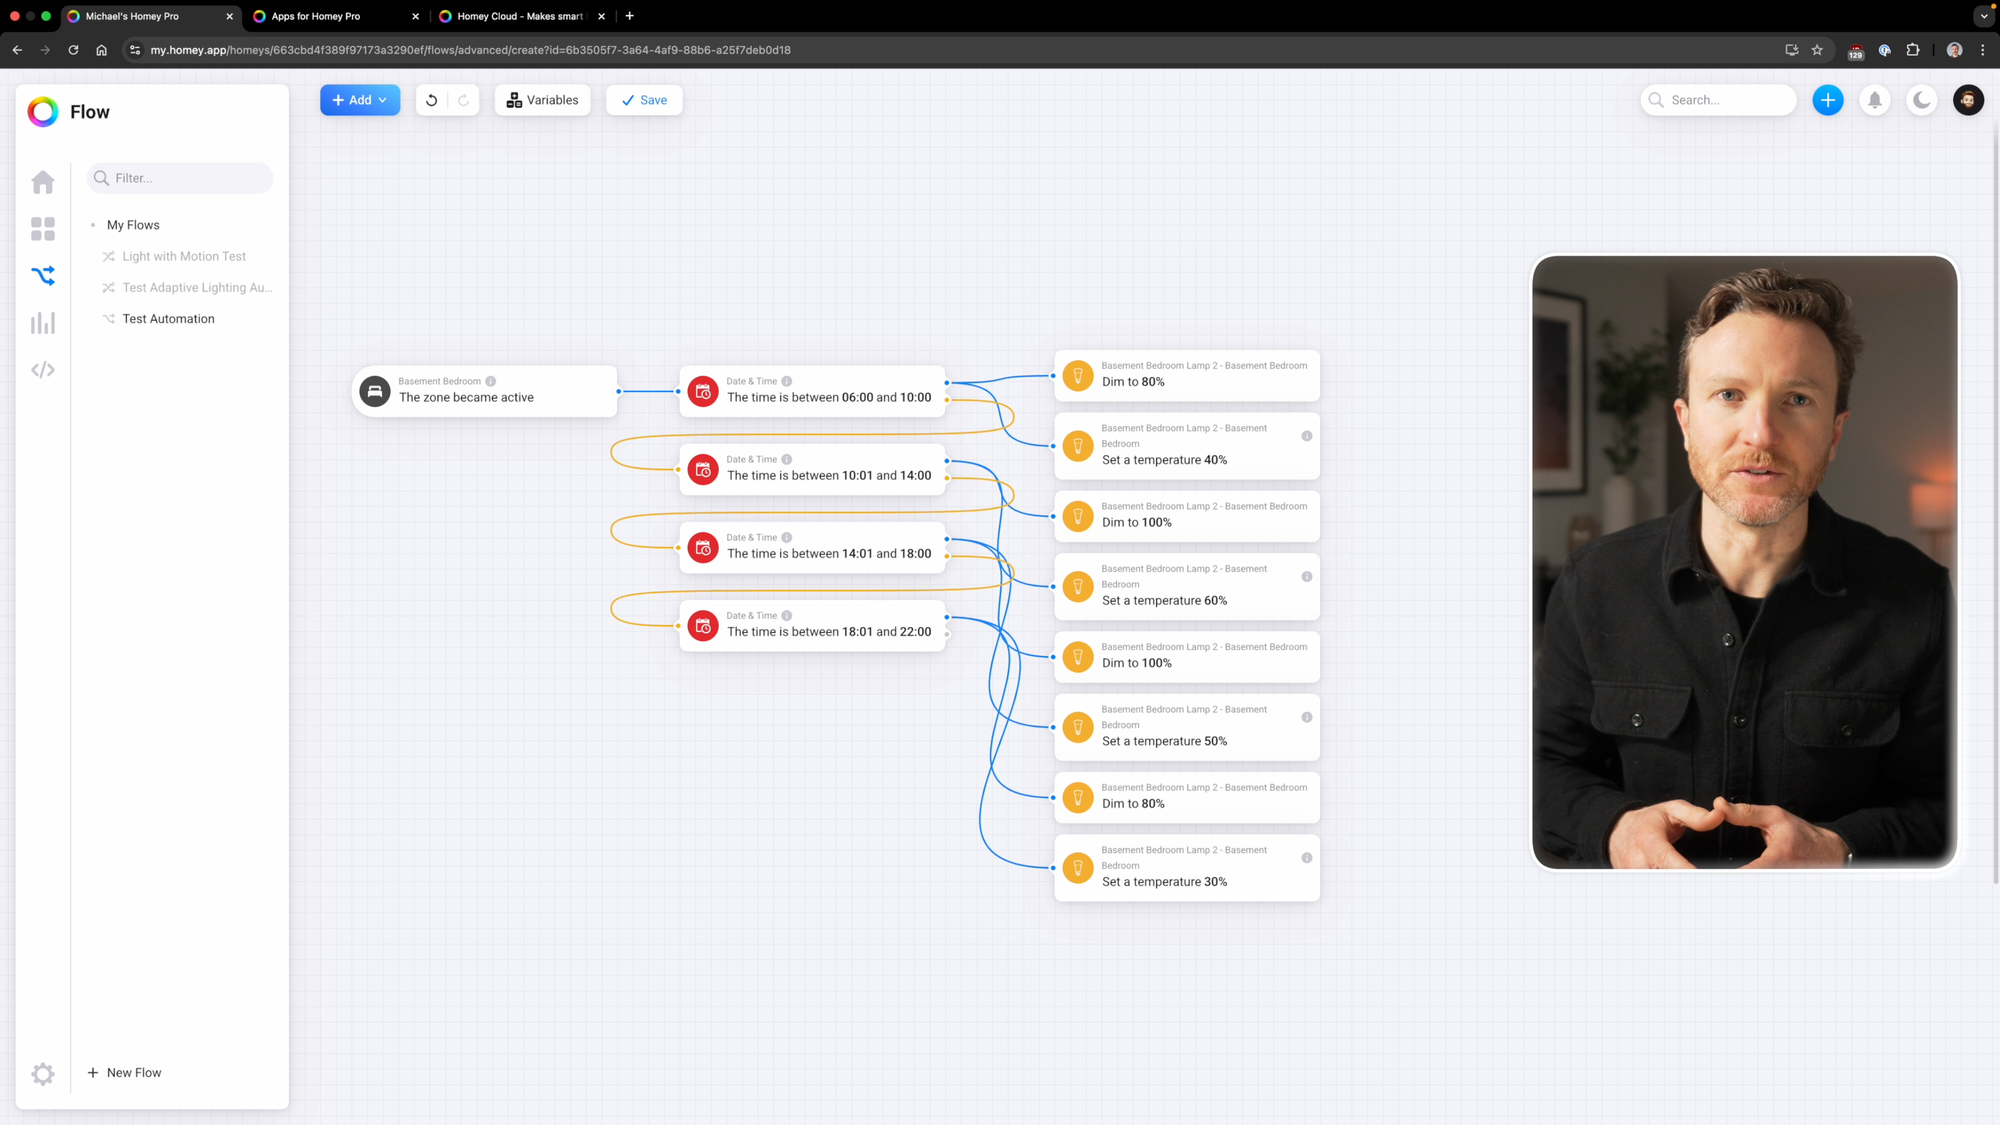
But what if you wanted to do something more elaborate with your lighting automation, like adjusting the light’s brightness and color temperature based on time of day?
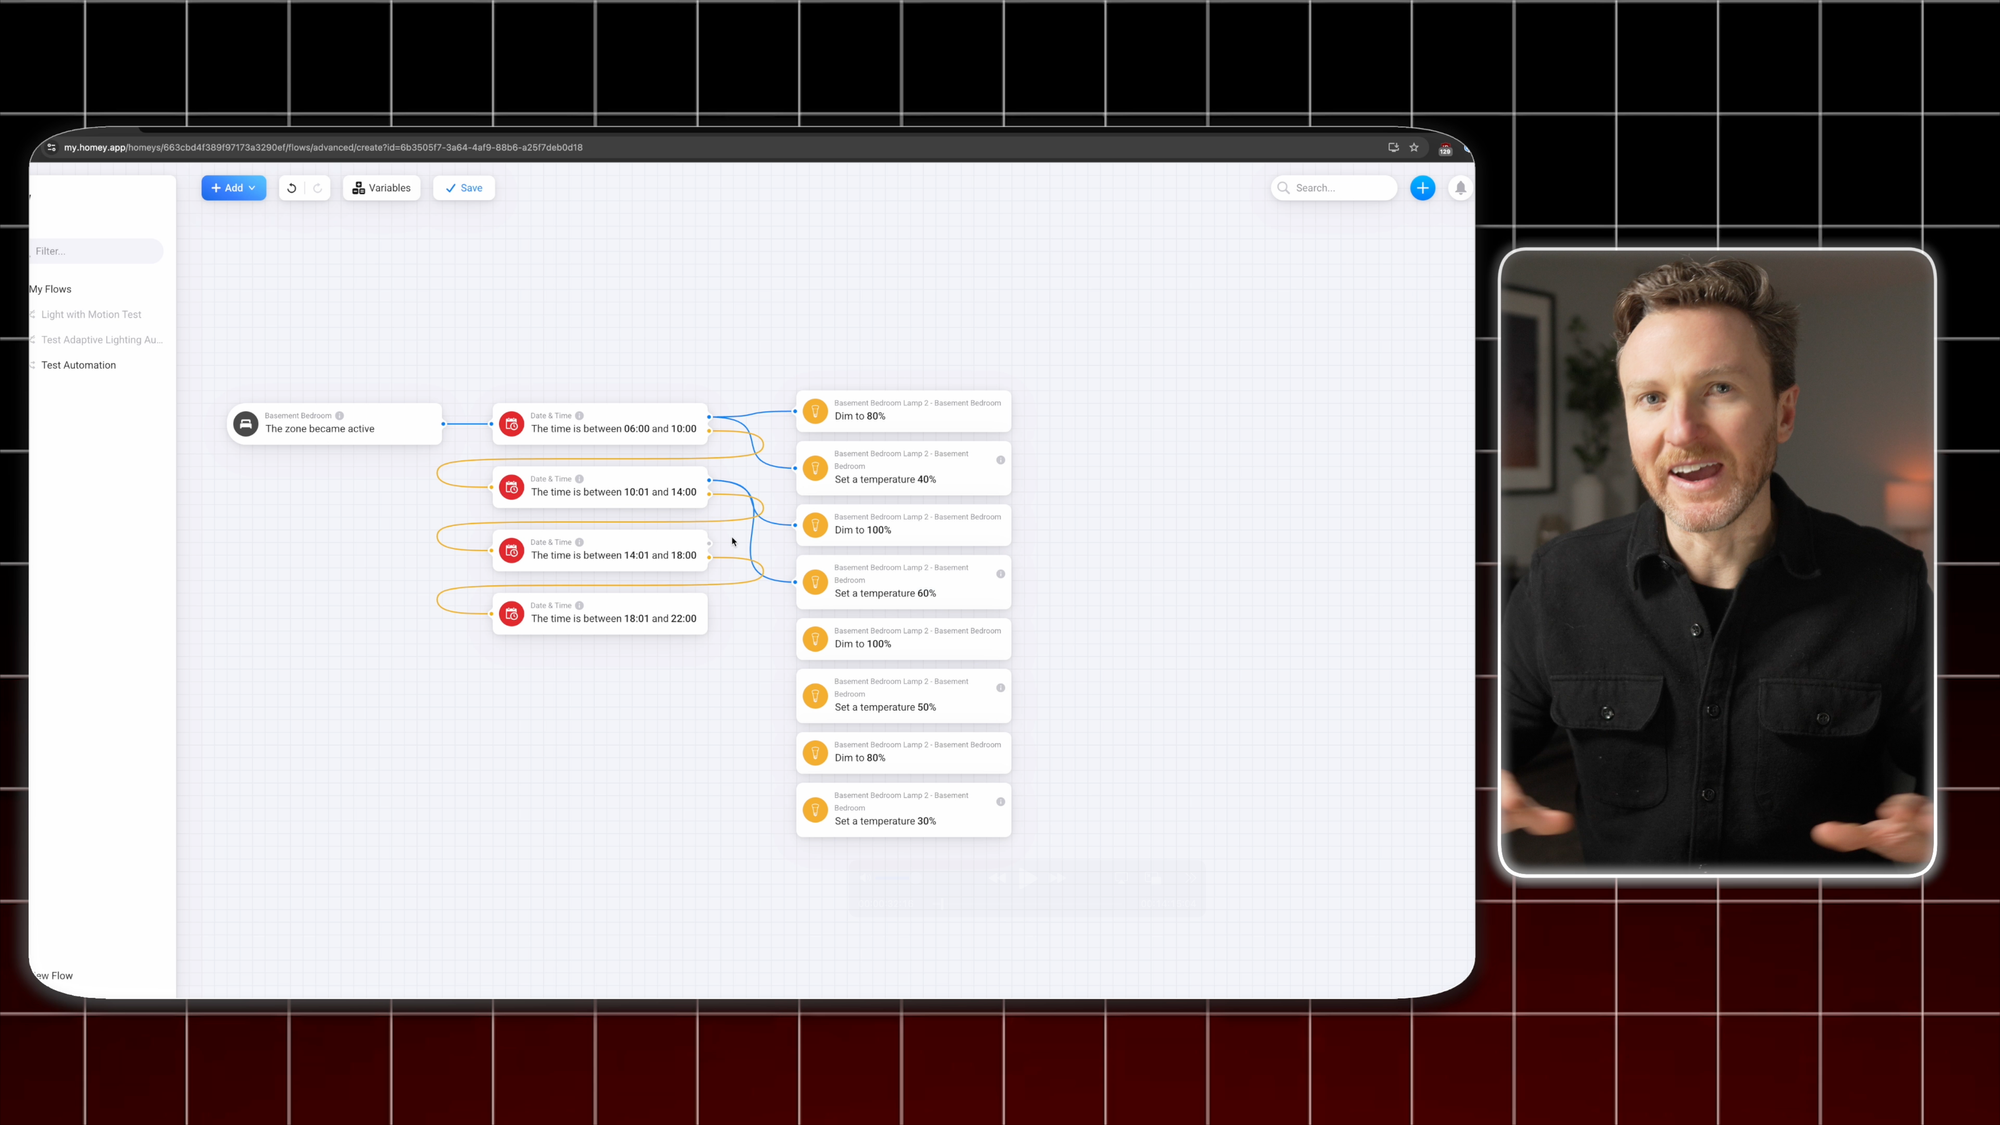
To show the options, this time I’ll choose when the Basement Bedroom zone became active. For the condition, I want the lights to change based on time of day.
I’ll add a Date & Time card for the time again, and start off with for when the time is between 6 AM and 10 AM. I can then duplicate this card and adjust the time for the different time intervals throughout the day that I want to base my lighting conditions on.
For the Then, I’ll add a card to adjust the brightness of the light, and another card to adjust the color temperature of the light. For color temperature, the higher the percentage, the cooler the light, and the lower the percentage, the warmer the light.
Now, you can draw lines between the cards to determine what happens. I can draw a line from the When card to the first And card. On the right hand side of the And cards, there is an upper and lower point. The top line is what to do if the condition is true. The bottom line is what to do if it’s not true.
There’s a bunch more you could do to fine-tune this or approach it differently — the point is to show how things work differently when using Advanced Flows.
Homey Pro advanced flows
Pros
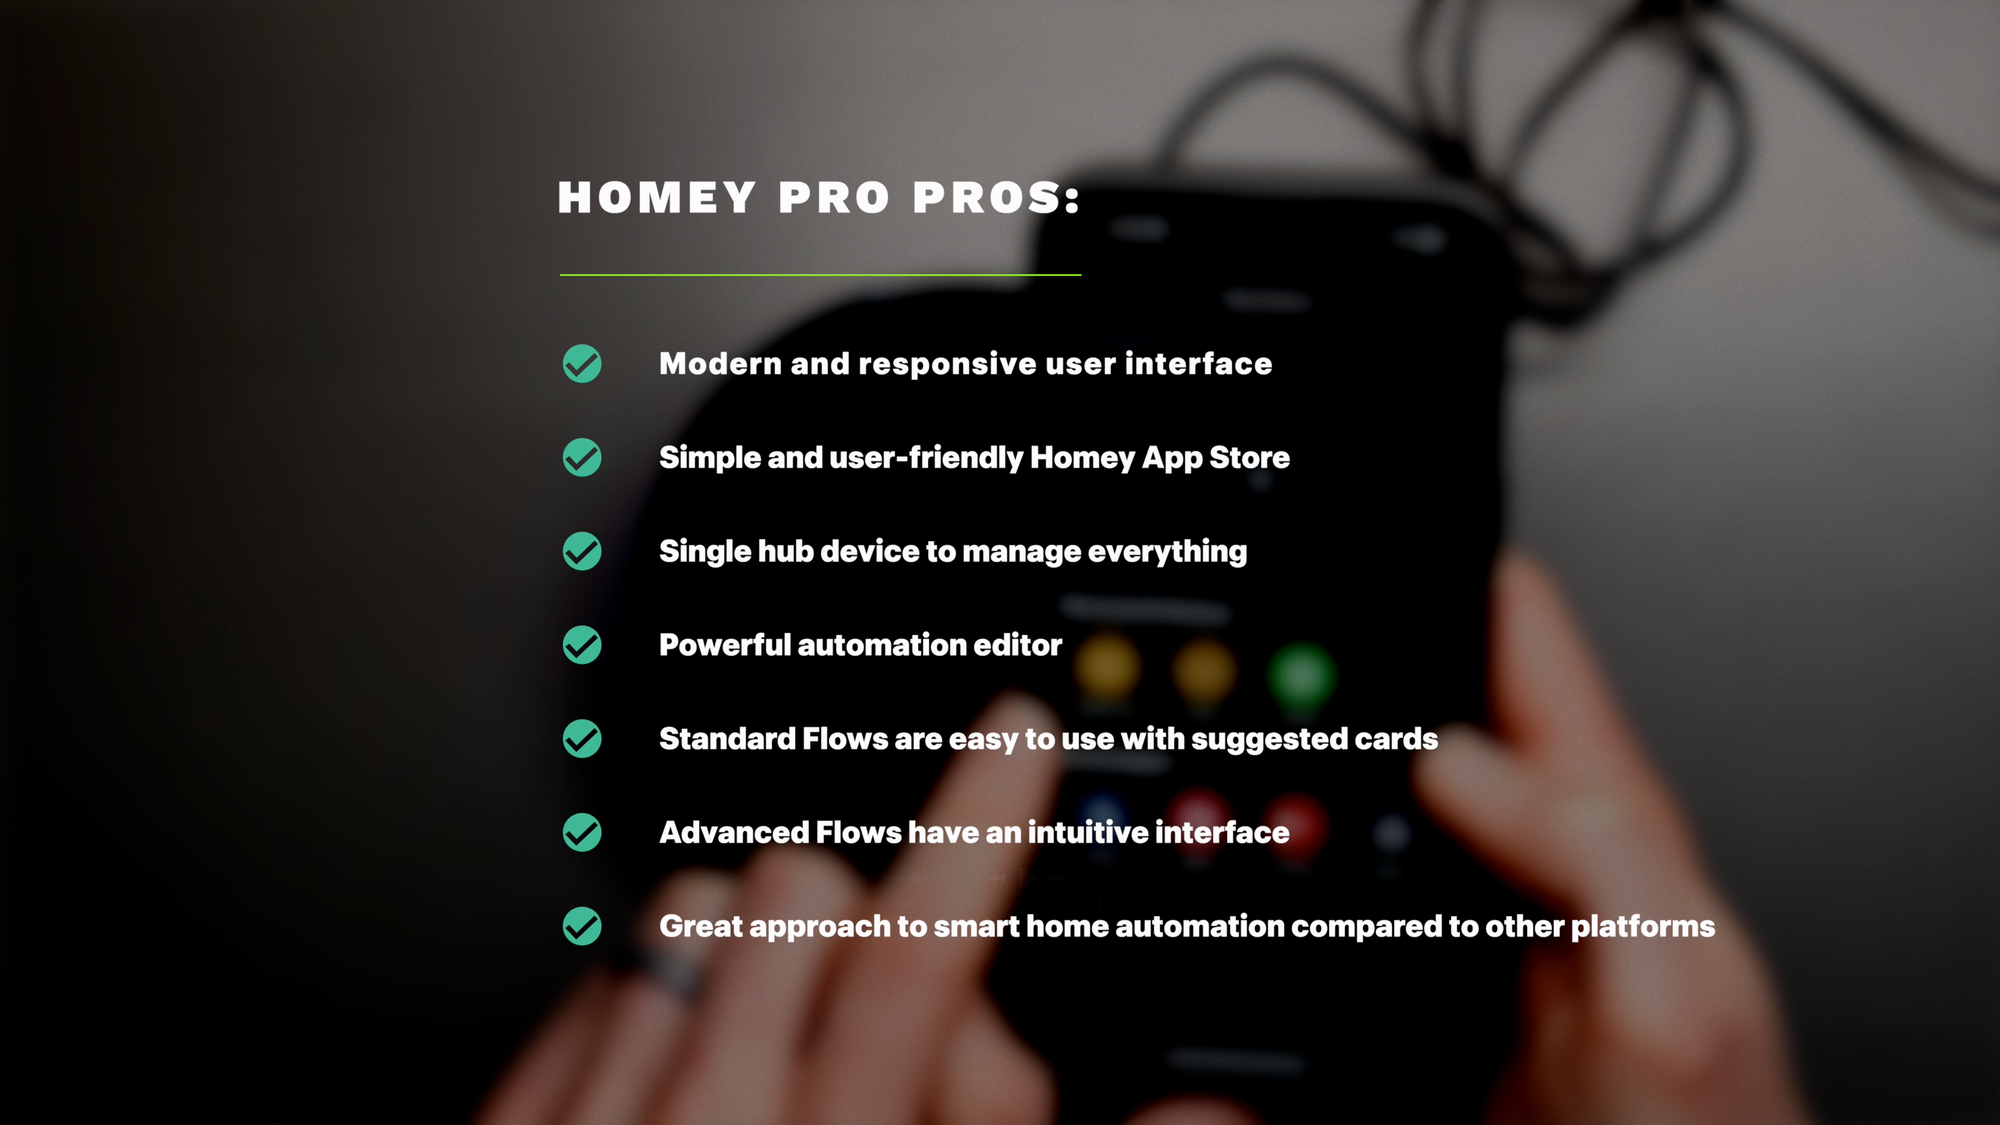
There’s a lot to like about Homey Pro, including the modern and responsive user interface, the simplicity of the Homey App store, a single hub device to run everything for you, and perhaps most of all, the automation editor. Standard Flows are super easy for anyone to jump into with suggested cards for automation triggers, conditions, and actions. And I love the interface of Advanced Flows, and wish other smart home platforms took a similar approach.
Homey Pro pros
Cons
Of course, Homey isn’t perfect. For example, there are a couple things that I think could be better when it comes to adding devices. First, I wish Homey made it clearer when you installed an app if it was necessary to visit the configuration in settings, or if you were good to just dive straight into adding devices.
Second, the apps for some brands will include a long list of devices. Depending on the app, you may need to connect each device type separately. For example, I have a Ring Alarm, which includes a base station, contact sensors, motion sensors, keypads, and chimes. I was hoping I could connect all of these at once since they use the same Ring account, but I had to connect each device type separately, which was a bit tedious.
Homey Pro cons
Final Thoughts
Homey Pro is great for the user who wants a relatively simple setup but with the potential to create more advanced automations. If you can get past the $399 price, it’s a one-stop-shop for the person who just wants to push a button or drag-and-drop and be done. But it also works really well for power user who will take advantage of Advanced Flows and HomeyScript.
Watch on YouTube
Featured Tech
Homey Pro
Get $20 off Homey Pro and save 5% on anything else with code YT-MLEEN-5: https://homey.app/en-us/homey-pro/#buy